Most people start a Kali Linux install like any other install: download the file, make a USB drive, click Next a few times, and expect the computer to sort the rest out. Kali does not work like that. Its installer assumes you know exactly which part of your drive you are giving it, and it will use whatever you point it at.
A dual boot setup with Windows 11 is doable on an ordinary home computer, with no paid tool. You need free space on the right drive, the correct installer image, a USB drive made the right way, and patience to read one installer screen twice. Dual boot means two systems live on the same computer, and you choose one at startup from a menu called GRUB. This guide puts the mistakes first, because knowing what not to do keeps Windows safe.
7 Lessons I Wish I Knew Before Touching the Installer
Lesson 1: One wrong partition choice can wipe the whole drive
This is the warning that opens the video, and it is not dramatic effect. Once you confirm a partitioning plan in the Kali installer, the changes are written to the disk. Point it at the wrong disk, or tell it to use a whole disk instead of the free space, and your Windows partitions and files can be gone in seconds. Watch the full process once before you start, back up anything you cannot afford to lose, and never rush the partitioning screens.
Lesson 2: Kali needs empty space, not just a drive with room in it
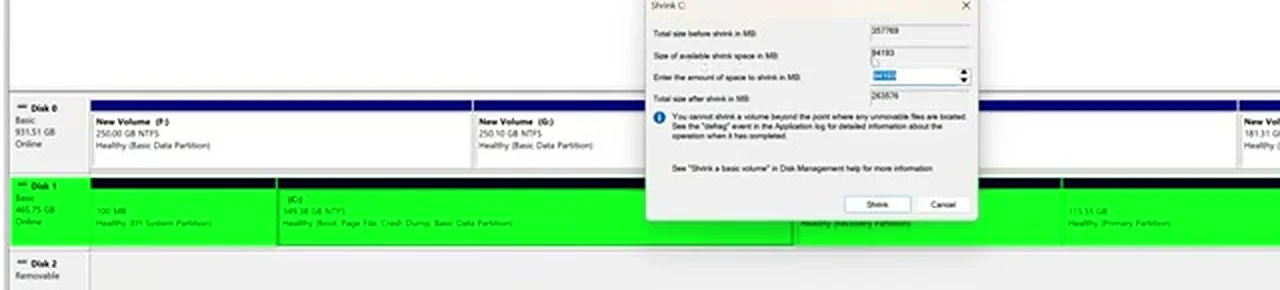
Having 100 GB free inside your C drive is not the same as having space Kali can use. Kali needs unallocated space, space that belongs to no partition at all. So the first job is shrinking a Windows volume in Disk Management until unallocated space appears. About 50 GB is a sensible target.
Lesson 3: Put Kali on the SSD if you possibly can
If your computer has both a hard disk and an SSD, use the SSD if it has enough free space. Booting and updating all feel noticeably quicker. The video shows a hard disk as Disk 0 and an SSD as Disk 1, with the advice to use the SSD unless it is genuinely full. With only one drive, shrink the volume with the most free space.
Lesson 4: The USB drive must match how Windows was installed
Rufus asks you to choose a partition scheme. MBR is the older way of booting. GPT is the modern way, and it is how almost every Windows 10 and Windows 11 install on a newer computer is set up. If Windows is GPT and you make an MBR USB drive, it can boot awkwardly. In the video, GPT is chosen because Windows is already installed that way. Check your own disk properties in Disk Management, and match it.
Lesson 5: Kali in Rufus needs DD image mode, not the default
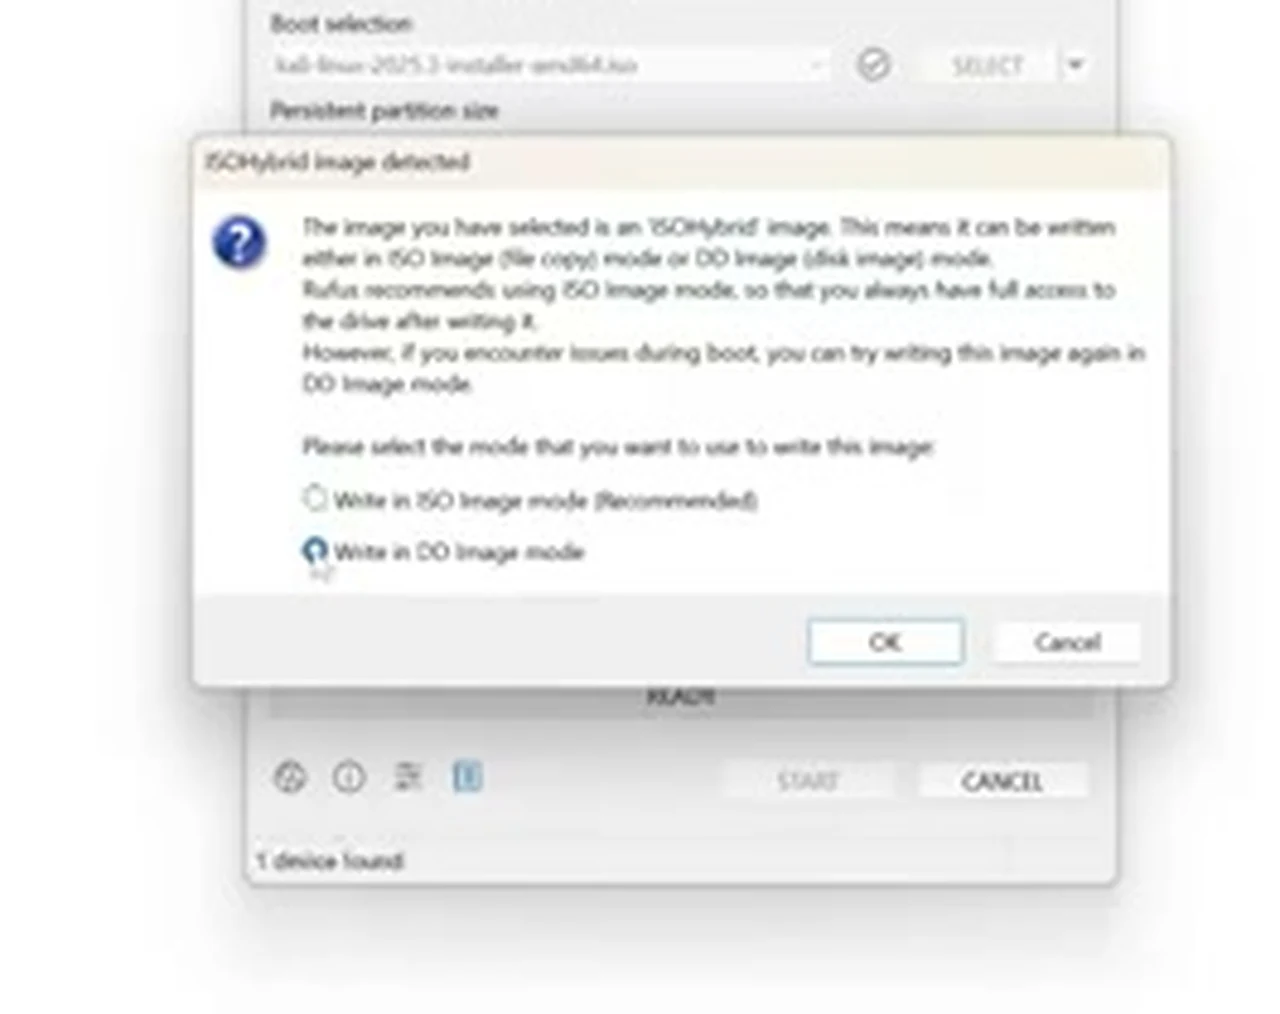
This surprise catches almost everyone who has made a Windows USB drive before. With a Windows ISO file, Rufus writes in ISO image mode and everything works. Kali is a hybrid image, and Rufus warns you the moment you select the file. The recommended choice for Kali is DD image mode. Pick the wrong one and the drive may fail to boot. Choose DD image mode, confirm when Rufus warns the USB drive will be erased, and let it finish.
Lesson 6: Your boot key is not the same as mine
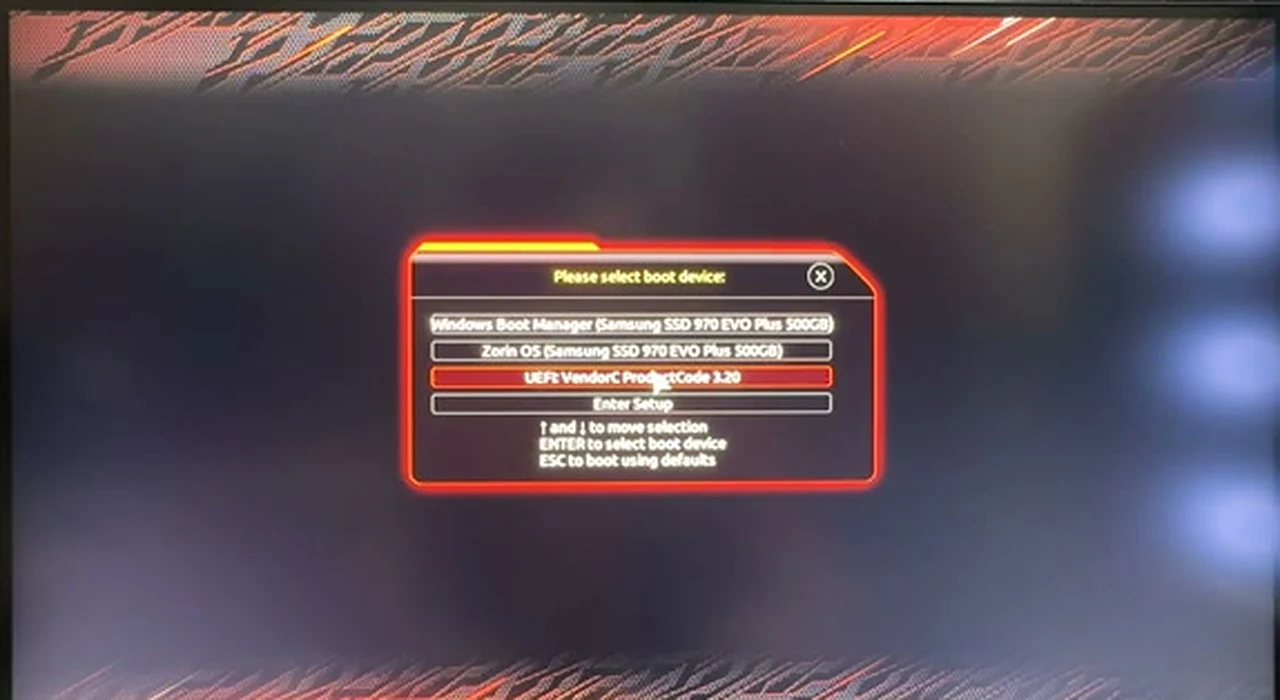
There is no universal key for the boot menu. On the Gigabyte board in the video, it is F12. On another board it might be F8, F11, or Escape, and it is often shown on screen for only a second or two. Look yours up before you restart. Restart with the USB drive plugged in, press the key repeatedly, and select the USB entry.
Lesson 7: Old boot entries hang around, and installer screens can be hard to read
Two smaller surprises are worth knowing. First, if a Linux system was installed on the computer before, its entry can still appear in the boot menu even after its partition is deleted, as happened in the video with an older system that had been removed. It usually disappears once the new installation is complete and GRUB is rebuilt. Second, the Kali installer screens are pale and washed out on camera, which shows how easy they are to misread. At the partitioning screens, stop, read every line, and only then click Continue.
Before You Start: The Short Checklist
- Back up your important files somewhere outside the computer, such as an external drive or cloud storage.
- A USB drive of at least 8 GB, with nothing on it you need. Rufus will erase it completely.
- At least 50 GB of free space you can spare, on the SSD if possible.
- A stable internet connection for the Kali download, which is several gigabytes, your boot menu key looked up in advance, and the computer plugged into power.
The Correct Method, Start to Finish
Step 1: Free up unallocated space in Disk Management
Open Disk Management in Windows. Pick the disk from Lesson 3, right-click the volume with the most free space, usually the C drive, and choose Shrink Volume. In the video, around 94 GB was available, and 51200 MB, which is 50 GB, was entered. Type the amount you want, click Shrink, and wait. A block labelled Unallocated space then appears. Do not format it or give it a drive letter. That empty block is where Kali will live.
Step 2: Download the Kali Linux installer image
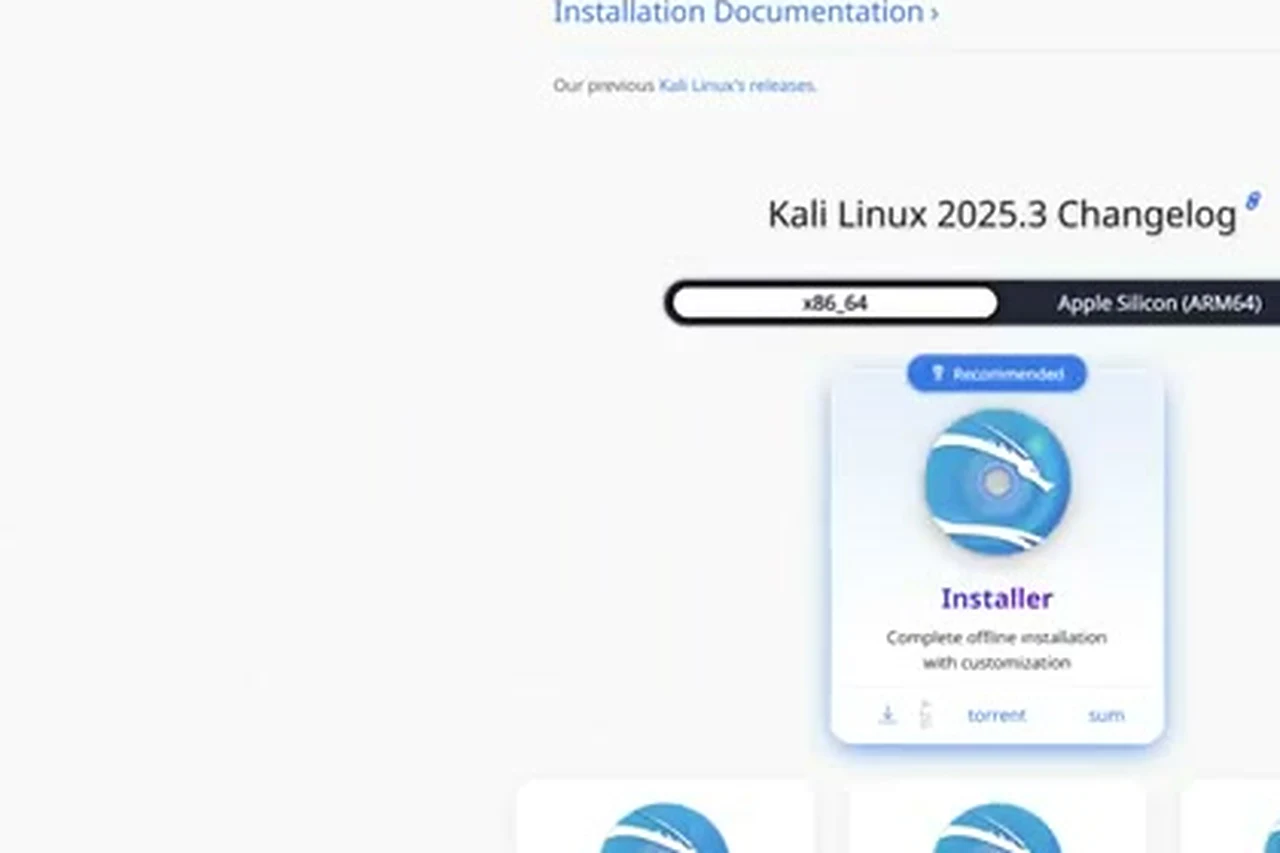
Go to the official Kali Linux website, open the download page, and choose the Installer image. For a normal desktop or laptop, that means the 64-bit version, labelled x86_64, and the Installer card marked as recommended. The version in the video is Kali Linux 2025.3. Do not grab a live image, a virtual machine image, or a version built for another processor by mistake. The Installer image is the complete offline install, which is what you want for a dual boot setup. Let the download finish fully.
Step 3: Download Rufus and make the bootable USB drive
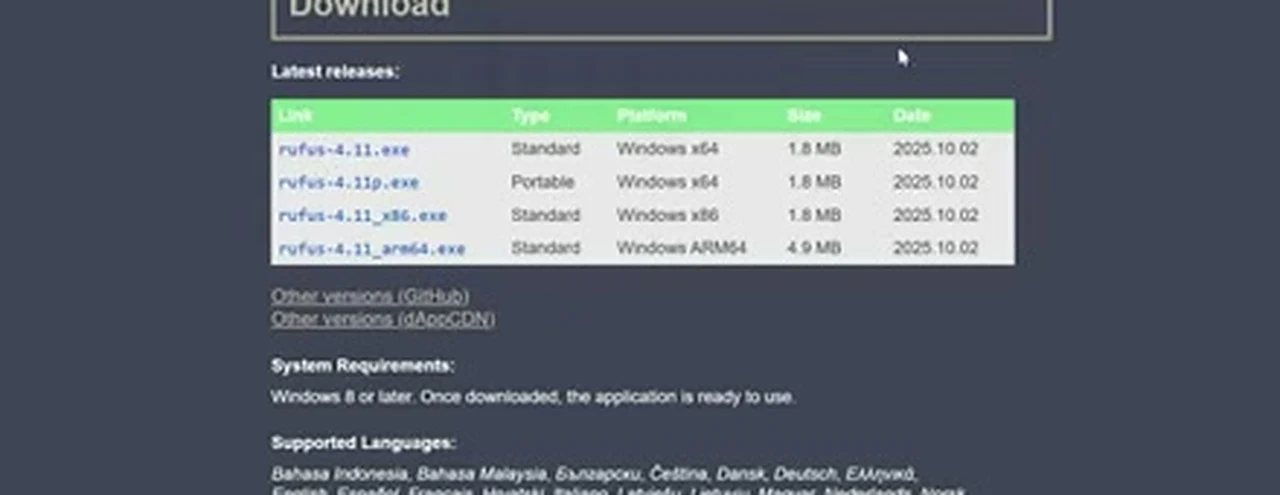
Download Rufus from its official website. It is a small, portable tool that needs no install. Run the file, confirm the security prompt, and plug in your USB drive. Check that Rufus has selected the correct device, because the wrong device here means the wrong drive gets erased. Click Select, find the Kali ISO file, and open it. Set the partition scheme to GPT, and leave the other settings alone. Click Start, select Write in DD Image mode, and confirm when Rufus warns that all data on the USB drive will be destroyed. Wait until Rufus reports that it is ready. Do not pull the drive out early.
Step 4: Boot the computer from the USB drive
Keep the USB drive plugged in and restart the computer. As soon as it begins to start, press your boot menu key repeatedly. In the video, the USB drive appears as a UEFI entry below Windows Boot Manager. Use the arrow keys to move to it and press Enter. If the menu does not appear, you probably pressed the key too late, or you have the wrong key. Restart and try again, pressing earlier. Once the USB drive boots, select Graphical Install and press Enter.
Step 5: Language, location, keyboard, and your new user
Keep the language as English and click Continue. For location, choose Other, then Asia, then your country, which in the video is Bangladesh, and continue. Keep the locale as United States and the keyboard as American English. The installer then asks for a hostname, the name of this computer on a network. Use something short and plain, such as kali, and use the same name for the domain name. Next, it asks for the full name of the new user, then a username, then a password. Choose a username and a strong password you will remember, and type them carefully.
Step 6: Let the installer use the free space, and nothing else
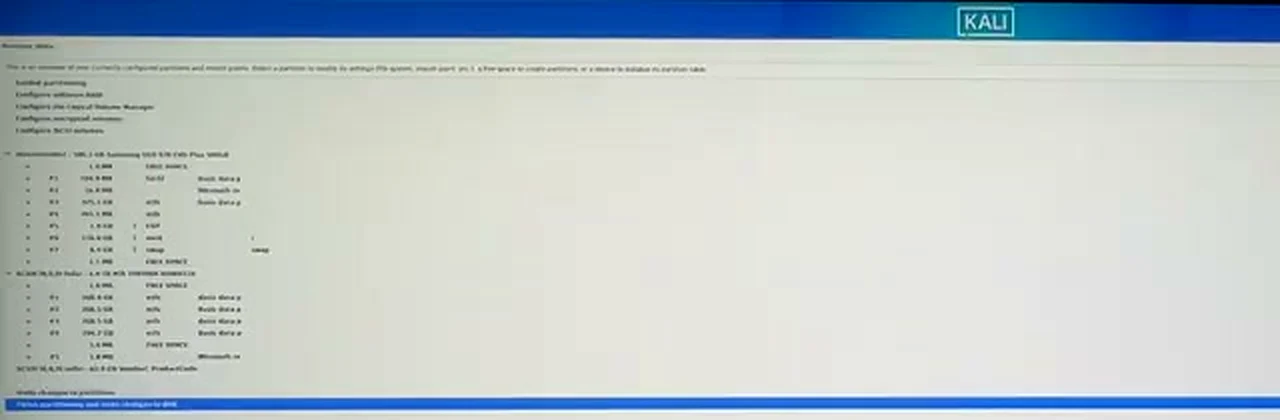
Read this screen slowly. Choose Guided, use the largest continuous free space. That tells the installer to use only the unallocated block from Step 1, and to leave every Windows partition alone. Next, choose All files in one partition, the option recommended for new users. The installer then shows its plan. In the video, about 124 GB was split into a small boot partition, the main system partition, a swap area, and a tiny reserved piece. Your numbers will differ, but the shape should look the same. Select Finish partitioning and write changes to disk, click Continue, and confirm with Yes. If anything mentions using an entire disk, or a partition you recognize as Windows, stop and go back.
Step 7: Finish the installation, remove the USB drive, and test both systems
After partitioning, the installer finishes the setup on its own. Leave the computer alone until it says the installation is complete, then click Continue. As it restarts, remove the USB drive, so it does not boot back into the installer. GRUB then appears, with Kali at the top and Windows Boot Manager below it. Press Enter on Kali, type the username and password from Step 5, and press Enter. The Kali desktop loads. Open the file manager and check that your other drives are visible. The icons can look small on a high-resolution monitor, as they did in the video, and that is a display scaling matter, not an installation problem. Now test the other half. Restart, wait for GRUB, move down to Windows Boot Manager, and press Enter. Windows should start normally. If both systems boot, the setup is working.
If Something Goes Wrong
If the USB drive does not appear in the boot menu, check that it is plugged in before you restart, try a different port, and confirm you are pressing the right boot menu key. Should Rufus finish without errors, but the drive still will not appear, remake it, double-checking the GPT setting and DD image mode. If the installer shows no free space, go back to Windows and open Disk Management. If there is no unallocated block, shrink the volume again, leave the result unallocated, and restart the installer. Do not let the installer use a whole disk to work around this. If Windows is missing from GRUB, do not reinstall anything in a panic. Check whether Windows Boot Manager is still offered by the firmware boot menu. If it boots that way, Windows is intact.
Watch the Full Video
The video below shows the whole process on a real computer, from freeing the space in Disk Management to the first Kali login and the switch back to Windows. Watch it once all the way through before you start.
Kali Linux rewards patience and punishes rushing. Free the space first, match the USB drive to your Windows install, choose DD image mode in Rufus, and give the partitioning screen your full attention. Do those four things, and you get both worlds on the same computer: Windows for everyday work, and Kali ready when you want to practice security testing.