My laptop never asked for Windows 11. I installed it anyway, on hardware Microsoft never meant to run it on. For the first week it felt fine. Then the small things piled up: the fan spinning for no reason, apps taking a beat longer to open, the battery draining faster than it used to. Windows 11 was not broken. It was just the wrong fit for that machine.
Going back to Windows 10 was the obvious fix, but I had no pen drive anywhere in the house, and no interest in buying one for a single job. That is the situation this guide is built for. You will downgrade Windows 11 to Windows 10 without a USB drive, without Rufus, and without touching the BIOS boot menu. All you need is the Windows 10 ISO file, free space on a drive that is not C:, and about an hour.
Your Options, Compared Honestly
There is more than one way back to Windows 10, and the right choice depends on your situation:
| Method | Needs a USB drive? | Works after 10 days? | What happens to your C: drive? | Effort |
|---|---|---|---|---|
| Go Back (Settings > Recovery) | No | No — 10 days only | Restores your old Windows 10 | Easy |
| Reset this PC | No | Yes | Reinstalls Windows 11 — no downgrade | Easy, wrong result |
| Run setup.exe inside Windows 11 | No | Yes | Usually blocked or forced into an upgrade | Easy, unreliable |
| Bootable USB clean install | Yes | Yes | Full clean install of Windows 10 | Most hassle |
| Extracted ISO + Recovery Command Prompt (this guide) | No | Yes | Full clean install of Windows 10 | Medium |
The Winner: The No-USB Recovery Method
Here is the honest verdict. If you upgraded to Windows 11 less than 10 days ago, stop reading and use Go Back in Settings. It keeps your files and apps, and it exists for exactly this moment. But for everyone else, Go Back is already gone. Windows deletes the old installation after 10 days, and with it, the easy way out.
That leaves the method in this guide as the winner. It gives you the same result as a bootable USB clean install — a genuinely fresh Windows 10 — but it skips the USB drive entirely. The trick: boot into Windows Recovery, open Command Prompt there, and launch the Windows 10 installer from the extracted ISO files on one of your own drives. The installer runs outside of Windows 11, so nothing blocks it. No boot key, no BIOS menu, no borrowed pen drive.
One thing to be clear about: this is a clean install. It wipes the C: drive. Your other drives stay untouched, but anything on the desktop, in Documents, or in Downloads on C: will be gone. Back that up first.
Before You Start: A Short Checklist
- Back up your files. Copy everything important off the C: drive — desktop, Documents, Downloads, pictures, bookmarks — to another drive or cloud storage.
- Keep the charger plugged in. A laptop that dies halfway through an install is a bad day.
- Free space on a drive that is not C:. You need room for the ISO, around 6 GB, plus the extracted files, another 6 GB. Any drive other than C: works.
- WinRAR installed. You will use it to extract the ISO. If you do not have it, grab it from the official WinRAR site first.
- Your Windows license. If this machine previously ran an activated Windows 10, it has a digital license tied to the hardware, and Windows 10 will activate itself once you are online. You do not need an old product key.
- About an hour. The ISO download is the slow part. The install takes roughly 20 to 30 minutes.
Step 1: Download the Windows 10 ISO
Open any browser and search for “windows 10 iso file download”, then open the Microsoft result, the official page for the Windows 10 disc image. Microsoft would rather hand you the Media Creation Tool than a direct ISO link, and on a Windows machine that is what the page offers at first.
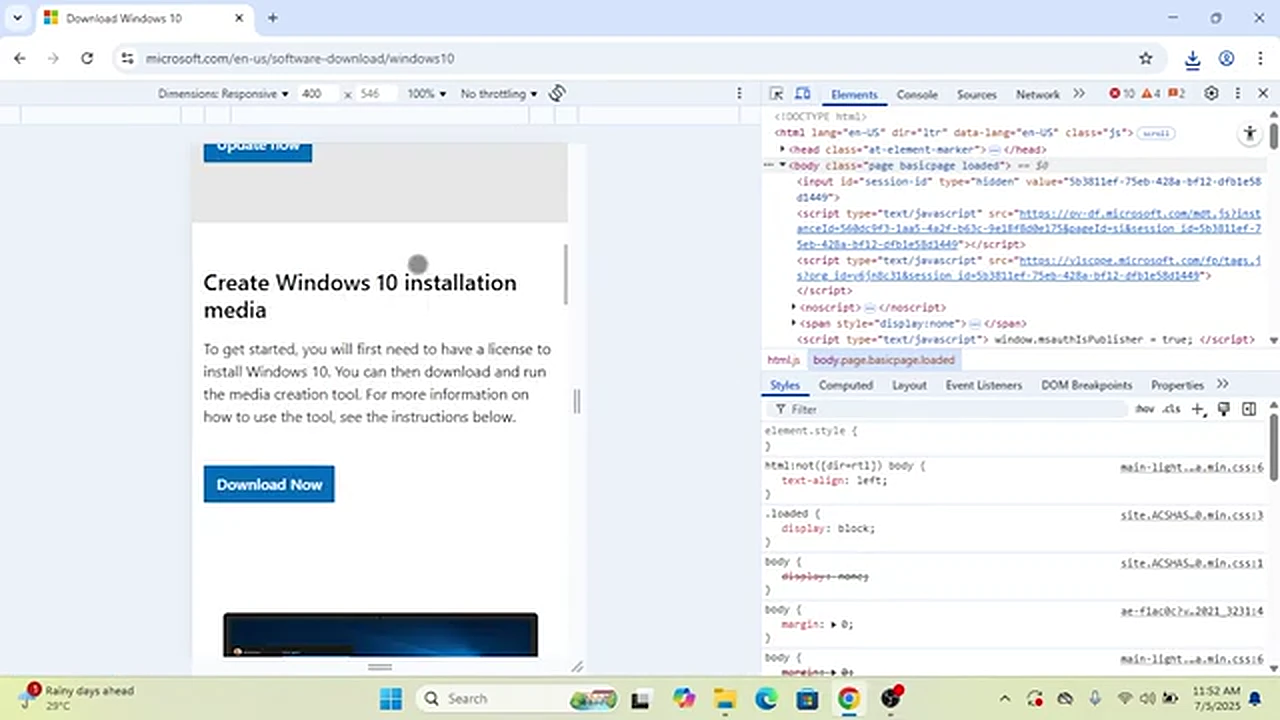
There is a workaround built into the browser itself. Open Developer Tools, switch on the device toolbar so the page thinks you are on a phone, and refresh. The page shows the edition selector instead: pick Windows 10, confirm, pick your language, confirm again, and you get a direct 64-bit ISO download link.
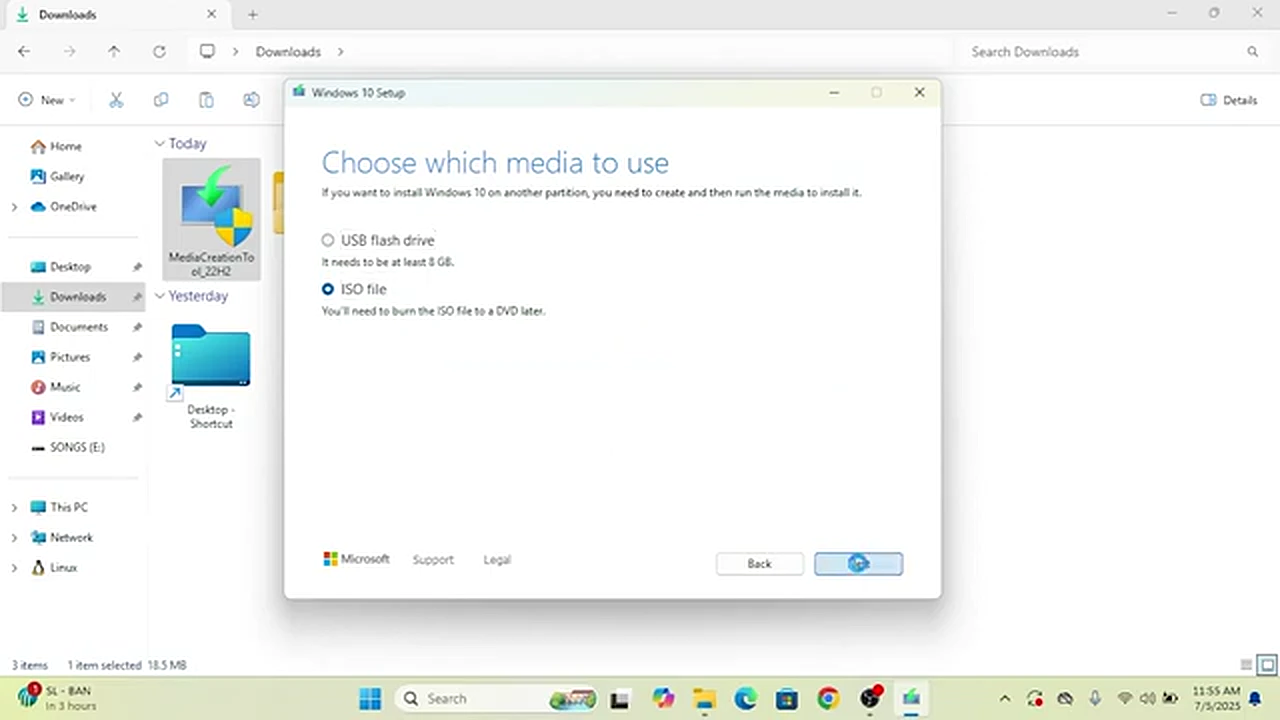
If that trick does not work, download the Media Creation Tool instead. Run it, accept the license terms, choose “Create installation media”, keep 64-bit selected, choose “ISO file” when it asks which media to use, pick a save location on a drive other than C:, and let it download. When it hits 100%, click Finish.
Step 2: Move the ISO and Extract It
Once the ISO has downloaded, copy it to any drive other than C:. It cannot live on the drive you are about to format, because the installer needs those files after Windows 11 is gone. A half-empty data drive is perfect.
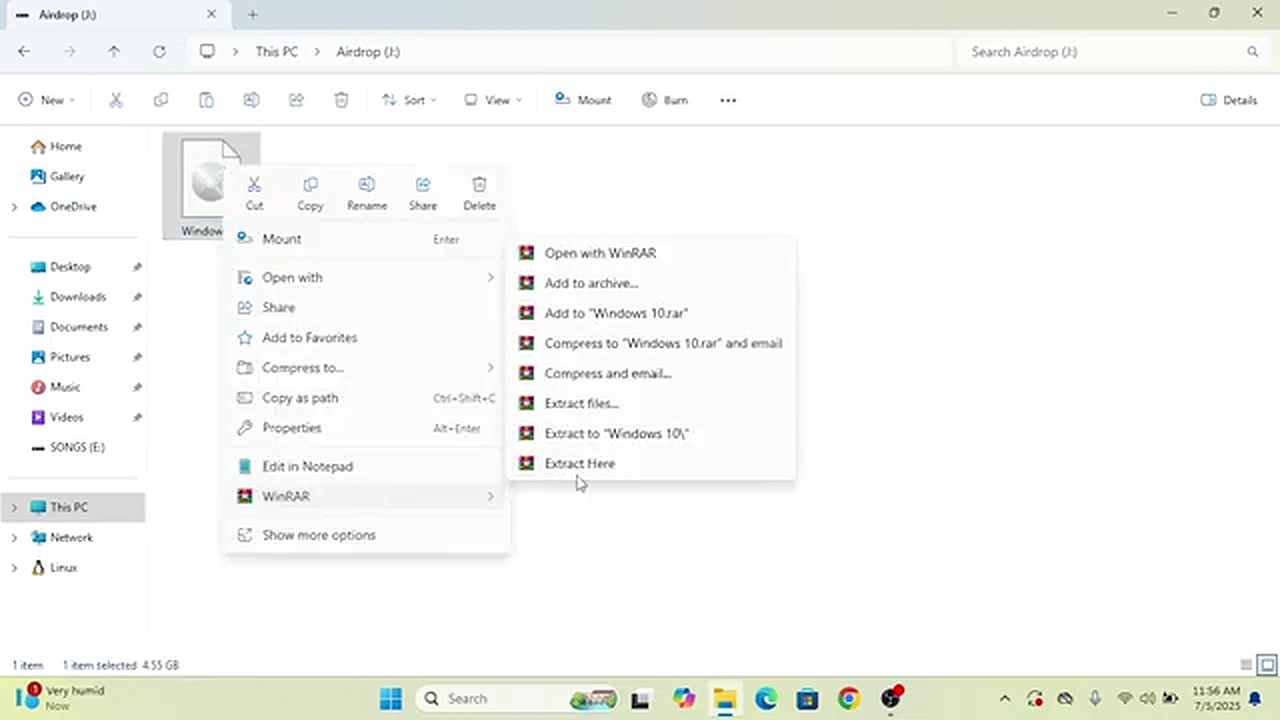
Now right-click the ISO file and extract it with WinRAR — “Extract Here” is the option you want. A 5 to 6 GB file takes a little while to unpack. When it finishes, you will see the Windows setup files, including setup.exe. The ISO itself is done — delete it to get the space back.
Step 3: Write Down Your Drive Size and Letter
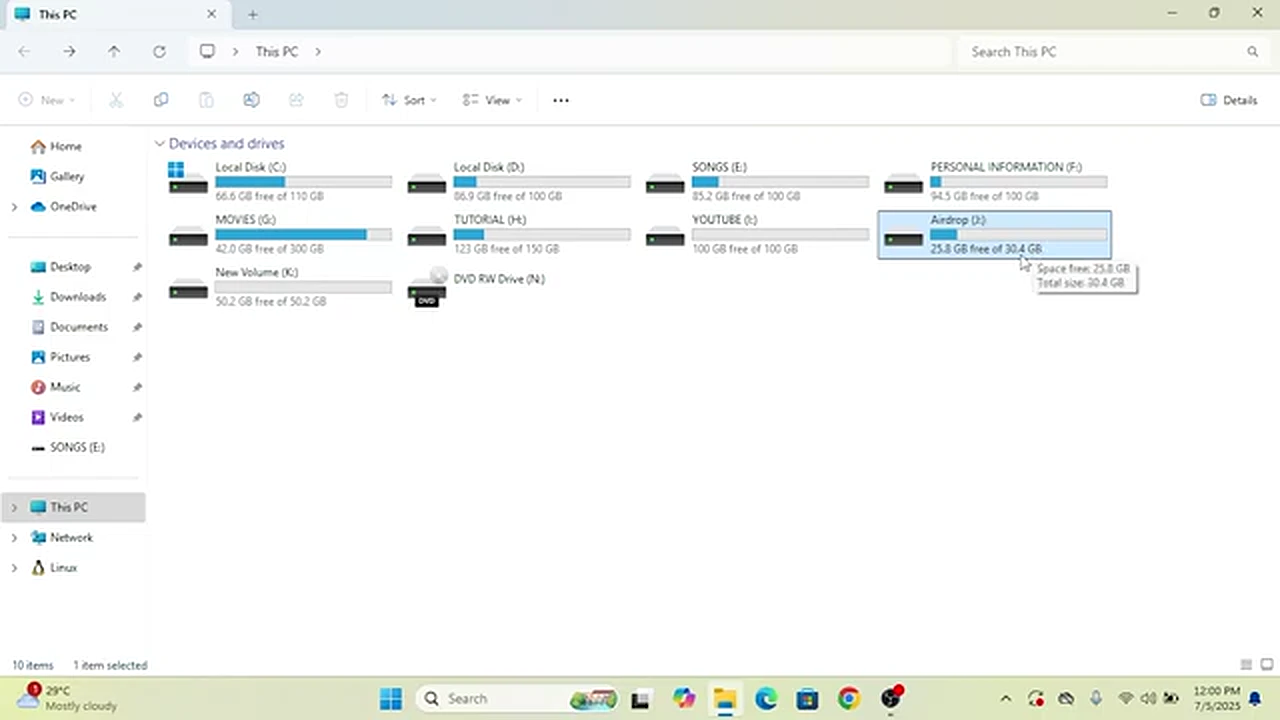
This is the step people skip, and then they get stuck. Open This PC and look at the drive where you put the extracted files. Write down its letter and its size. In my case the drive was J: and about 30 GB. The size matters more than the letter: when you restart into recovery mode, Windows sometimes reassigns drive letters. My J: drive showed up as I: in the recovery Command Prompt. The letter changed; the size did not.
Step 4: Restart Into Advanced Startup
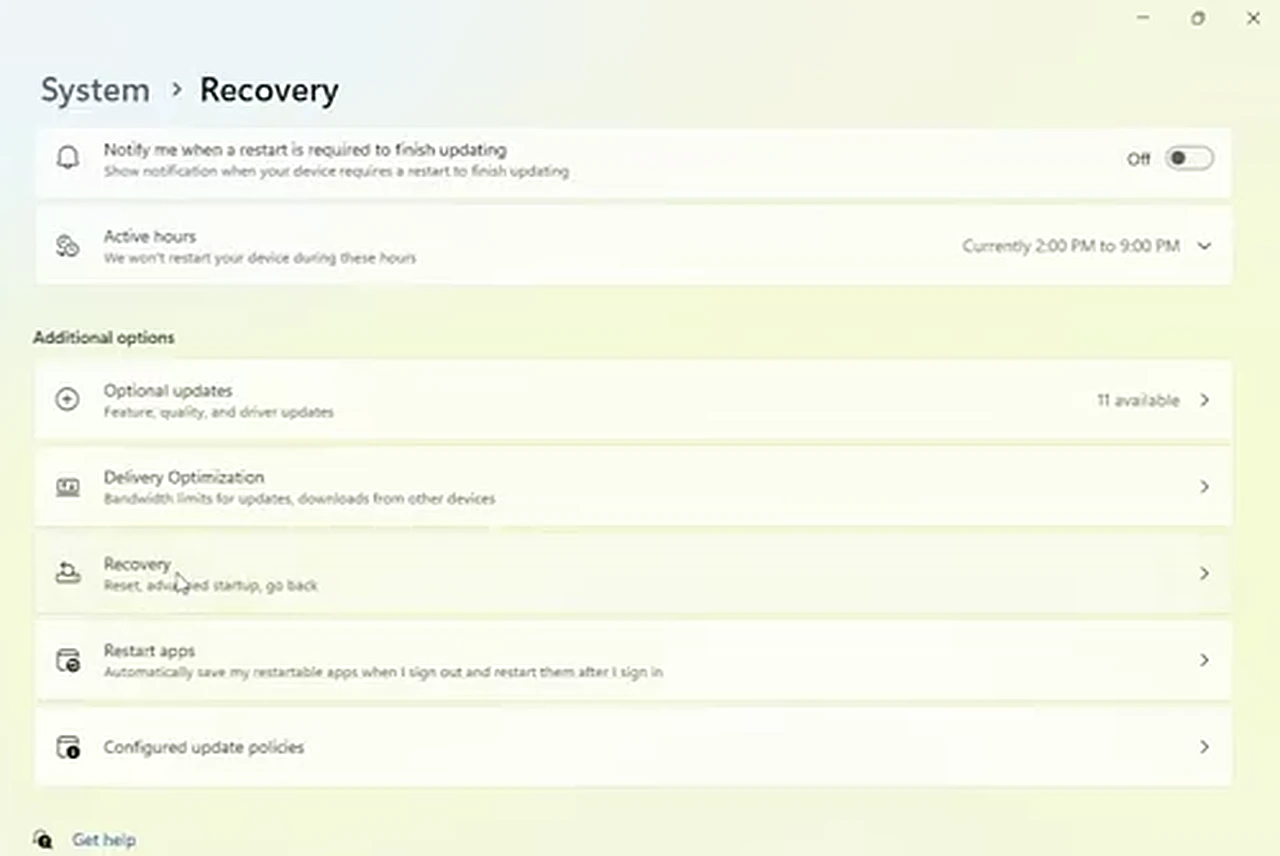
Now head to Settings, then Windows Update, then Advanced options. Scroll down to Recovery and open it. Under Advanced startup you will see a Restart now button. Click it. Your machine will restart into a blue recovery screen instead of the desktop.
Step 5: Open Command Prompt From Recovery
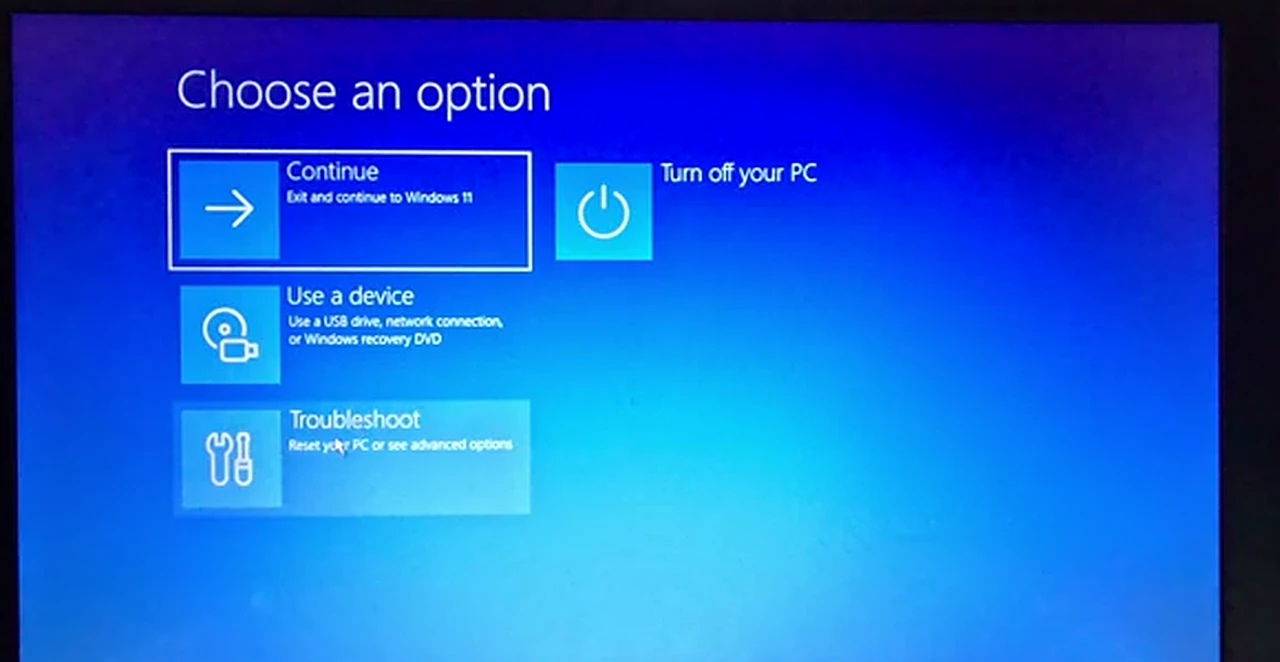
On the blue “Choose an option” screen, click Troubleshoot, then Advanced options, then Command Prompt. This is the heart of the method. You are now at a command line running outside of Windows 11, with full access to every drive — nothing stops you from starting the installer by hand.
Step 6: Find Your Drive With diskpart
Type diskpart and press Enter. Then type list volume and press Enter. You will see every volume on the machine with its letter, label, file system, type, and size. Scan the Size column for the number you wrote down. In my case the 30 GB drive was listed as volume 7 with the letter I: — the same drive that was J: inside Windows.
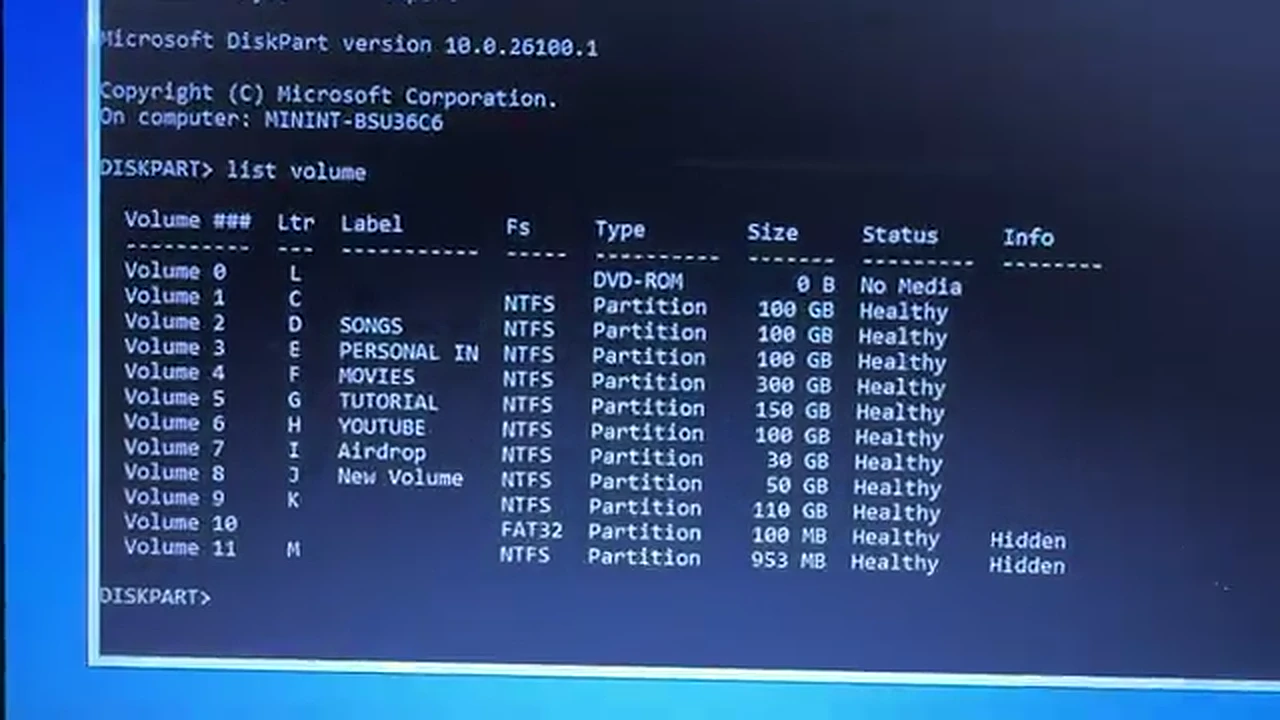
Once you have spotted your drive, type exit and press Enter to leave diskpart.
Step 7: Run setup.exe
Switch to your drive by typing its letter followed by a colon — in my case I: — and press Enter. Then type dir and press Enter. You should see the extracted Windows 10 files, and most importantly, setup.exe. If it is there, you picked the right drive. If it is not, go back to diskpart and check the other drives by size.
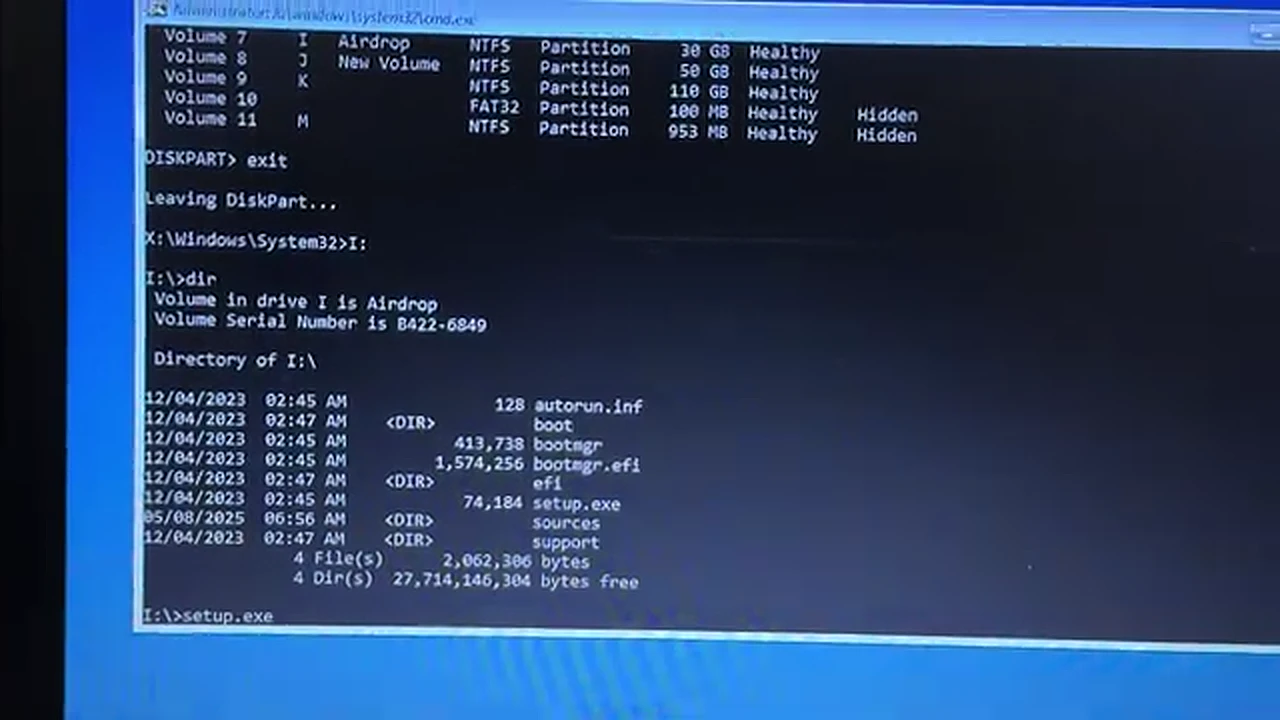
Now type setup.exe and press Enter. The Windows Setup window opens, just as if you had booted from a USB installer.
Step 8: Walk Through Windows Setup
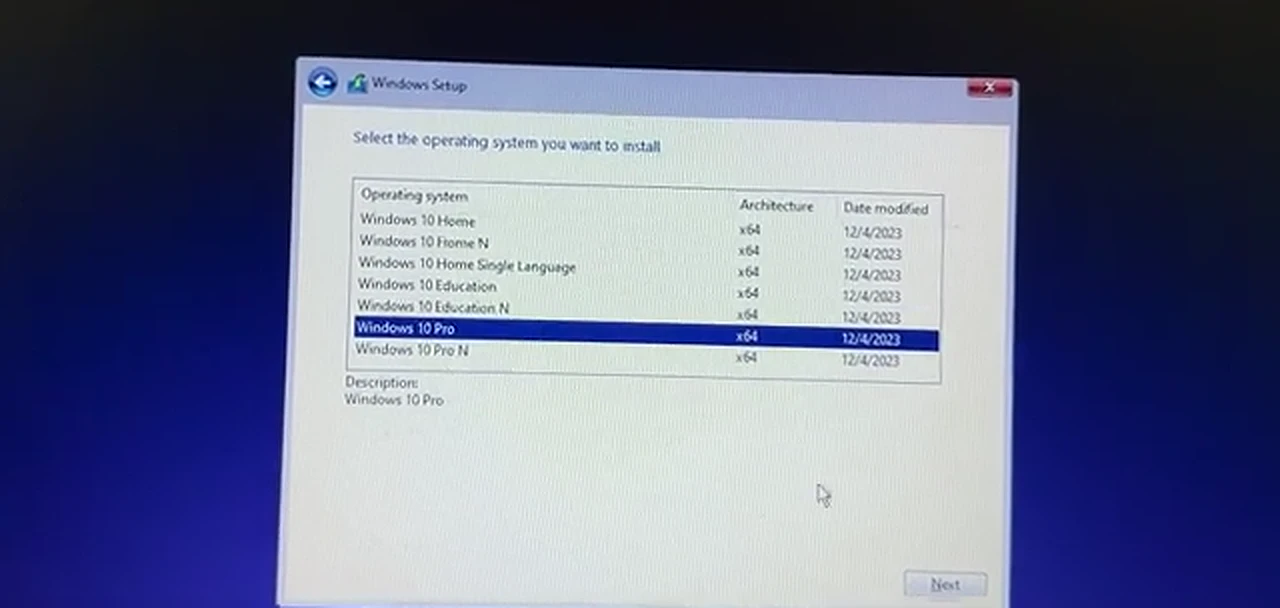
Click Next on the language screen, then Install now. When setup asks for a product key, click “I don’t have a product key” at the bottom. Next, pick your edition — I chose Windows 10 Pro, but pick whichever matches your license — accept the license terms, and click Next.
Now comes the one screen where a mistake costs you data, so slow down. Setup asks which type of installation you want: choose Custom, the “install Windows only” option. Find your C: drive in the list — the one Windows 11 lives on. On my machine it was the roughly 110 GB partition on the SSD. Select it, click Format, confirm with OK, and then click Next with that same partition selected. Do not format any other partition, or you will wipe a data drive by accident.
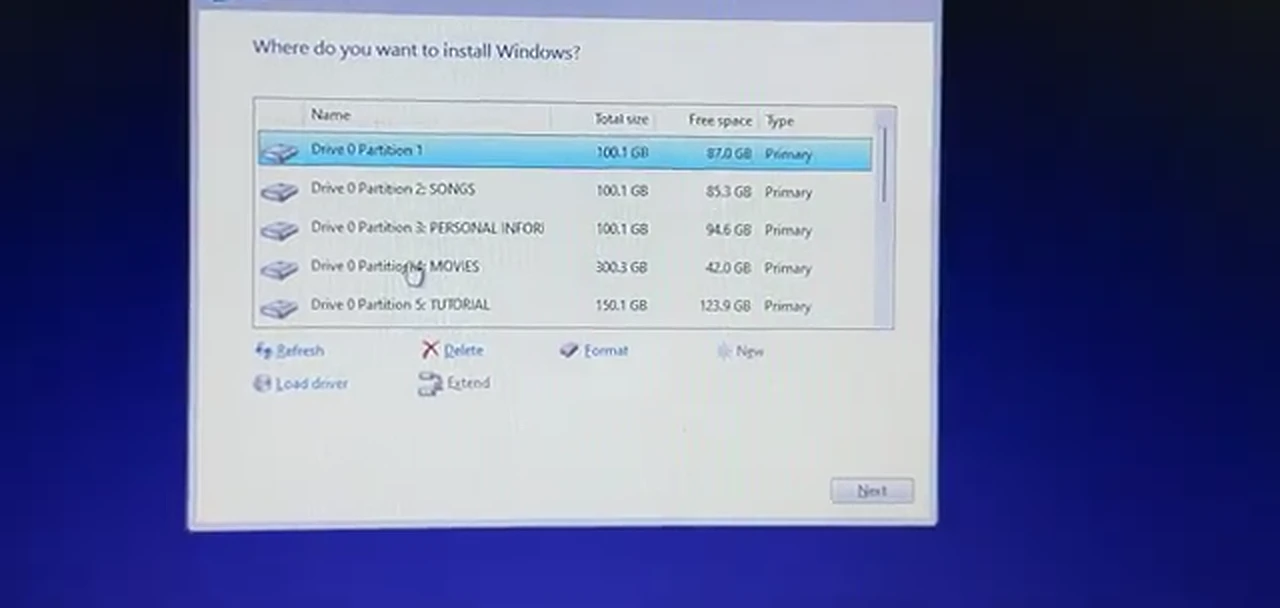
That is the last decision you have to make. Setup copies files, installs features, and restarts a few times on its own. The rest — region, keyboard, account setup, privacy settings — is identical on every Windows 10 install. Once you reach the desktop, run Windows Update and check Settings > Update & Security > Activation to confirm Windows is activated.
Watch the Full Process
Watching the clicks happen helps, especially for the diskpart part. Here is the full video walkthrough:
After the Install: Three Things Worth Doing
- Run Windows Update until it says you are up to date. A fresh ISO is usually months behind on patches.
- Check Device Manager for missing drivers. Anything with a yellow warning triangle needs a driver from the maker’s support page.
- Reinstall your apps fresh. Do not restore old program folders from a backup — install each app properly so it registers itself with the new system.
If Something Goes Wrong
setup.exe is not on the drive. You opened the wrong drive letter. Check list volume again and match the size. Also confirm you actually extracted the ISO — a folder holding a single ISO file is not extracted.
The drive letter keeps confusing you. Ignore letters and work by size. Two drives of the same size are the only real trap; if that happens, use the volume label as the tiebreaker.
Setup says it cannot install to the partition. Make sure you formatted the C: partition from inside setup and that it is selected when you click Next. If the partition is marked system reserved or recovery, you picked the wrong row — find the large one that matches your C: drive size.
Frequently Asked Questions
Will I lose my files? Everything on the C: drive, yes — that is what a clean install means. Files on other drives are safe. Back up C: first regardless.
Do I need a product key? Not during setup. Click “I don’t have a product key” and finish the install. If the machine ran activated Windows 10 before, it normally activates on its own once online.
Can I go back to Windows 11 later? Yes. Nothing about this process locks you out. You can upgrade again later from Windows Update or the Installation Assistant if your hardware supports it.
Does this work on any brand of laptop or desktop? Yes. The steps do not depend on the brand, and you never open the BIOS, so there is no boot key to look up for your model.
The Bottom Line
A missing pen drive is a weak reason to stay on a system that does not suit your machine. Download the ISO, extract it somewhere safe, note the drive size, restart into recovery, find the drive, and run setup.exe. Half an hour later you are back on Windows 10, on hardware that can actually breathe again.