Running macOS on a Windows laptop sounds like a magic trick: keep the machine you own, and one long afternoon later it greets you with an Apple logo. The video behind this guide really does end there — an HP laptop, a spinning hard disk, and a working macOS Sequoia desktop. But reaching that desktop took most of a day, several restarts, and a long stretch where the only thing on screen was scrolling text. This is not a normal installation.
This guide follows the video step by step. Read the compatibility section first: if your hardware fails that check, stop before you download anything.
Checkpoint 0: The Compatibility Verdict Comes First
Forget what you know about installing Windows. A Windows installer asks almost nothing about your hardware. macOS was built for Mac hardware, and it expects to find that hardware in exactly the places Apple put it. On a Windows PC it finds none of that, so it will not install directly, and no installer setting changes that fact. Everything in the first half of this process exists for one reason: building a map — an EFI folder — that tells macOS where each part of your machine lives, from the USB ports to the Wi-Fi card, before the installer ever runs. Build it on the machine you plan to install on — a folder made for another machine will not describe yours.
Even with a correct map, some things may never work properly. In the video, Wi-Fi did not work after installation; a wired LAN cable did. Apple also licenses macOS for Apple hardware, so running it on other hardware sits outside that licence, Apple provides no support when it breaks, and macOS updates can break a working installation overnight. Keep a backup and never update on a day you need the machine.
So who passes Checkpoint 0? Someone with a spare machine or a second drive, who can afford a day of troubleshooting and a possible clean reinstall of Windows afterwards. Someone with one machine, important files on it, and a deadline tomorrow does not pass — yet.
What You Need Before You Start
Back up anything important: one wrong click in Disk Utility later is all it takes. Next, free the space. macOS needs roughly 100 GB free, and the installation itself takes 50 GB or more. The video laptop’s 128 GB SSD had only 70 GB free, which ruled it out entirely. You also need a spare, empty USB drive; the one in the video was 64 GB. Plug it into a black USB 2.0 port, not a blue USB 3.0 port. Keep a phone handy to play the video on, an Ethernet cable for the day Wi-Fi fails, and a full free day.
Checkpoint 1: Build the EFI Map for Your Own Hardware
The first tool is OpenCore Simplify. Download it, extract the archive, and run the Windows batch file inside. Install Python first if Windows says it is missing. Inside the tool, choose the hardware report option, then export it. On the video laptop, the report said the newest macOS, Tahoe 26, was supported — and the presenter deliberately did not choose it. So he chose Sequoia 15 instead.
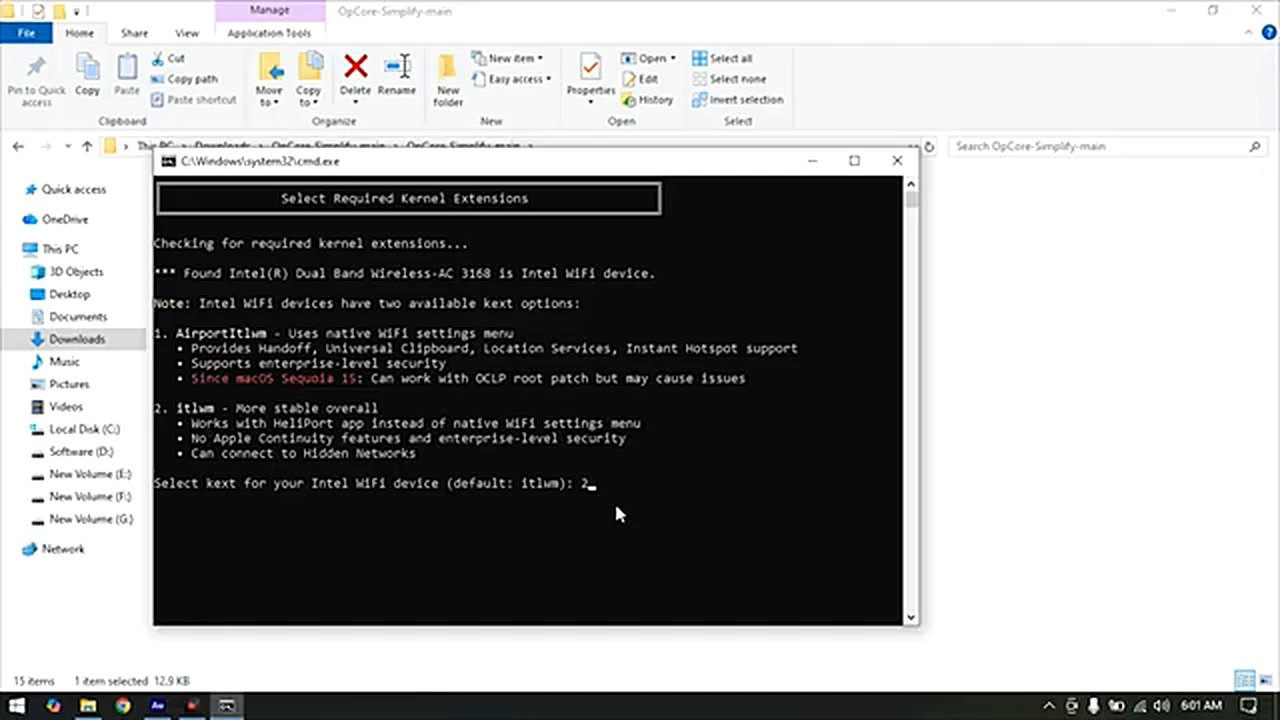
The tool then asks how your Wi-Fi should work. The laptop had an Intel Dual Band Wireless-AC 3168 card, with two driver choices: AirportItlwm, which uses the native Wi-Fi menu but needs a root patch for Sequoia, or itlwm, the steadier option that works with the HeliPort app instead. Choose option 2, itlwm, the default. Then choose the build option and let the tool download the drivers it needs and write out an EFI folder. Wi-Fi users will be asked for their network name and password, which the tool stores in the folder.
Two more jobs finish the map. First, USB mapping with USBToolBox: Discover lists every port, then the build option writes it out as UTBMap.kext. Copy it into the EFI folder, inside OC and then Kexts, and delete the default mapping folder already sitting there. Second, tell the configuration file about the swap. OpenCore Auxiliary Tools (OCAT) is the editor for that: open config.plist from EFI and then OC, go to the Kernel section, delete the entry marked in red, add the new UTBMap.kext file in its place, and save.
Checkpoint 2: Download macOS and Prepare the USB Drive
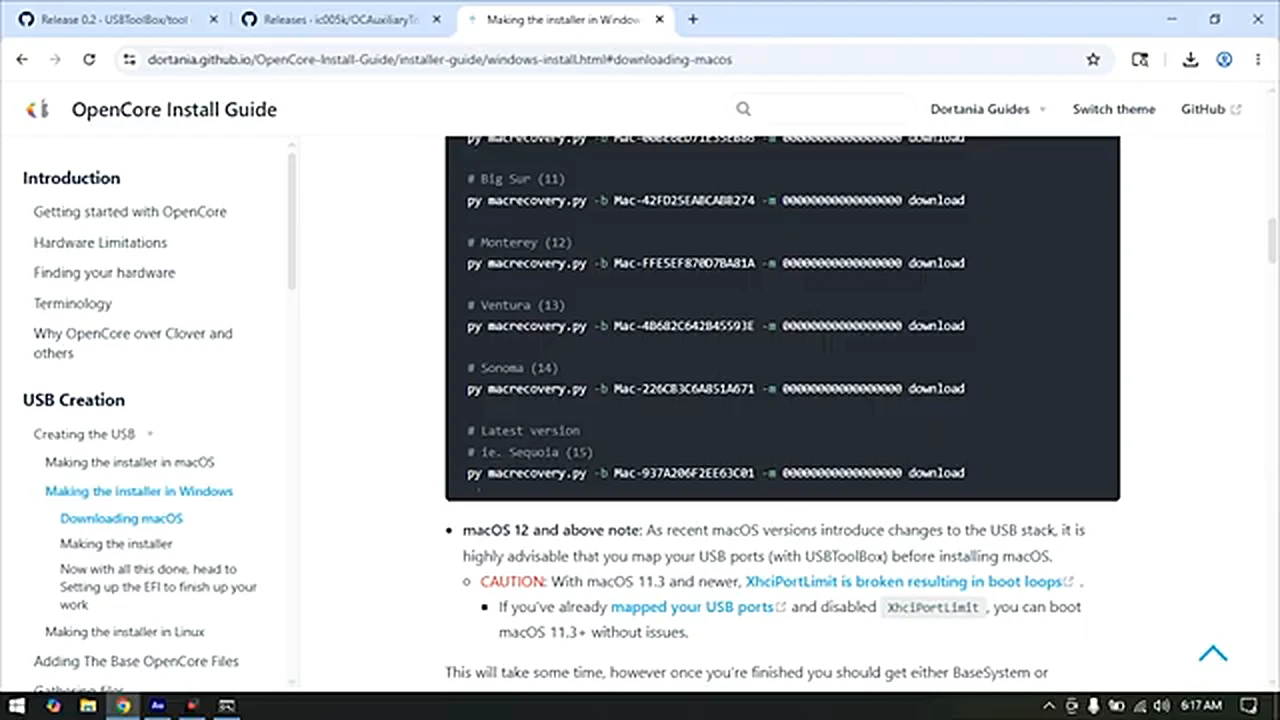
Now fetch macOS itself. Download OpenCore 1.0.7, extract it, and open the Utilities folder, then macrecovery. Open a command prompt in that folder by typing cmd in the address bar and pressing Enter. The download command comes from the Dortania OpenCore Install Guide — the “Making the installer in Windows” page lists one command per macOS version. Copy the Sequoia 15 line, paste it in, answer yes when asked, and wait. Tahoe is not on that list yet.
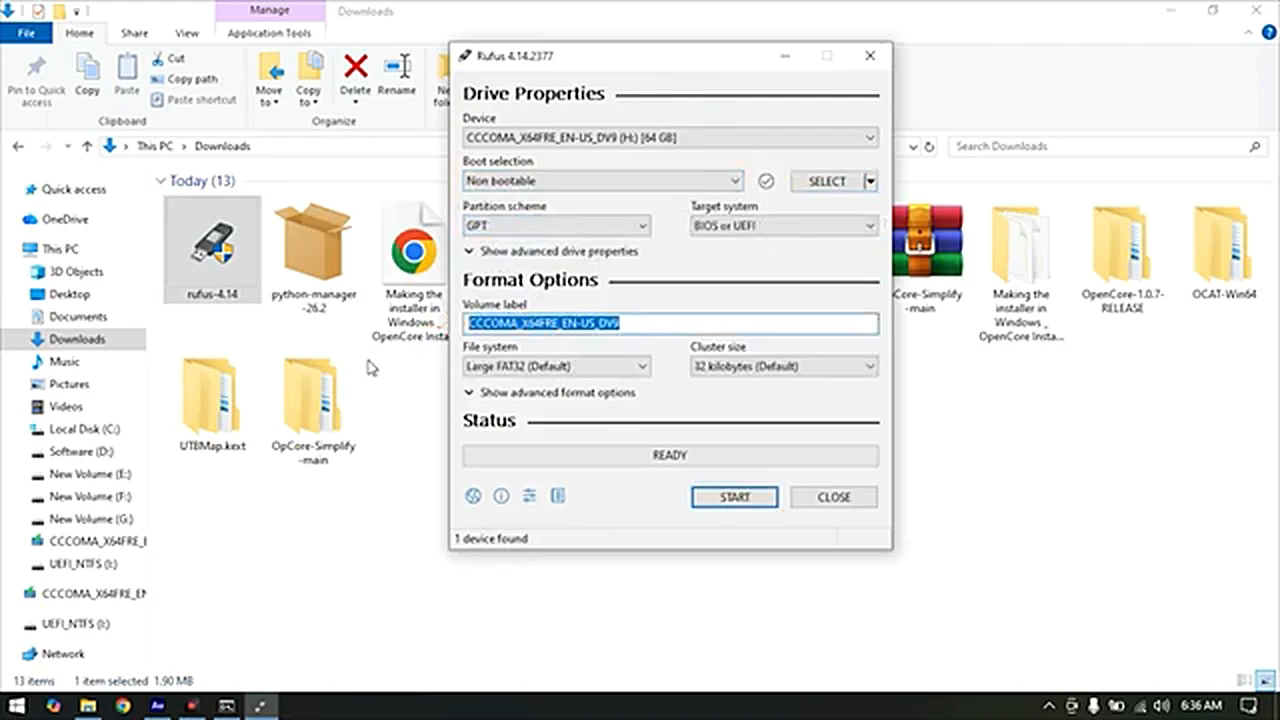
While that downloads, get Rufus. Select your USB drive, set Boot selection to Non bootable, Partition scheme to GPT, give the drive a name, and click Start. Non bootable is correct: the bootable part comes from the files you copy next. Anything on the drive is erased, so move it first. When formatting finishes, copy two folders onto the drive: the EFI folder from your desktop, and the macrecovery folder. That is the whole installer.
One last decision before you leave Windows: where will macOS live? Open Computer Management, then Disk Management, and look at your disks honestly. If a single drive has no free space, right-click a volume and choose Shrink Volume to carve out at least 100 GB — an SSD is strongly preferred, because the installation that took two and a half hours on the video’s hard disk would have finished far sooner on flash storage. The presenter installed to a free hard-disk partition, keeping Windows on the SSD. With one small drive and no free space, choose single-boot or stop.
Checkpoint 3: BIOS, First Boot, and the Long Install
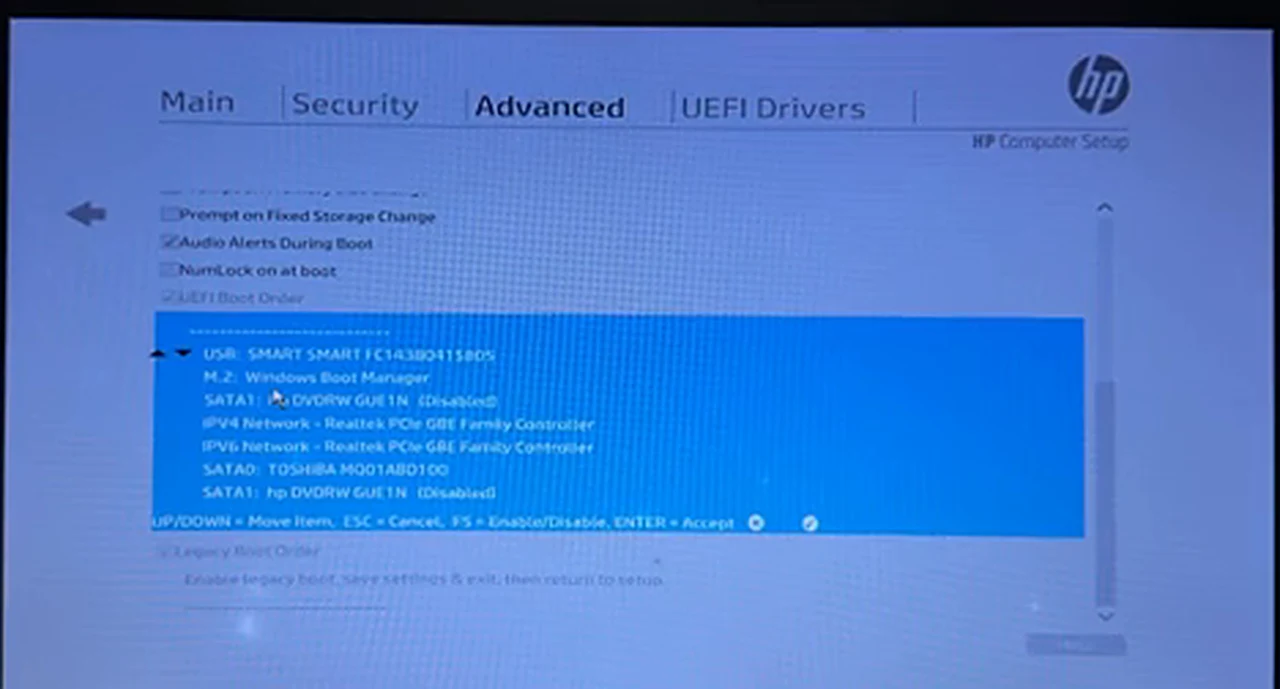
Restart and open your firmware settings — the BIOS or UEFI setup. The key varies by brand; on the HP laptop it was F9 for the boot menu and Esc for setup. Two settings matter most: Secure Boot must be disabled, and Legacy support must be disabled too, leaving the machine in UEFI mode with a GPT-partitioned drive. Then find the boot order and move the USB drive to the top, above the SSD, so the machine tries the installer before Windows. Save and exit.
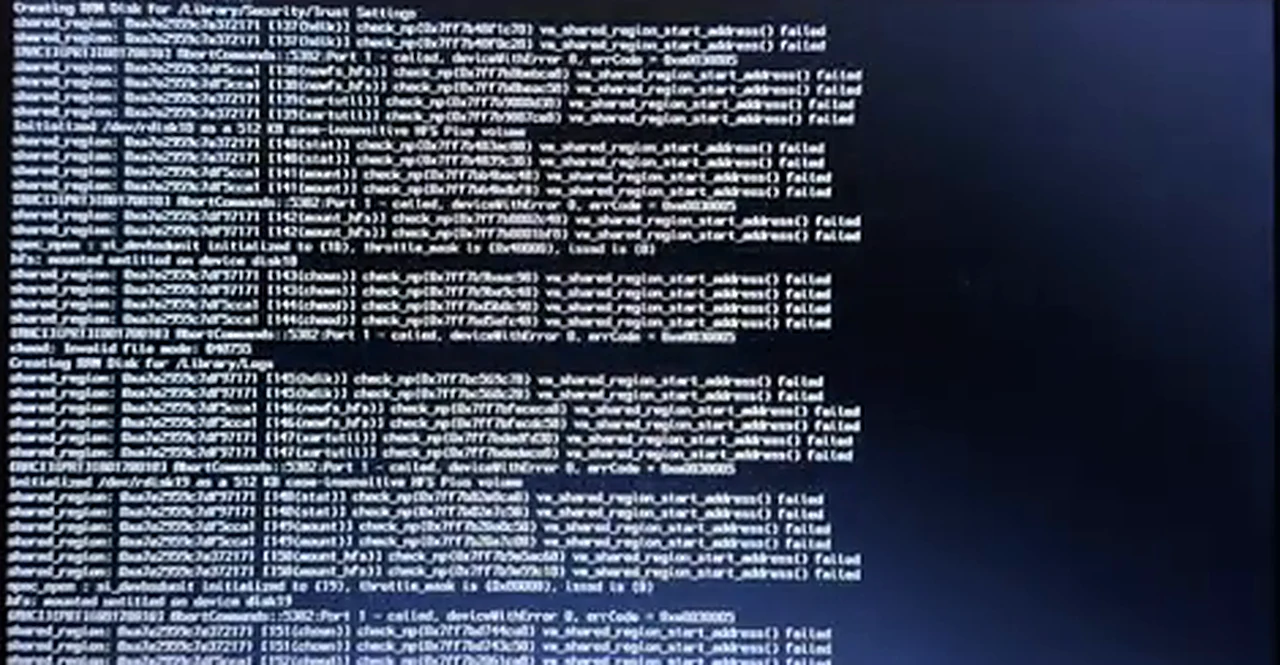
When the machine restarts, the OpenCore picker should appear, offering macOS, Windows, and restart options. If Windows boots straight through instead, restart again and tap the Space bar repeatedly as the machine powers on; the picker will show. Select the macOS entry and press Enter. What follows looks alarming and is completely normal: pages of small white text scroll past. Then the Apple logo appears. Choose English, and you arrive at macOS Recovery. Open Disk Utility first.
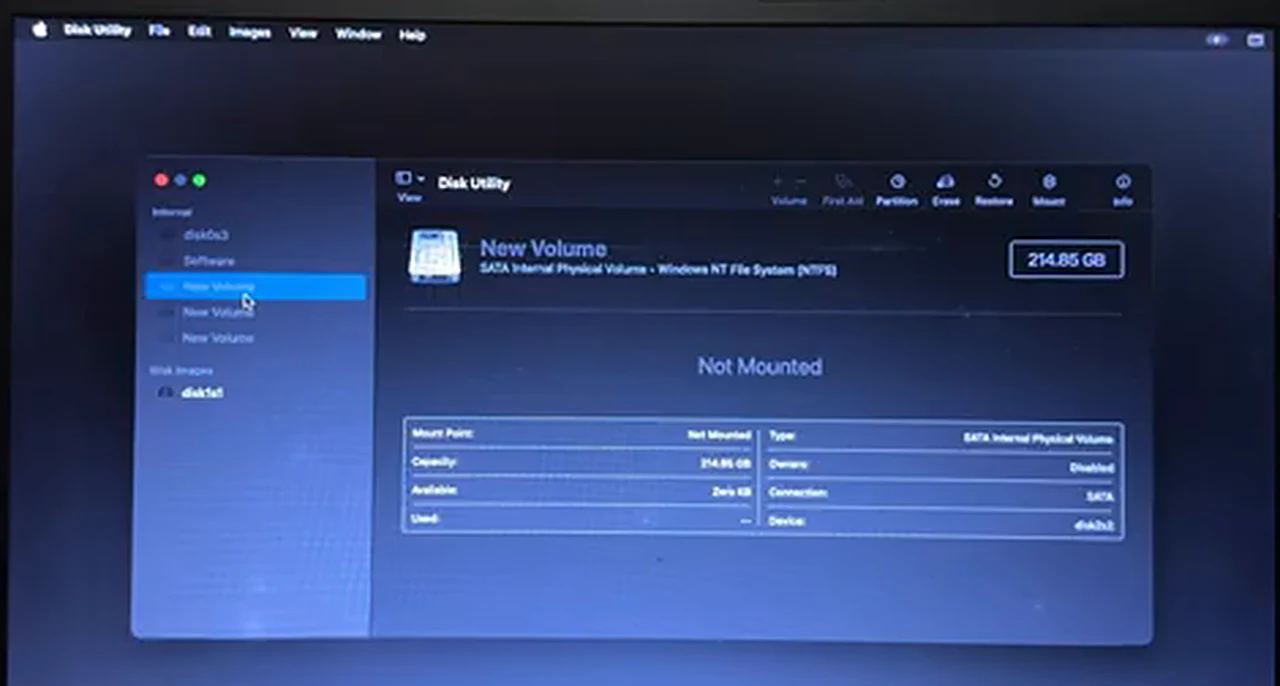
In Disk Utility, find the partition you set aside — it will still show as a Windows volume — select it, click Erase, name it macOS, set the format to APFS, and erase it. This is the point of no return for that partition. Check the name and size twice before you confirm, because the list also shows your Windows drive, and erasing the wrong volume cannot be undone.
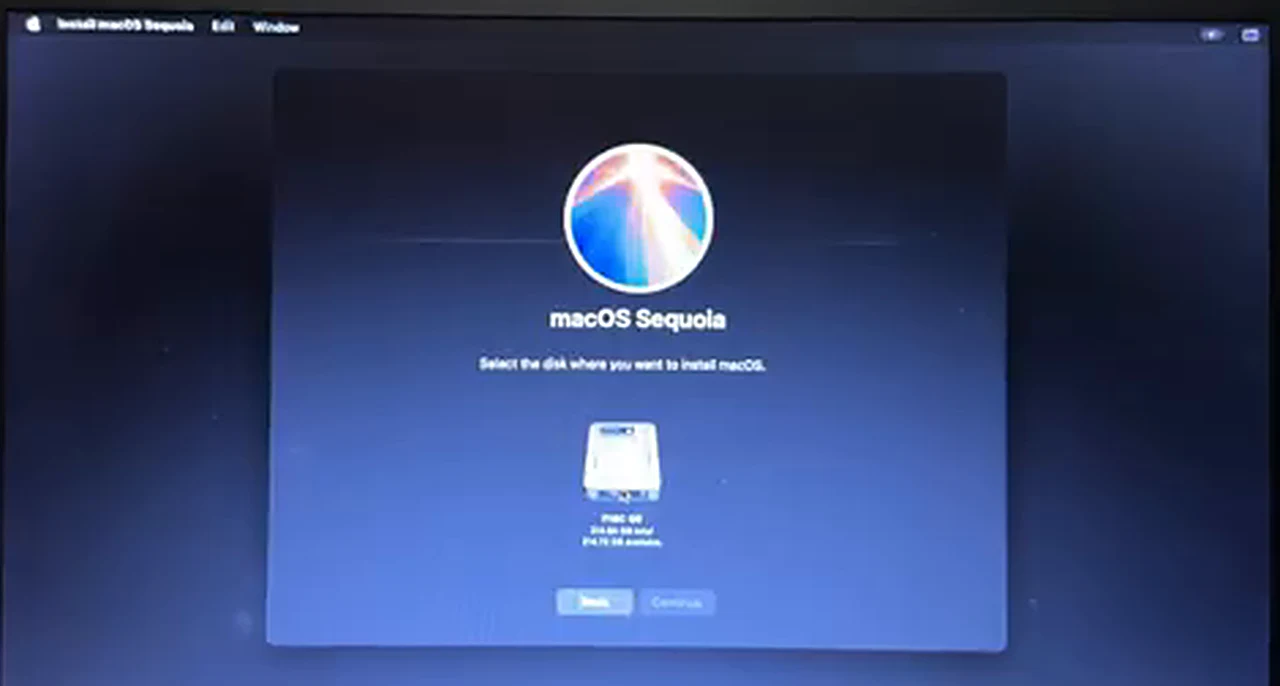
Close Disk Utility, choose Reinstall macOS, agree to the licence, and select the APFS volume you just erased. Then wait — properly wait. The video’s hard-disk install took roughly two and a half hours from this point, with three or four automatic restarts and the Apple logo returning each time. When the setup screens appear, choose your country, set the machine up as new, skip the Apple Account sign-in with Set Up Later, create a local account, and agree once more.
Checkpoint 4: Make It Boot Alone, Then Fix What Is Broken
You are on the macOS desktop, but you are not finished. Right now the machine still boots from the EFI folder on the USB drive; pull the drive out and it will not start. Open OCAT for Mac — the same tool as before, now the Mac version — and use Edit, then Mount ESP, to mount the hidden EFI partition of the internal drive. Copy the EFI folder from the USB drive into it, replacing what is there, then restart with the USB drive removed. If macOS starts on its own, the move worked, and the USB drive becomes your rescue disk.
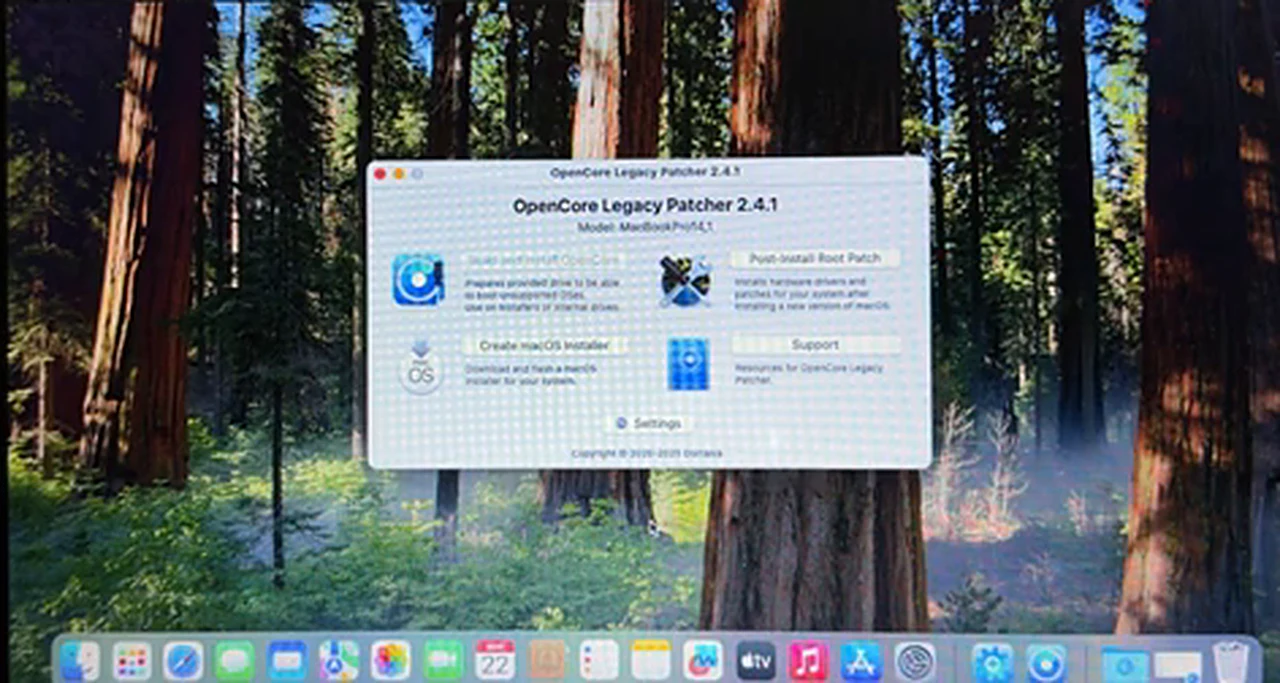
Next, the fixes. Download OpenCore Legacy Patcher — version 2.4.1 in the video — and run Post-Install Root Patch. On the video laptop it reported that no patches were required: sound and graphics were already working, so the presenter correctly left it alone. On your machine the same screen may offer patches for graphics, audio, or Wi-Fi; if it does, apply them. Then silence the scrolling text: in OCAT, open the config file again, go to NVRAM, find the boot arguments, delete the -v flag at the start, and save. If Wi-Fi or audio still fails, use Hackintool to identify the exact part, then search that name with “macOS” for the fix others used.
One practical warning: macOS will refuse to open OCAT and Hackintool at first, because they come from outside the App Store. Open System Settings, go to Privacy and Security, and click Open Anyway for each app, entering your password when asked. The presenter, who already owns a real Mac, still called the result surprisingly fast on a hard disk. Usable, not identical to a Mac.
The Verdict: Who Should Attempt This?
Attempt it if you are curious, patient, and comfortable following a long procedure exactly — if you enjoy the process itself, and if losing a weekend to troubleshooting would annoy you rather than ruin you. Do not attempt it if this is your only computer, if you need it for work tomorrow, if you cannot back it up, or if one missing feature would make the whole thing pointless. The installation in the video worked. The installation on your machine might work too.
Frequently Asked Questions
Will macOS install on any Windows PC?
No. It installs on machines whose hardware can be described correctly by an EFI map and whose parts have working drivers. Machines with Intel Wi-Fi and common Intel graphics stand the best chance. Run the hardware report in Checkpoint 1 before you commit to anything.
Can I keep Windows and dual-boot?
Yes, if you have a free partition or a second drive with at least 100 GB free. Install macOS on its own APFS partition and the OpenCore picker offers both systems at every start.
How long does the installation really take?
Plan for a full day. Preparation takes an hour or two, the macOS download depends on your connection, and the installation itself took about two and a half hours on the video’s hard disk.
What if Wi-Fi or sound does not work afterwards?
Run OpenCore Legacy Patcher and apply any root patch it offers. If that does not help, use Hackintool to identify the exact hardware, then search that part name together with macOS to find the driver other people used.
Will macOS updates break my installation?
They can. An update may replace patched system files, and a major new version may need a rebuilt EFI folder. Never update without a backup and your USB installer at hand, and wait until other people with your hardware report success.
How do I remove macOS and go back to Windows only?
Boot into Windows, delete the macOS partition in Disk Management, and restore the Windows boot entry as the first boot device in your firmware settings.