My old phone had started dropping from 40 percent battery to 12 percent while it sat in my pocket doing nothing. I was not ready to buy a new one. What I wanted was a bigger screen for the two or three Android apps I open every day, a real keyboard, and a way to try an app without draining the one phone I still trust. That was the afternoon I decided to run Android 16 on PC hardware I already owned, with the Play Store working, and find out whether it felt like a real tablet or a science project that eats an evening and gives nothing back.
I had tried an emulator years ago: slow, the mouse felt wrong, and half the apps refused to install. I went in expecting the same this time. I was wrong about the speed, and right about one thing: the process still has a moment where you can take a wrong turn and build the wrong device. I took exactly that wrong turn. This is what happened, in the order it happened.
Here is the full run-through on video, with the same screens I used.
I Wanted to Run Android 16 on PC, and I Cleared a Whole Evening for It
The plan sounded simple: download Android Studio, create a virtual device, pick Android 16, sign in to the Play Store, and install apps. In practice, the plan had a long tail of downloads, and every one was bigger than the last. On a slow connection or a nearly full drive, start early.
Before I downloaded anything, I did the one check that decides whether any of this works. I right-clicked the taskbar, opened Task Manager, clicked Performance, and looked at the CPU page. Near the bottom, under the graphs, there is a line that reads Virtualization, and it needs to say Enabled. Mine said Enabled. If yours says Disabled, the fix is not in Windows. It lives in the BIOS, and the key is different on every brand of computer, so searching for your exact model plus BIOS virtualization beats guessing keys and restarting five times.
The second check was more honest than technical. How much memory does the computer actually have to spare? The guidance I followed put it plainly: 8 GB of RAM or more, and the emulator gets a fair chance. With 4 GB, nobody could promise how it would behave. If yours is tight on memory, close everything else first, and do not give the emulator more RAM than the host system can spare.
The First Check Almost Ended the Whole Thing Before It Started
The Virtualization line is easy to miss. It sits below Sockets, Cores, and Logical processors, in the same quiet block of small text. The screenshot below is the screen I kept coming back to: CPU at the top of the left list, the big graph in the middle, and Virtualization: Enabled tucked into the details underneath. If that word says Disabled, stop here and fix that first. Nothing later works without it.
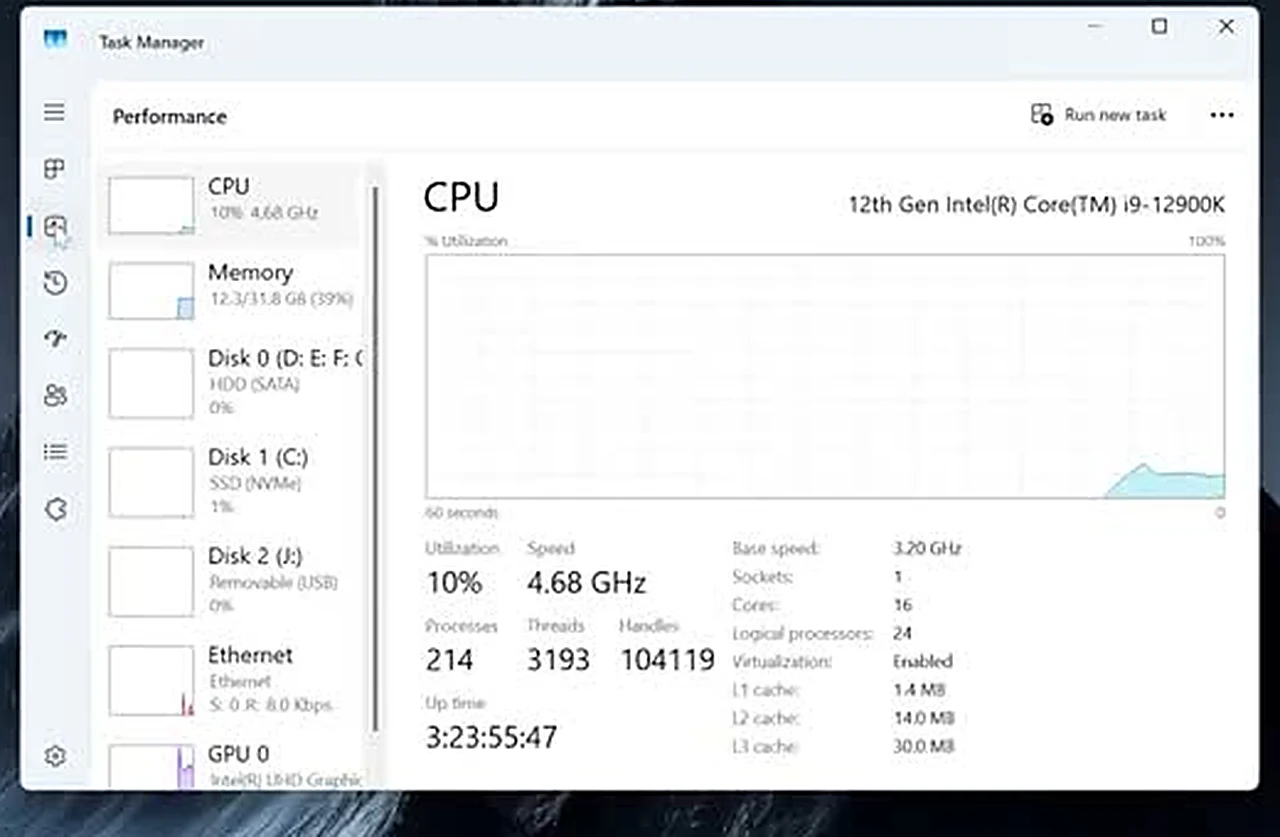
A disabled virtualization setting does not warn you at the start. It waits until you have downloaded gigabytes, and then the emulator crawls, and you blame the wrong thing.
Downloading Android Studio Was the Easy Part, Until It Was Not
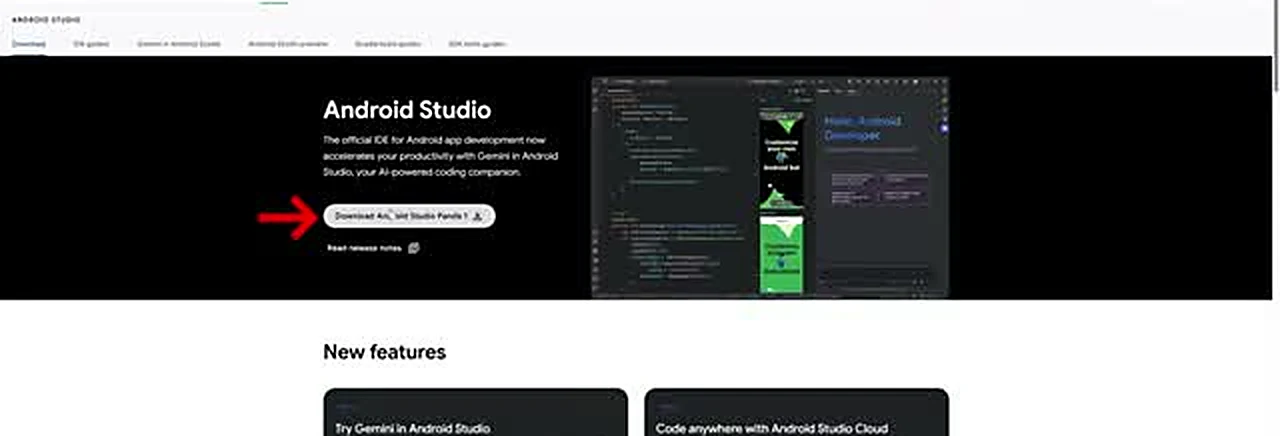
With virtualization confirmed, I opened a browser and searched for Android Studio. The official developer site is the only place I would get it from, and the download button sits right there on the hero section of the page. The file is over 1 GB, so it took a while.
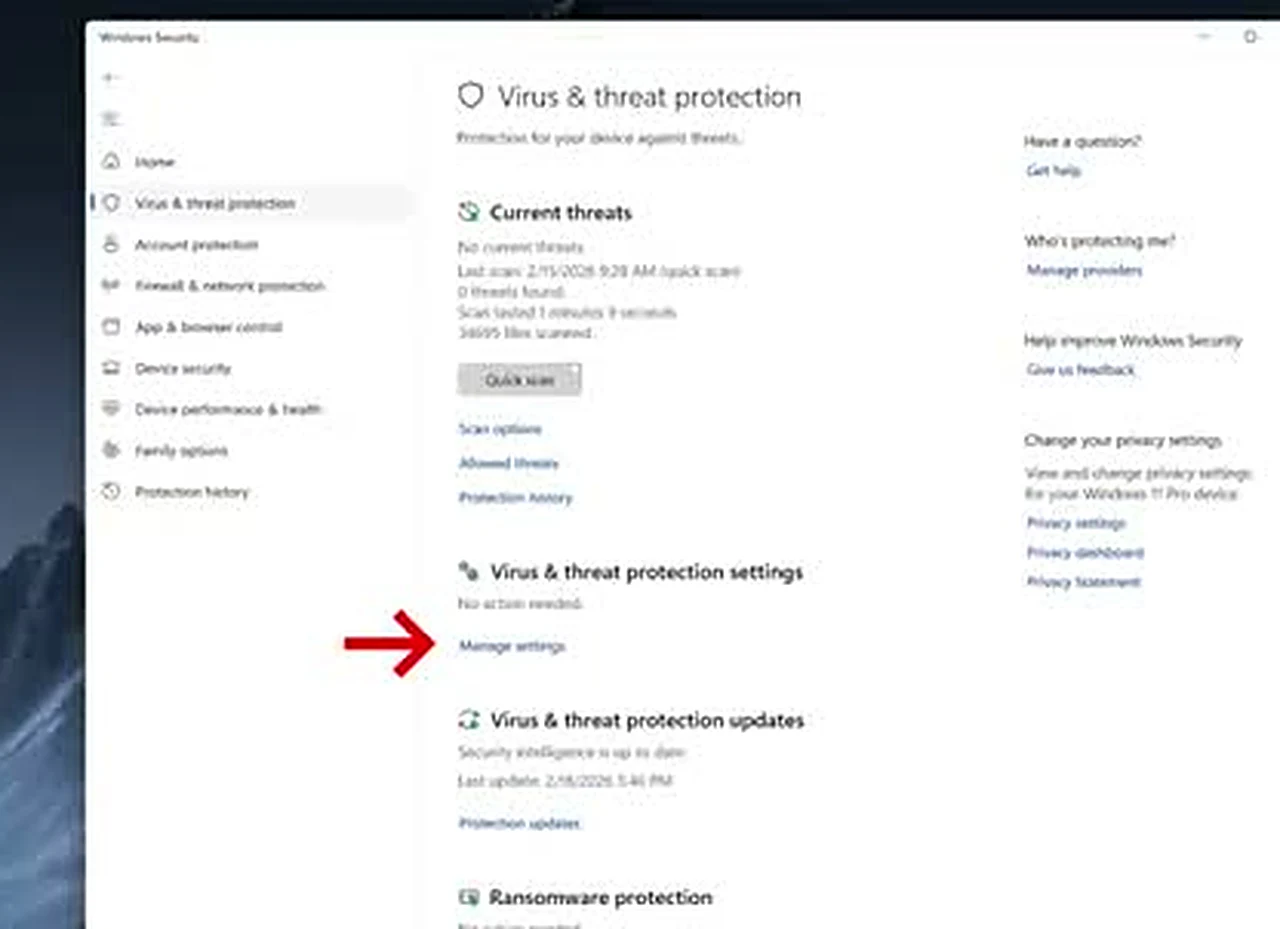
Here is the uncomfortable part. After the download finished, Windows did not simply let the installer run. The guidance in the video was to open Windows Security, go to Virus and threat protection, open Manage settings, and turn the protections off before installing, then turn them back on after the installation finished. I hesitated, and hesitating was the correct response. I treated it as a narrow window: protections off, installer run, protections back on, nothing else open in between. If you follow this path, turn the protections back on the moment the installation is done, and check that they stayed on.
The installation itself was pleasantly boring after that. Double-click the installer, say Yes, click Next through the setup screens, click Install, and wait for the green bar. When it finished, Android Studio opened and asked whether I wanted to share usage data with Google. I clicked Don’t send.
The Setup Wizard Kept Downloading, and I Kept Waiting
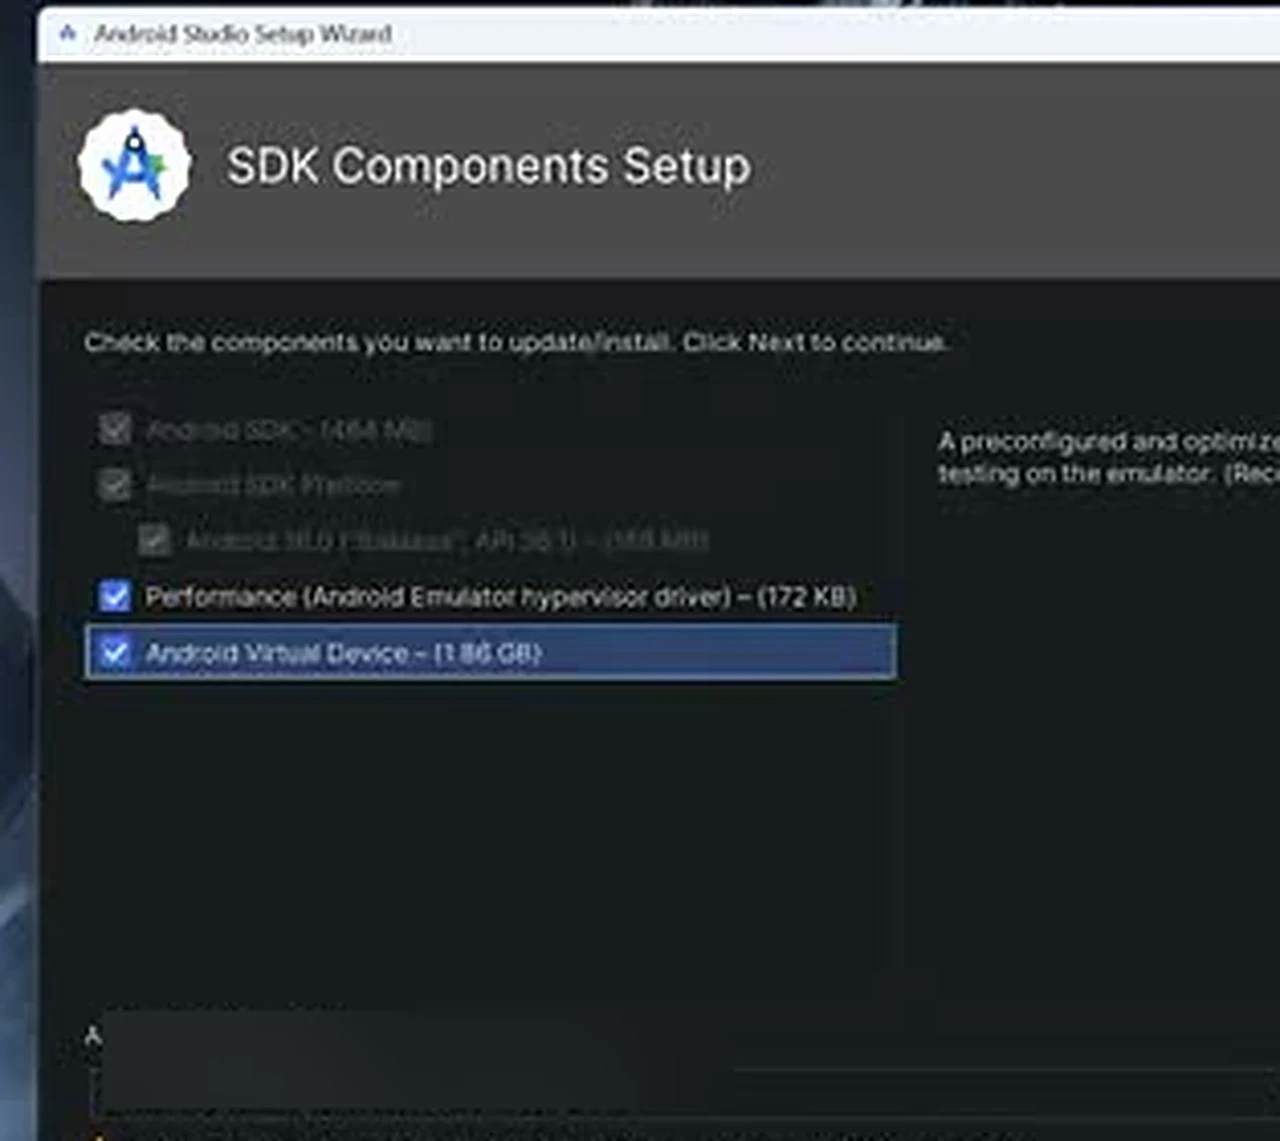
The first-run wizard offered Standard or Custom setup. I chose Custom, because the default path hides the choices I wanted to see. Then the wizard started downloading components, and I learned the second lesson of the evening: the 1 GB installer is only the beginning. The SDK, the platform tools, and the emulator pieces added up to close to 2 GB more.
The component list is worth reading before you click Next: the Android SDK, the SDK Platform, a system image for Android 16, the emulator hypervisor driver, and the Android Virtual Device package. When the downloads finished, I clicked Finish, and Android Studio opened to its welcome screen.
Under More Actions on the welcome screen, there is an entry called Virtual Device Manager. Clicking it asked about network access, and I allowed it, because an emulator with no network is a tablet with no Play Store. The manager opened with a plus button to add a new device and more choices than I expected: phone, tablet, desktop, and several screen sizes under each. This was where I made my mistake, because the most interesting-looking option was the wrong one for my goal.
My First Emulator Was the Wrong One, and It Ran Perfectly
I clicked the plus button, chose Desktop, and picked the Large size. A desktop-sized Android on a desktop monitor sounded right. In Additional settings I gave it generous storage and 8 GB of RAM, because the host machine had 64 GB. Then I went to the system image page, and there it was: the highest API level on offer for the desktop profile was API 14. Not 16. Not anything close to 16.
I built it anyway, because I wanted to see it run. It downloaded about 1.5 GB of system image, installed, and booted into a clean Android desktop at 1080p. On the 4K monitor in the video, it sat in a window that did not quite fit. It worked. It just was not Android 16, and Android 16 was the point. So I powered it off and went back to the plus button. The lesson was simple and a little annoying: the device profile decides which Android versions you can pick. Desktop mode tops out lower. If you want the newest version, you need a phone or tablet profile.
The Pixel Tablet Changed Everything in About Two Minutes
Back in the device list, I chose Tablet, then Pixel Tablet, then Next. The system image page looked completely different. There it was, at the top: API 36.1, codename Baklava, Android 16.0, with Google Play Store listed as the service. I selected the Google Play system image, because a system image without the Play Store would have left me installing apps by hand. Then I opened Additional settings before I clicked Finish, because the defaults were the next trap.
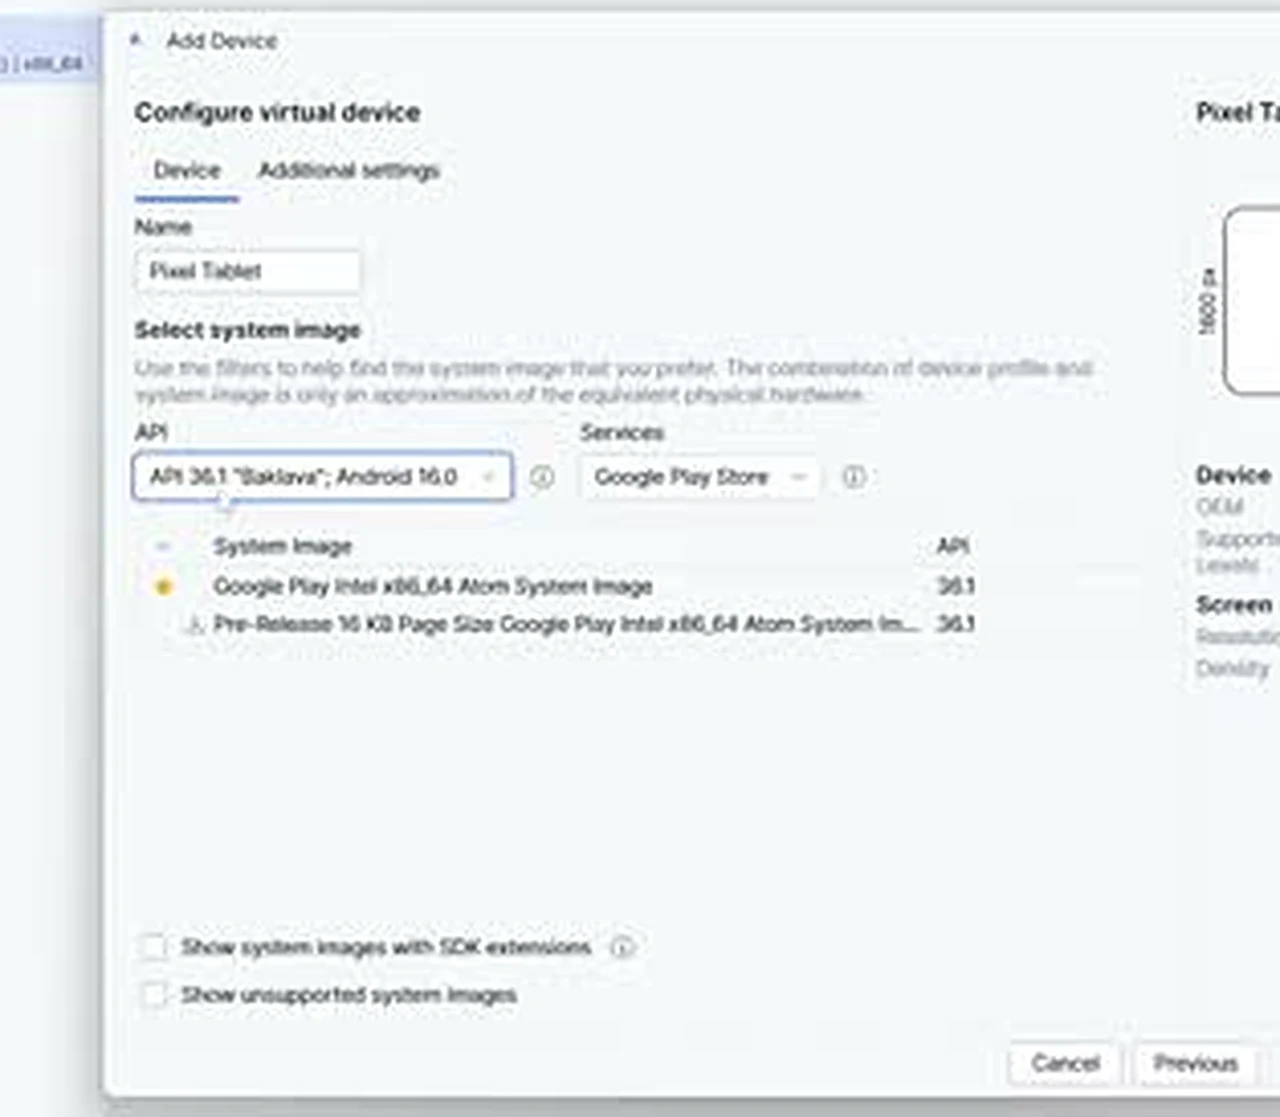
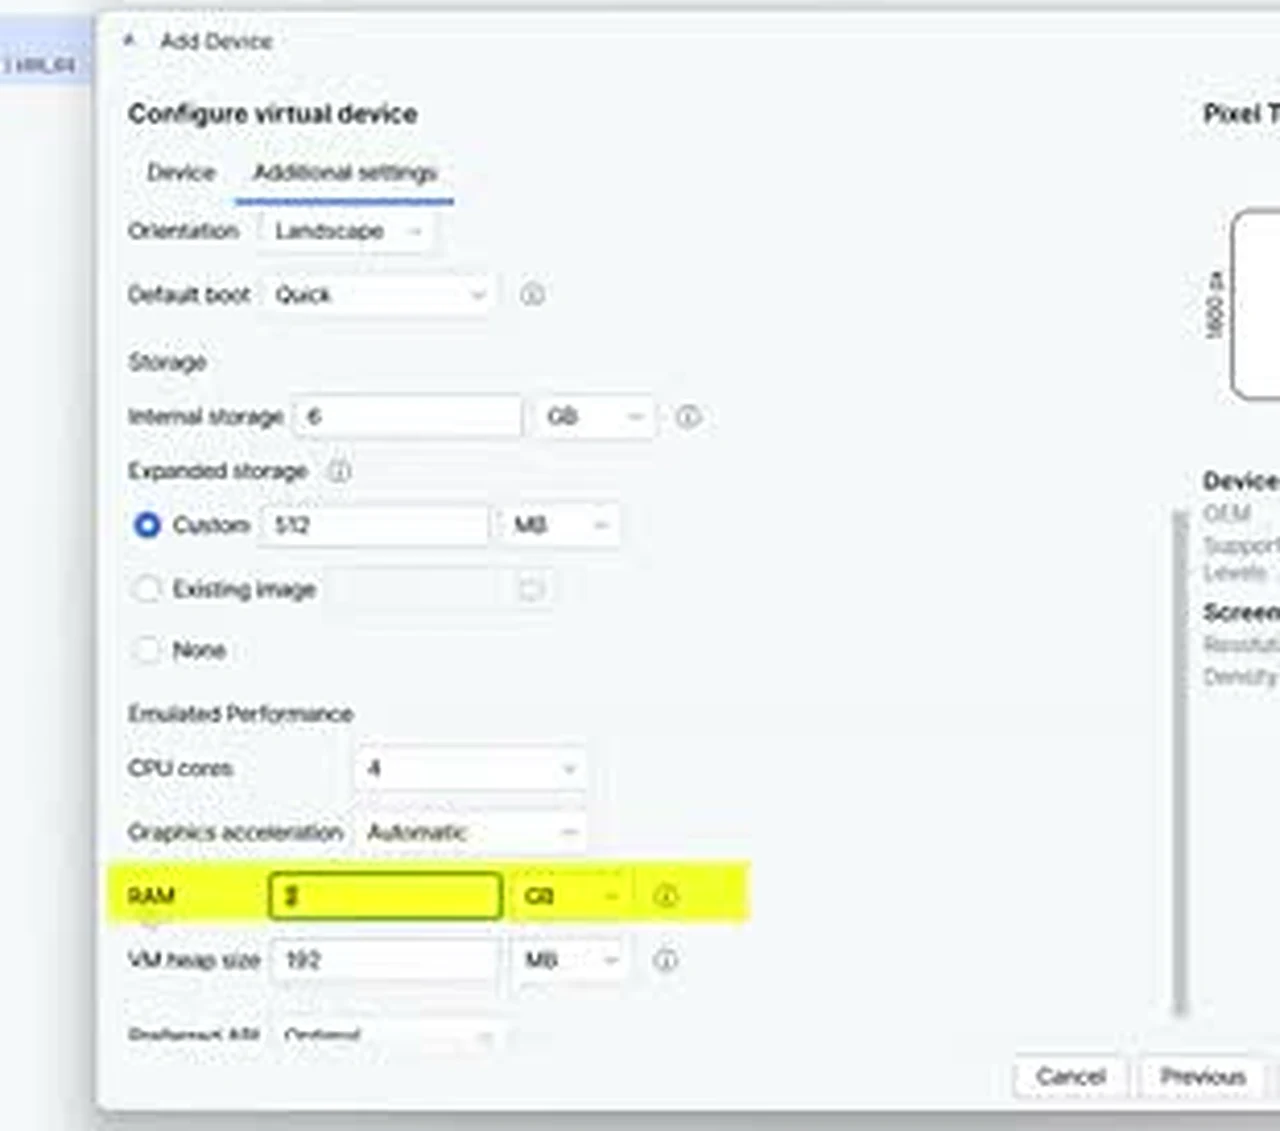
The default RAM for the tablet profile was 2 GB. Two gigabytes, for a modern version of Android expected to run a store, a browser, and whatever else you open, all at once. That is not enough. I raised it to 8 GB and set internal storage to 10 GB. You can go higher on both if your machine allows it.
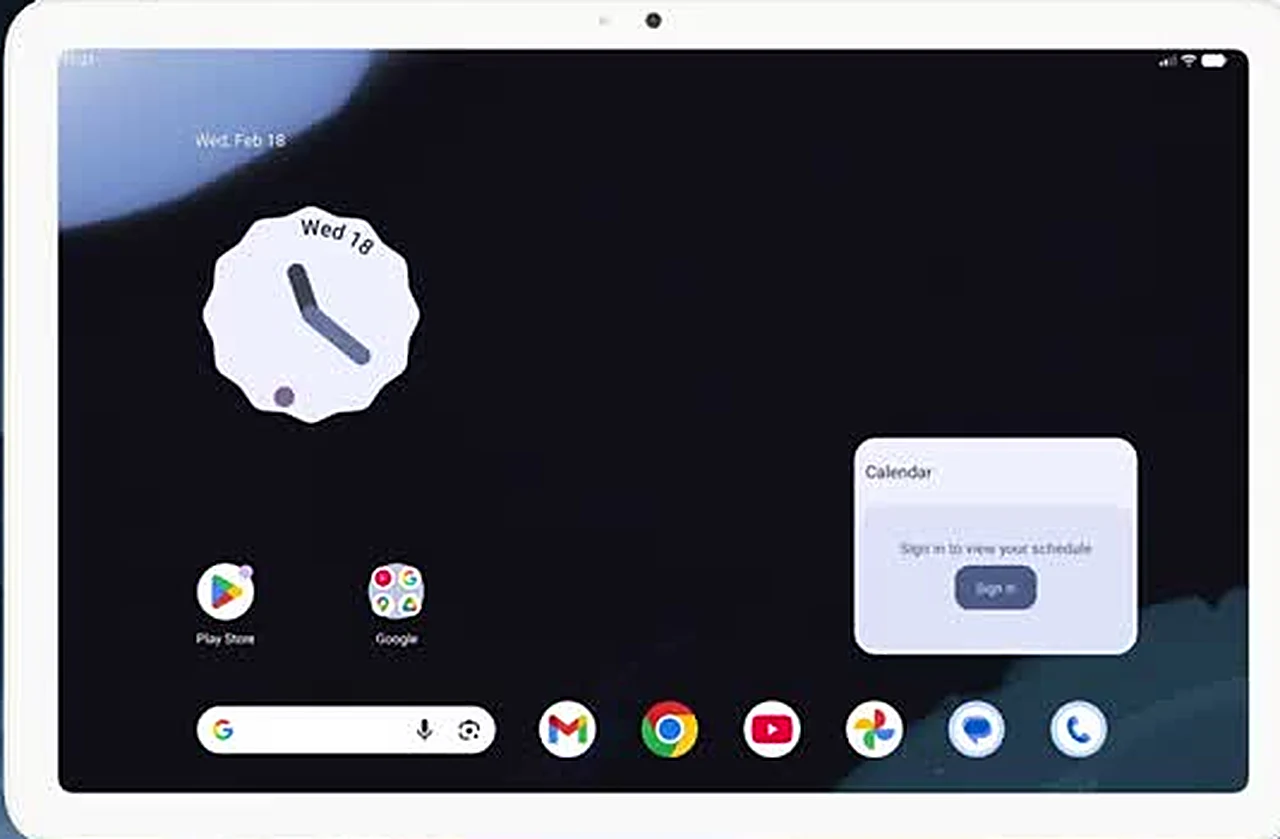
I clicked Finish, and this time there was no big download waiting. The system image was already on the disk from the setup wizard. I clicked the Play button next to the tablet, waited through the first boot, and watched a tablet appear on my screen, with a clock widget, a search bar, and a row of familiar icons along the bottom.
Signing In to the Play Store Felt Like Unboxing a Real Tablet
The home screen looked the way a new tablet looks: mostly empty, with a Calendar widget asking me to sign in. I tapped the Play Store icon, and the store started updating itself before it would let me in. I waited again, and then the sign-in screen appeared. I signed in with a Google account, the same way I would on a physical tablet, and the store opened for real, with featured apps, suggested apps, and install buttons that actually worked.
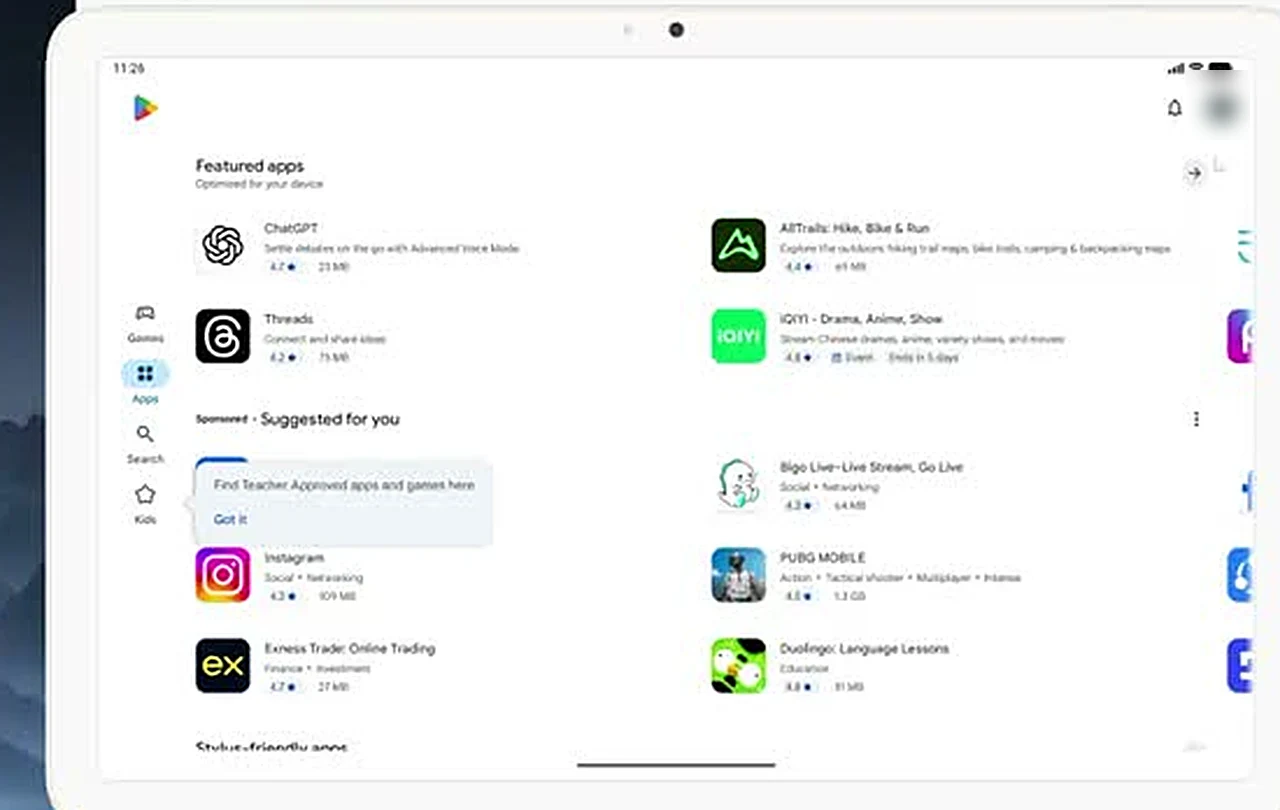
That moment is the one I keep coming back to. It was not the novelty of Android on a big screen. It was the ordinariness of it. I searched for an app, tapped Install, watched it download, and opened it, and nothing about the process felt emulated. The emulator window has a toolbar with a rotate button, and tapping it flips the tablet between landscape and portrait. Some apps only make sense tall, some only make sense wide.
I also started a phone while I was there: same plus button, same flow, but with Pixel 9 Pro as the device, the same RAM and storage changes, and the same Android 16 image. The phone profile needed to download its Play Store system image first, unlike the tablet, which was already ready. I cancelled that download because the tablet was already doing everything I needed, but the path is there.
What I Would Do Differently Next Time
If I did this again tomorrow, I would change five things. First, I would check virtualization before downloading a single byte, and treat a Disabled result as a BIOS errand. Second, I would pick the tablet profile first and skip the desktop detour, because the desktop profile cannot reach Android 16 in the version I used. Third, I would raise the RAM to 8 GB and the storage to at least 10 GB before the first boot. Fourth, I would keep the security window narrow: protections off only for the installation, back on immediately after.
Fifth, I would go in with honest expectations. It is not a phone. It has no SIM card, no real GPS hardware, and no battery to worry about. Most everyday apps run fine. Demanding games may run slower than on a real phone, some apps check for an emulator and refuse to run, and anything that needs a fingerprint or a real camera will behave differently or not at all. For banking and anything that guards real money, I would still use the real device.
About space: between the Studio download, the setup components, and the system images, this project eats several gigabytes before you install a single app. Clean up the system images you do not use.
I closed the emulator at the end of the night, and Windows was still there underneath it, untouched, with its protections back on. The tablet is still in the device manager, ready to start again with one click. I did not replace my phone. I gave my computer a second personality, one that runs Android 16, signs in to the Play Store, and waits patiently in a window until I need it. For the apps I wanted on a bigger screen, that turned out to be exactly enough, and the wrong turn in the middle turned out to be the most useful part, because now I know which profile to pick, which numbers to raise, and which line in Task Manager to check before I download anything at all.