Sooner or later, every curious computer user hits the same wall. You want to try Linux, or you need an old version of Windows for one stubborn program, or you want to test software you do not quite trust. The safe advice is always the same, and always annoying: do not do it on the computer you depend on. VirtualBox lets you skip that dilemma. It builds a second computer inside the one you already own. Install another operating system on it, throw the whole thing away when you are done, and your real Windows installation never notices.
Think of it like a flight. The takeoff is the interesting part, but the ground checks keep you out of trouble. This guide follows that order: a pre-flight checklist, four checkpoints, then a post-flight check. If something goes wrong, the fix is usually a check you skipped.
Pre-flight: seven checks before you touch the installer
Most VirtualBox failures are a missing BIOS setting, a drive with no room left, or an installer file from the wrong place.
Check 1: virtualization is switched on. Intel calls it VT-x, AMD calls it AMD-V or SVM, and it is often off by default. Open Task Manager, go to Performance, click CPU, and check the bottom right. If it says Virtualization: Enabled, you are done. If it says Disabled, restart, enter the BIOS or UEFI settings (usually Del, F2, or F10), and turn it on. Without this, VirtualBox will refuse to start the machine or crawl.
Check 2: you have an administrator account. Installing VirtualBox changes network drivers, which is why the installer warns that the connection will drop for a moment. A standard user account will stall at the permission prompt.
Check 3: the RAM math works. A virtual machine borrows memory while it runs, and the host still needs enough for Windows and everything else open. Never give the guest more than half of your total RAM, and leave at least 4 GB for the host. On a computer with 16 GB, 8 GB for the guest is comfortable. On a computer with 8 GB, 4 GB is the ceiling. The video gives the guest around 10 GB because the host has plenty to spare. Copy the proportion, not the number.
Check 4: the CPU math works too. Leave at least two cores for the host. Two cores run Windows 10 fine for everyday tasks, and four feels smoother. Giving the guest every core does not make it faster. It makes the host stutter, which makes the guest stutter.
Check 5: 50 GB of free disk space, on an SSD if you have one. A Windows 10 guest needs about 32 GB at the bare minimum, before updates. Fifty gigabytes is the honest number. The virtual disk grows as it is used, so it will not swallow 50 GB on day one, but the space must exist, or the installation will fail halfway through. An SSD makes the guest feel like a real computer.
Check 6: the installer file is downloaded, from the official source. For a Windows guest, that means a Windows 10 ISO from Microsoft. For Linux, the ISO from the distribution’s own website. Do not use a repacked ISO from a random download site.
Check 7: close the heavy stuff. Close the browser tabs, the game, and the video editor before you start the virtual machine. You are about to run two operating systems at once. Nothing here is permanent: VirtualBox has snapshots, restore points for the whole machine, and a clean remove option that gives the disk space back.
Checkpoint 1: download and install VirtualBox
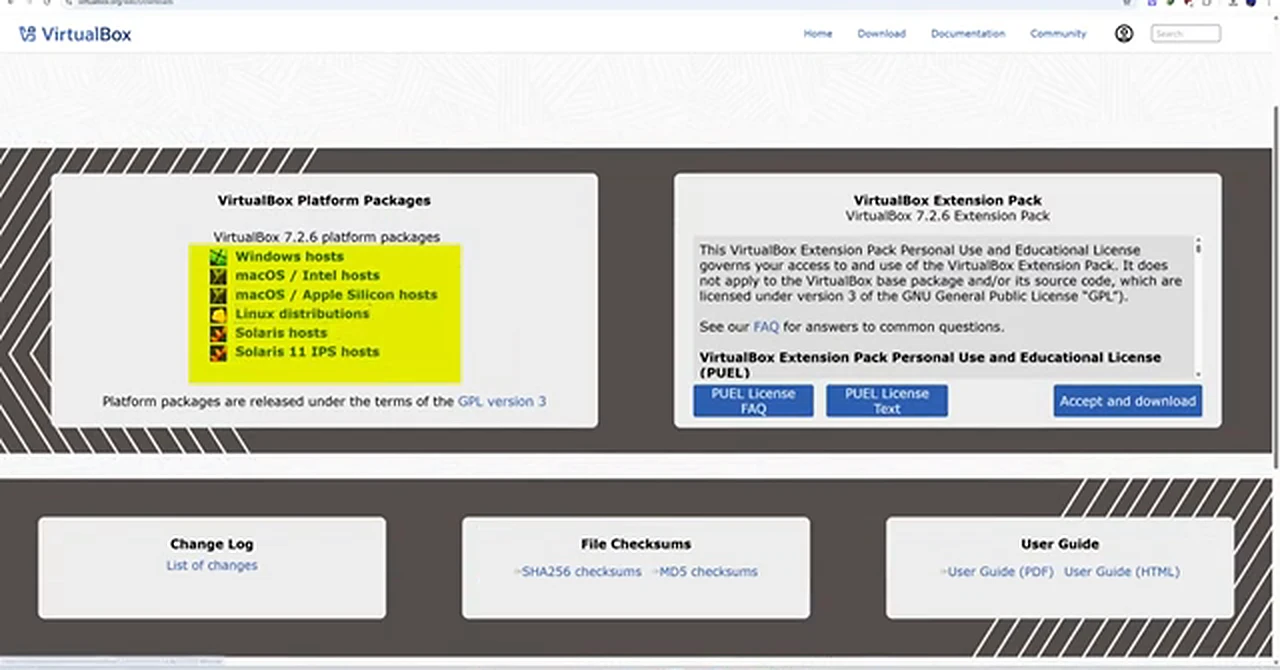
Go to virtualbox.org and open the Downloads page. Since the host here is Windows, choose Windows hosts. The version in the video is VirtualBox 7.2.6, but the correct link is always the one labeled for your own system. Ignore the Extension Pack panel for now. Nothing in this guide needs it.
Run the installer. Click Yes at the permission prompt, accept the license agreement, keep the defaults, and click Next until you reach the warning about network interfaces. That warning is real and harmless: VirtualBox briefly resets your network adapters, so a call may drop for a few seconds. Click Yes, then Install, and wait. Checkpoint 1 is done when the main window is open, with an empty machine list on the left.
Checkpoint 2: build the machine
Click New. Name the machine after the guest system, for example Windows10, because the name becomes the folder name and the name in the list. Check the folder it will live in, and pick a drive with room if the system drive is nearly full. Then attach the ISO file: click the ISO Image dropdown, choose Other, browse to the file from Check 6, and select it. VirtualBox usually fills in the operating system and version by itself. If it guesses wrong, correct the dropdowns.
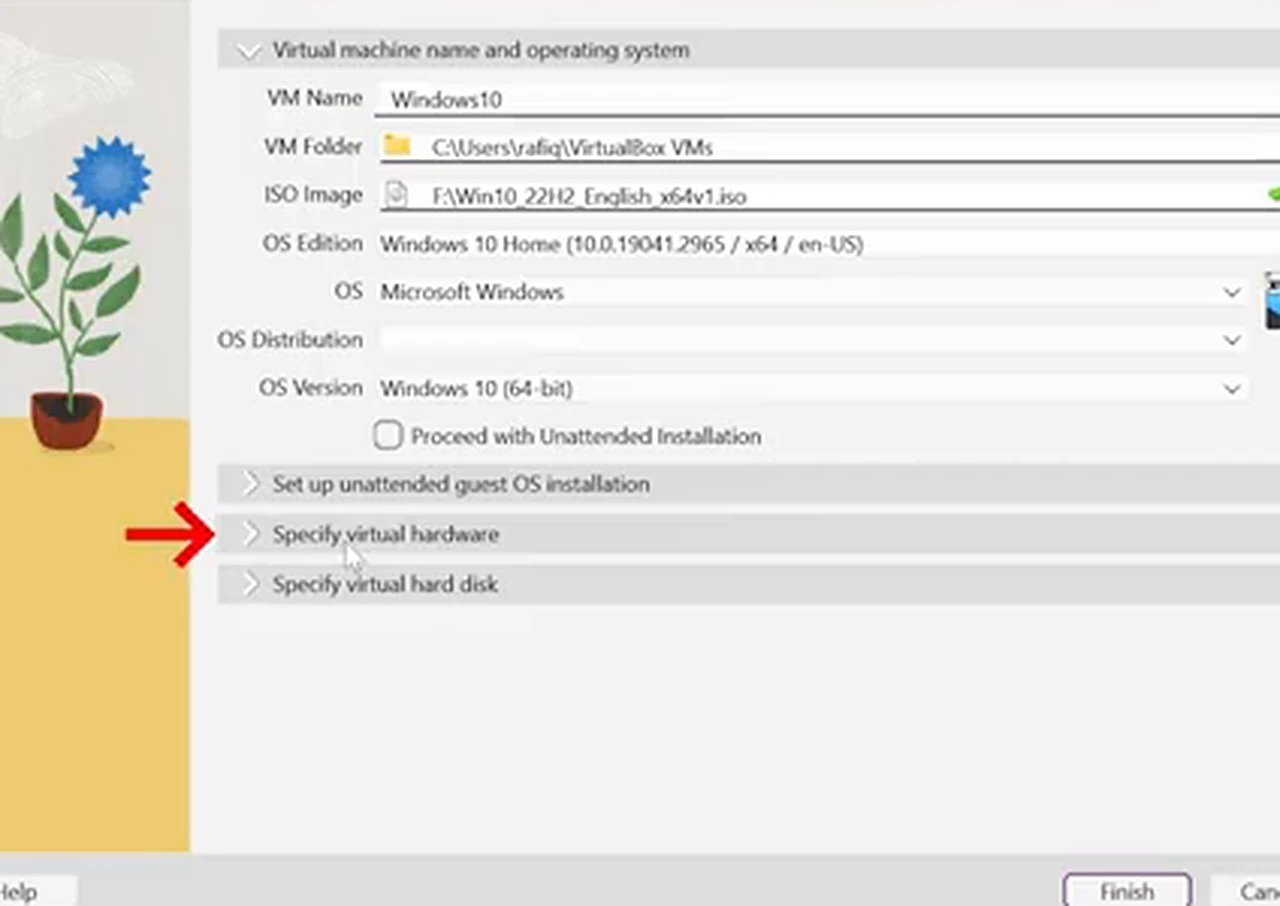
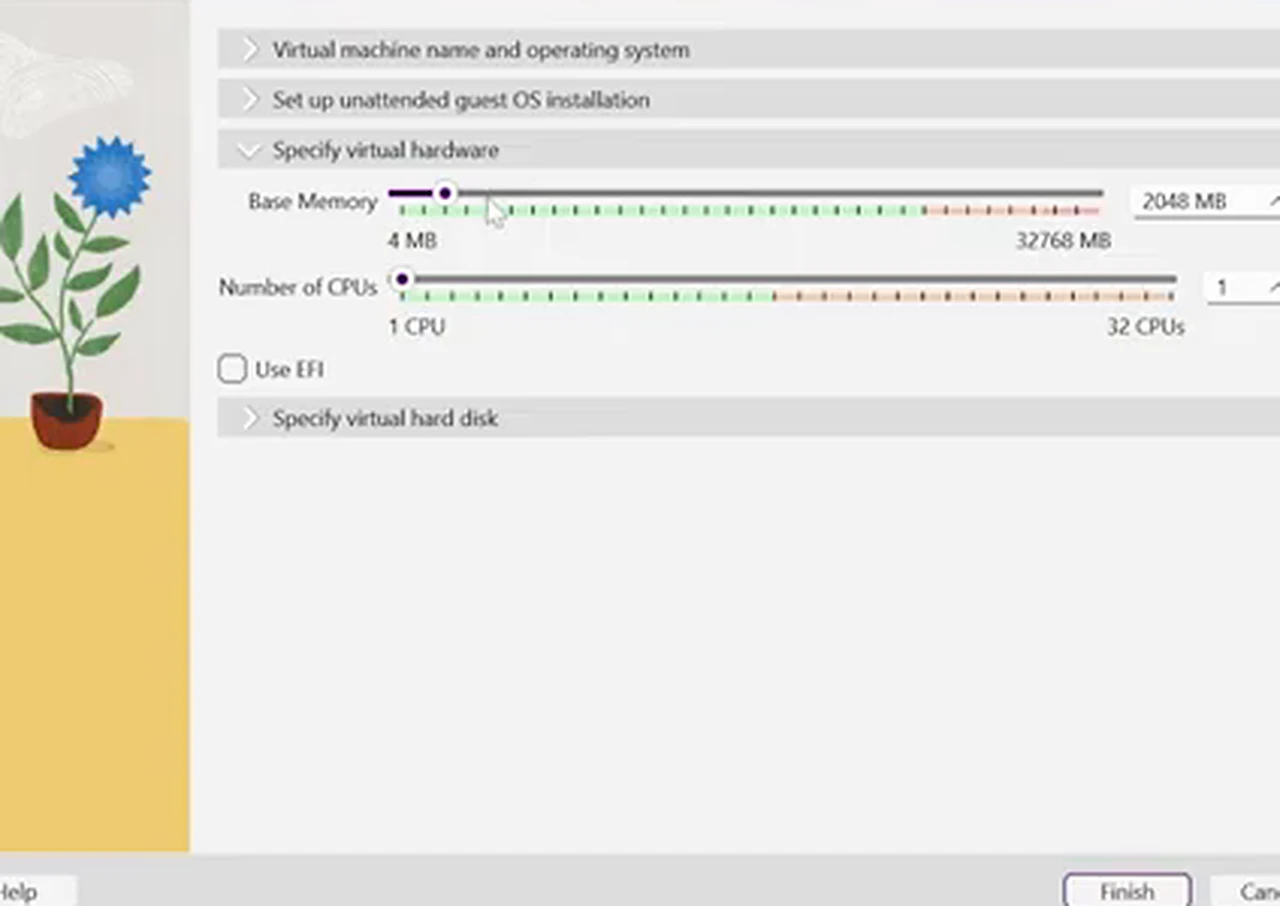
Make sure Proceed with Unattended Installation is unchecked. It pre-fills a username and password and installs the guest without asking you anything, which sounds convenient until it installs software you did not ask for. Open Specify virtual hardware. Drag the Base Memory slider to the amount from Check 3, staying clear of the red zone, and set the processors within the limits from Check 4. Leave Enable EFI unchecked. Then open Specify virtual hard disk: keep Create a Virtual Hard Disk Now, keep 50 GB and the VDI format, and leave Pre-allocate Full Size unchecked. Click Finish, then read the Details panel. If the memory still says 2 GB, you forgot to drag the slider.
Checkpoint 3: the settings pass most people skip
With the machine selected, click Settings, then Expert in the top right. Change only the settings below.
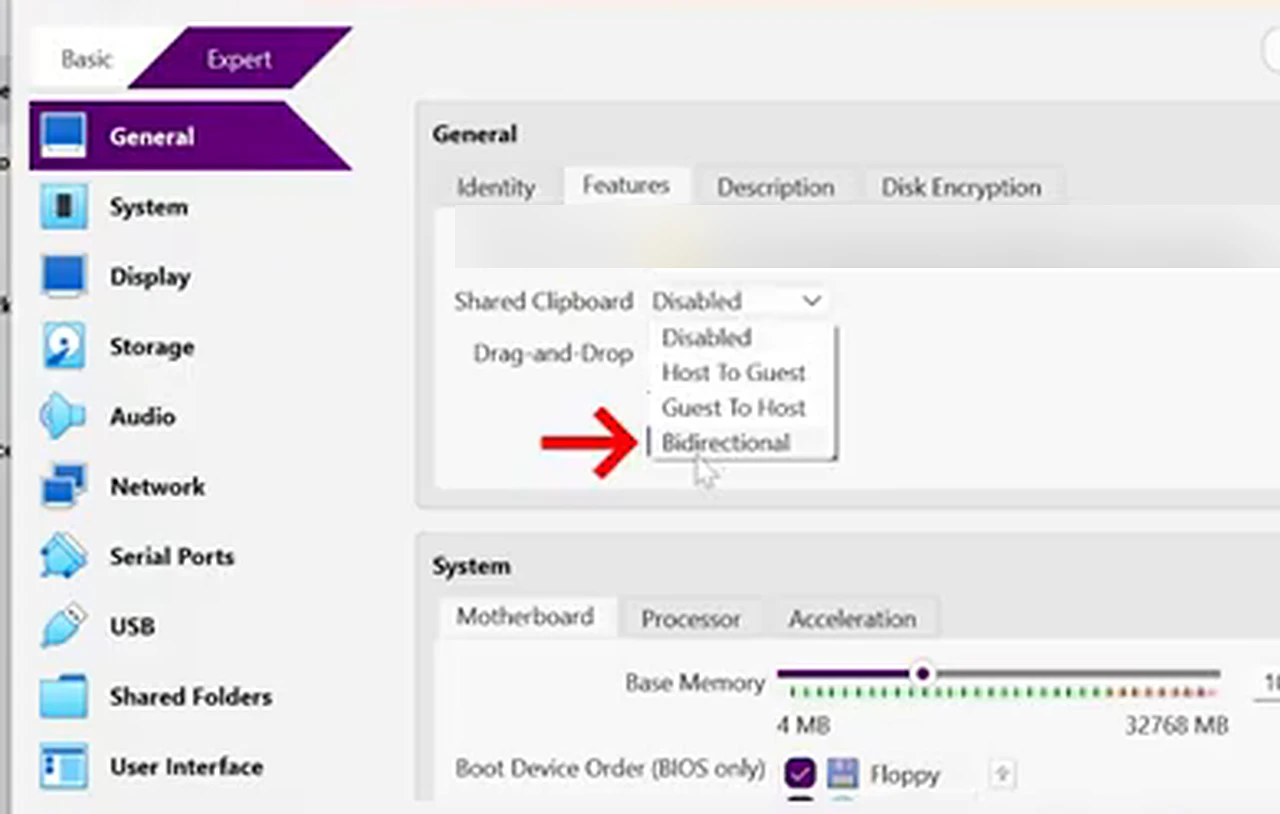
Start in General, on the Features tab. Set Shared Clipboard and Drag and Drop both to Bidirectional. Text copied on the host then pastes into the guest, and a file dragged from a host folder lands in the guest. It only takes full effect after Guest Additions is installed later.
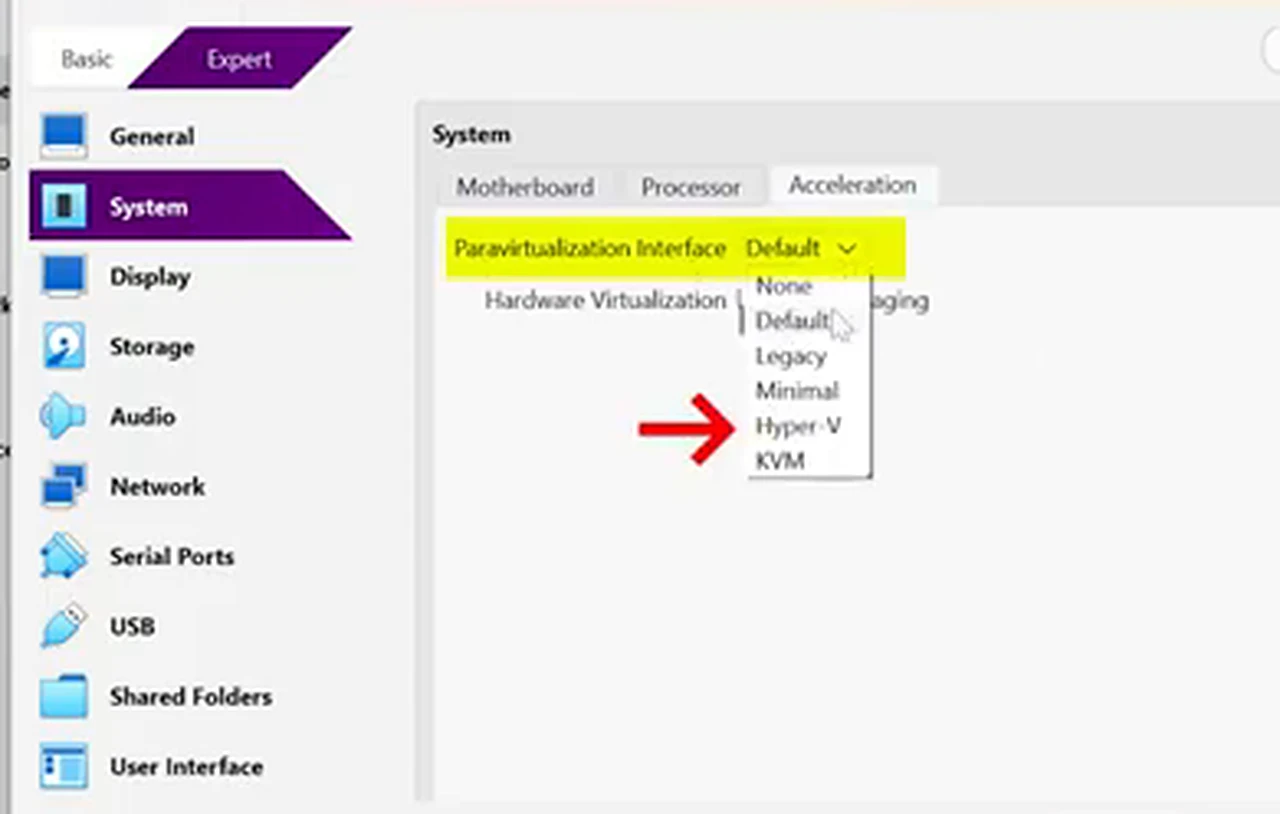
Move to System. On the Motherboard tab, confirm the memory figure and make sure the boot order puts Optical first, so the machine boots from your ISO. On the Processor tab, confirm the core count and tick Enable PAE/NX. Under Acceleration, set Paravirtualization Interface to Hyper-V. On a Windows host this keeps VirtualBox and the Windows hypervisor from fighting each other. Then open Display and set Video Memory to 128 MB, the maximum on the slider.
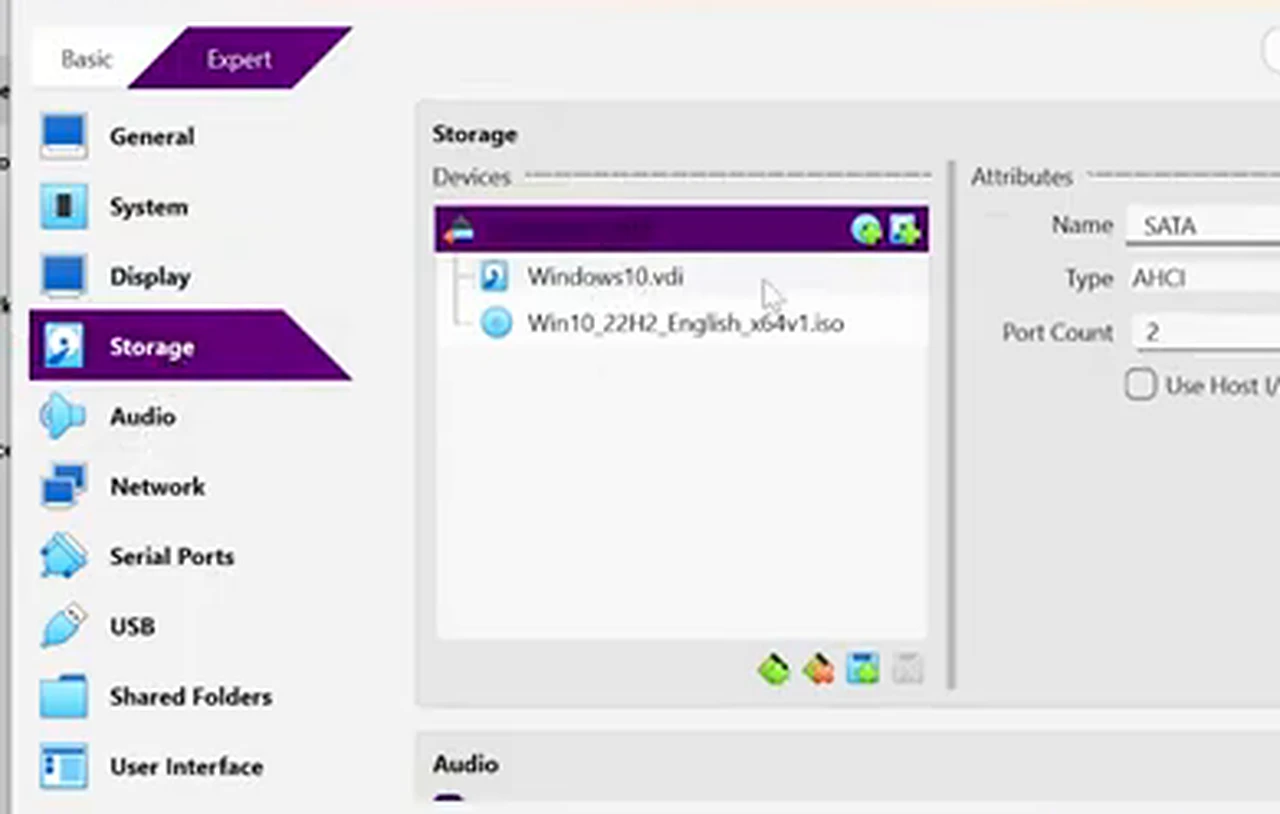
Finish in Storage. Under Controller: SATA you should see the virtual hard disk and an optical drive with your ISO attached. If the optical drive is empty, click it, then the disk icon on the right, and choose the ISO. Glance at Network, but do not change it: NAT, the default, gives the guest internet through the host. Click OK.
Checkpoint 4: first boot: install the guest system
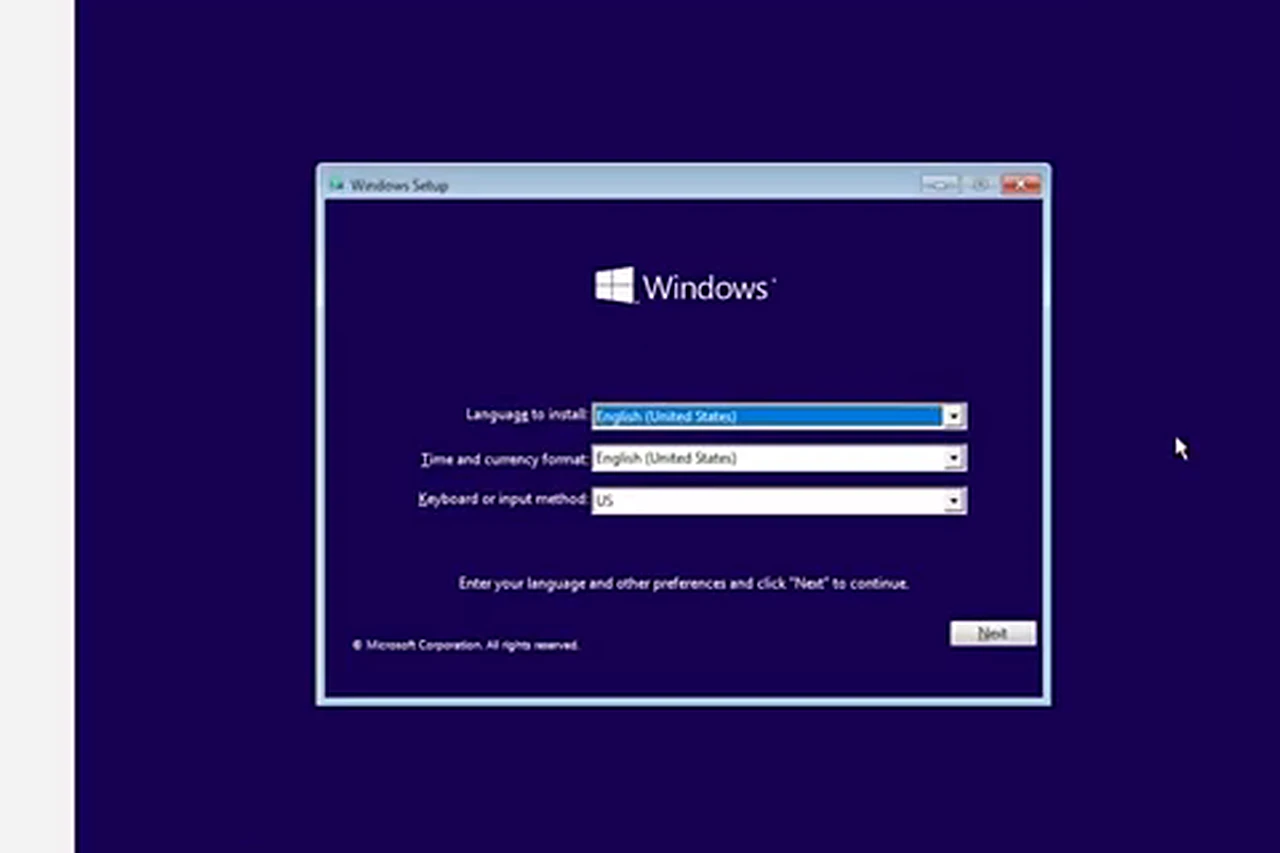
Select the machine and click Start. The guest boots from the ISO the way a real computer boots from a DVD. The Windows Setup screen asks for language, time and currency format, and keyboard layout. Click Next, then Install now. When setup asks for a product key, click I do not have a product key, so you can sort out licensing afterward with a key you actually own. Pick the edition that matches your license, accept the license terms, and choose Custom: Install Windows only.
The next screen shows the virtual hard disk as one block of unallocated space, about 50 GB. Select it and click Next. Setup copies files and restarts the machine, possibly more than once. Let it restart inside its own window. When the blue setup screens appear, pick your region and keyboard layout, skip the second layout unless you need it, and choose Set up for personal use. When it asks you to sign in with a Microsoft account, look for the offline account option and choose Limited experience. Give the local account a name, set a password you will remember, and answer the three security questions. Without them, a forgotten password is a rebuild, not a reset. Turn off the privacy toggles you do not want, skip the remaining offers, and wait. The desktop will be small, in the middle of a larger window. That is normal. If the pointer feels trapped, press the Host key, Right Ctrl by default.
Post-flight: five tests that prove it works
A guest that boots is not the same as a guest that works. The missing piece is Guest Additions, a small package of drivers from VirtualBox. Without it, the screen stays small, the mouse feels sticky, and the clipboard settings from Checkpoint 3 do nothing. Inside the running guest, open the Devices menu and click Insert Guest Additions CD image. Open File Explorer, go to This PC, open the CD drive, and double-click the Windows installer for 64-bit Windows. Click Yes, keep the defaults, click Finish, and let the machine reboot.
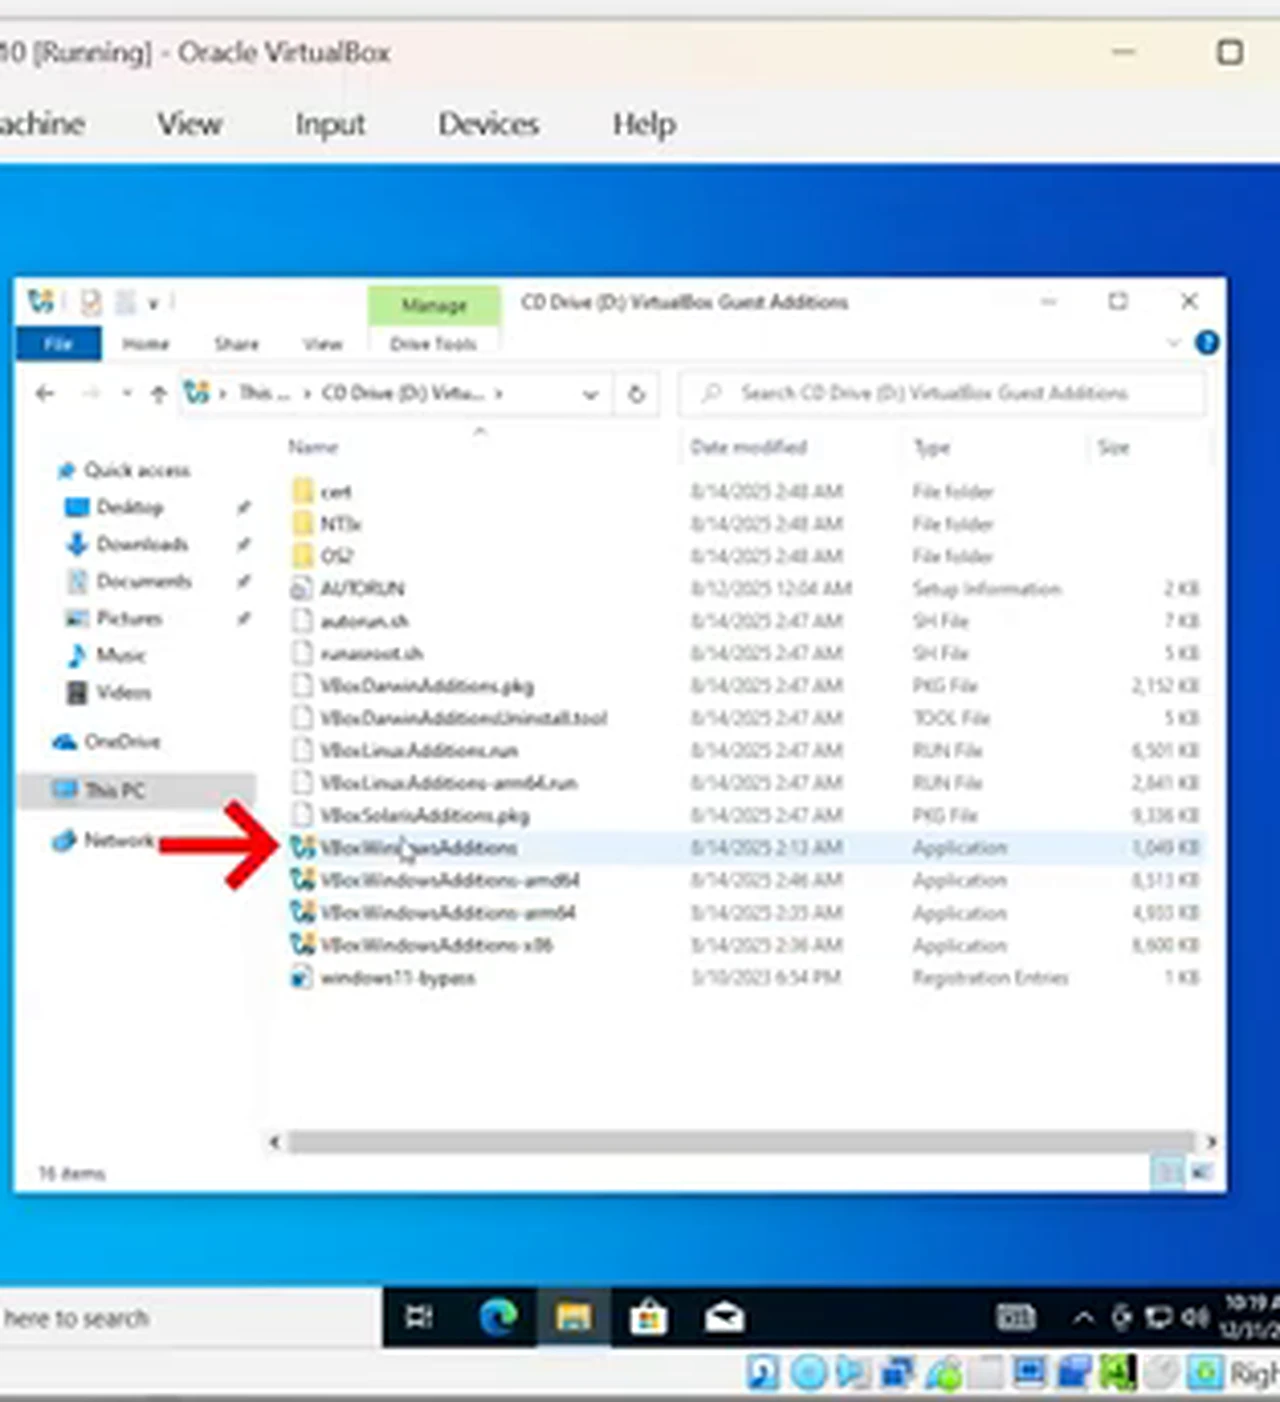
Now run the five tests. First, choose Full-screen Mode from the View menu; the guest should fill the whole screen, and Host key plus F leaves it. Second, copy text on the host and paste it into Notepad in the guest, then copy text in the guest and paste it back on the host. Third, drag a small file from a host folder into the guest window. Fourth, load a web page in the guest browser. Fifth, open This PC and confirm the drive shows roughly 50 GB. If all five pass, the machine is done. Before you experiment, take a snapshot: in the main VirtualBox Manager, open Machine and choose Take Snapshot, and name it after the clean state.
When a checkpoint fails
- The machine will not start, or VirtualBox complains about VT-x or AMD-V. Go back to Check 1. Virtualization is still off in the BIOS.
- The machine reports no bootable medium. Go back to Checkpoint 3. The ISO is not attached, or Optical is not first in the boot order.
- Setup fails halfway, or the disk fills up. Go back to Check 5. There was not enough free space. Free space, remove the broken machine, and start Checkpoint 2 again.
- The guest is painfully slow. Go back to Checks 3 and 4. The guest has too little memory or too few cores, or the host is running heavy programs.
- The window stays small after Guest Additions. Reboot the guest, then use View and Auto-resize Guest Display. If that menu item is grayed out, Guest Additions did not install.
- The guest has no internet. Check that the host has internet first, then confirm the adapter is enabled and attached to NAT in Settings, Network.
Living with a virtual machine
Shut the guest down the way you shut down a real computer: Start, Power, Shut down. Closing the guest window offers three choices: save the machine state, send the shutdown signal, or power off. Saving the state freezes the guest exactly where it is, which is handy for a quick break. Powering off is the same as pulling the plug. The same procedure builds any other system. A Linux guest is the obvious second machine: often 4 GB of RAM and 25 GB of disk is plenty. One honest limit belongs at the end. A virtual machine is not a gaming computer. Three-dimensional graphics run through a virtual adapter, and demanding games will struggle. For trying systems or testing software, it is excellent. Run the checks, build the machine, set the settings, install the guest, and prove it with the five tests. Do it once, slowly, and the next operating system you want to try is an afternoon, not a project.