An old laptop waking after a year in a cupboard makes a particular sound: the fan clears its throat, the hard disk clicks awake, and for a second you half expect the blue Windows 7 wallpaper to appear exactly as you left it. That memory is why many people want Windows 7 again. It was fast on modest hardware, and it ran the printer, the old program, or the game that never worked quite right on anything newer. Nostalgia is a real reason. In 2026, it is not a sufficient one.
This guide follows the video step by step, checked against its frames: a bootable USB drive made with Rufus, the boot menu, the installer, and the driver work that makes the desktop usable. The warning comes first.
The Warning Comes First, Not Last
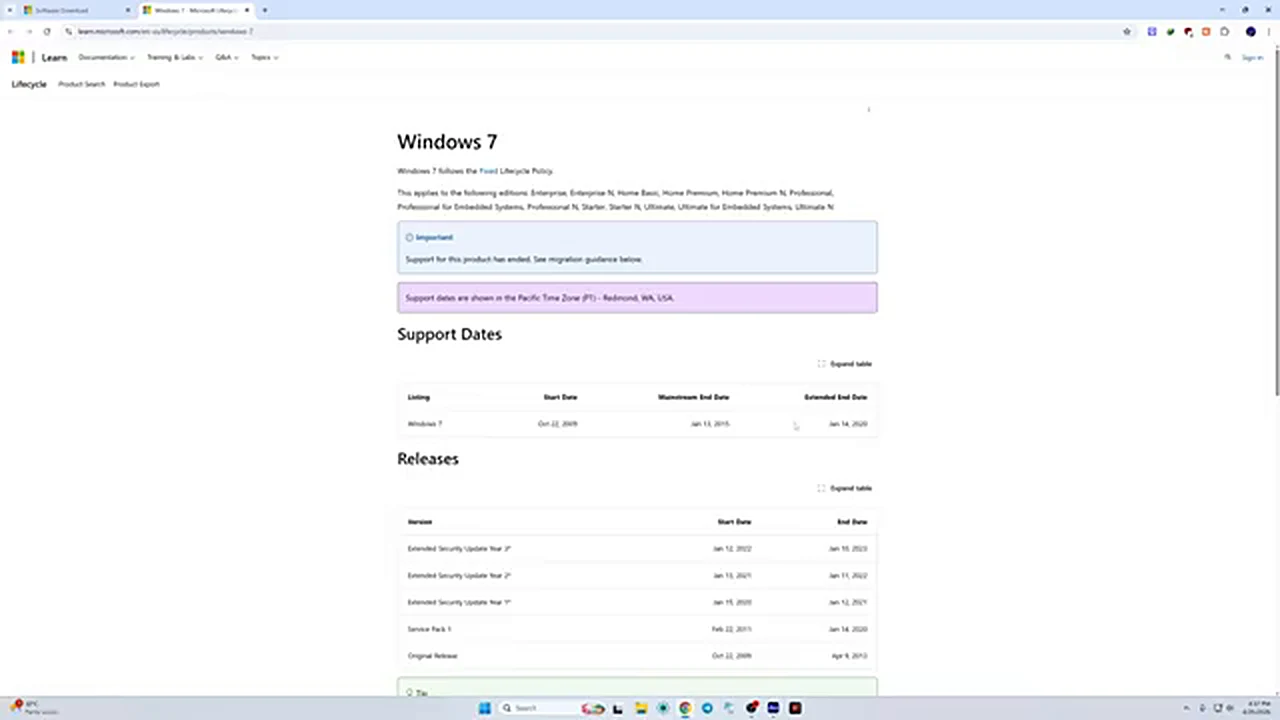
Microsoft ended support for Windows 7 on 14 January 2020. The lifecycle page in the video says it plainly: support for the product has ended. No new security fixes arrive, however carefully you install, and the extended updates once sold to large organizations have also ended. A fresh copy of Windows 7 in 2026 is frozen in time. Newly found weaknesses stay weaknesses.
That is also why Microsoft no longer offers the download. Only install a licensed copy you already own, from media you trust, and treat any random download with deep suspicion. An old installer is an ideal place to hide something unpleasant, and this system will not get the patches that might have caught it.
So who is this for? An old computer that will spend most of its life offline, one piece of older software or hardware with no modern replacement, a workshop machine, or a learning exercise on a spare drive. It is not a good daily system for banking, email, or work documents. Browsers and applications have been dropping Windows 7 for years. Back up everything you care about first, to a separate drive, and check that the backup opens.
Will Windows 7 Even Run on Your Machine?
Windows 7 belongs on old hardware. The video names third and fourth generation Intel machines as its natural home, and notes that newer, high specification computers could not run it at all. Modern processors and storage controllers often have no Windows 7 drivers, so the installer may not see the disk. If your computer is recent and runs a newer version of Windows happily, do not force Windows 7 onto it.
The official minimums are tiny: a 1 GHz processor, 1 GB of memory for 32-bit or 2 GB for 64-bit, 16 GB of disk space for 32-bit or 20 GB for 64-bit, and DirectX 9 graphics. Treat those as a museum floor, not a target. Aim for at least 4 GB of memory, a solid state drive if the machine has one, and 60 GB or more for the system partition; the video uses about 98 GB. Use 32-bit only on a very old machine with 2 GB of memory, and 64-bit, as in the video, for anything with 4 GB or more. Check first that Windows 7 drivers exist for your exact model.
What to Have Ready
- A licensed Windows 7 ISO file you already own, 32-bit or 64-bit to match your license and memory.
- A USB flash drive of at least 8 GB. Everything on it will be erased.
- A working computer to prepare the drive, plus the target computer.
- Rufus, downloaded from its official website.
- Your backups, verified, and driver downloads saved on a second USB drive.
Step 1: Build the Bootable USB Drive With Rufus
Plug in the USB drive and open Rufus. Under Device, make sure the USB drive is selected, not some other disk. Under Boot selection, click Select, find your Windows 7 ISO file, and open it. Rufus fills in the volume label and file system from the image; in the video the image is the 64-bit Ultimate edition. Check the drive and the image before going further, because the next click starts erasing.
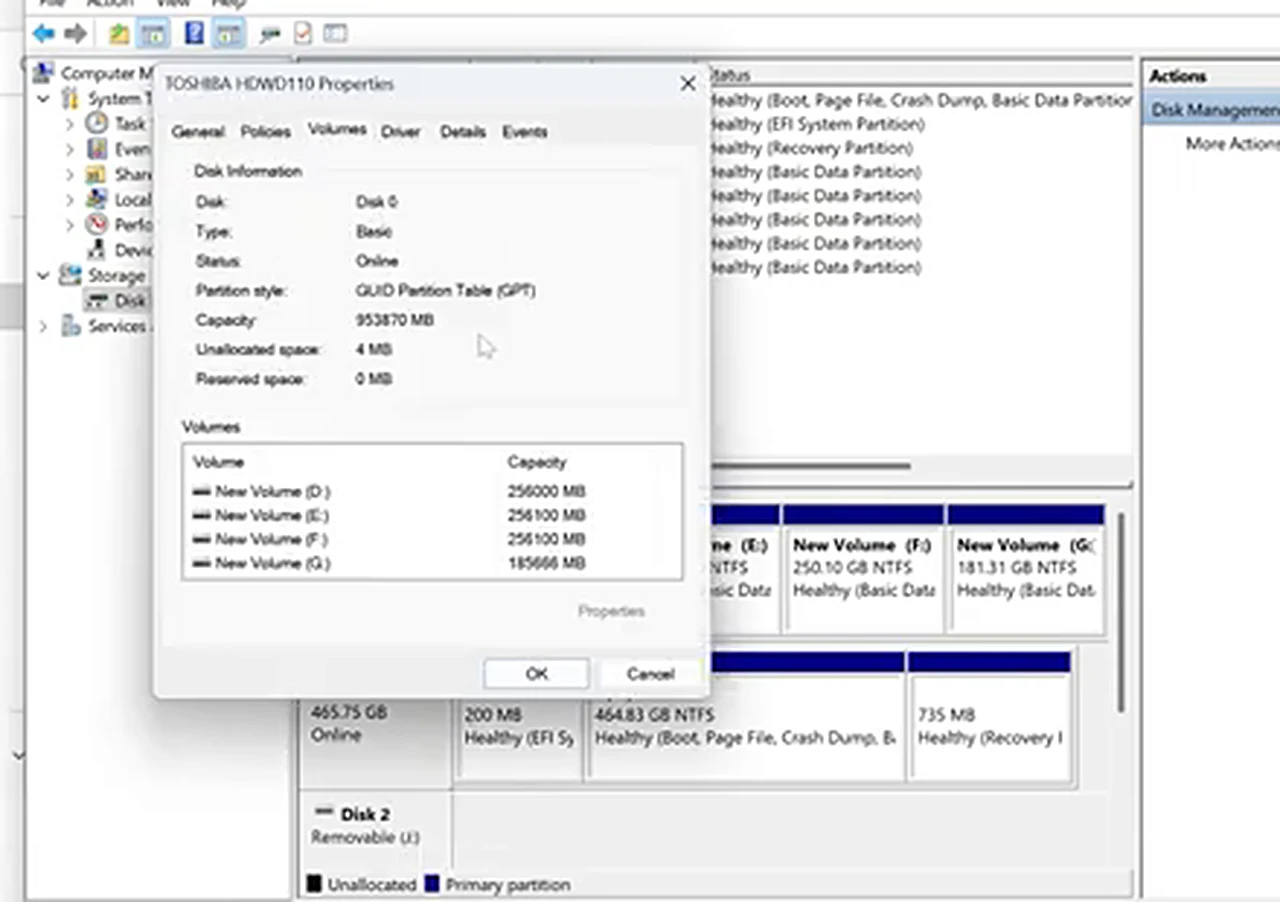
Now the choice most guides skip: the partition scheme. Rufus offers GPT and MBR, and the answer depends on the disk inside the target computer. GPT suits a disk set up for UEFI booting; MBR suits the older BIOS style. Pick the wrong one and the drive may refuse to boot. To check, open Computer Management, go to Disk Management, right-click the disk itself at the left of the lower pane, choose Properties, and open the Volumes tab. The Partition style line says it plainly: GUID Partition Table means GPT, Master Boot Record means MBR.
Set the scheme in Rufus to match, leave the other defaults alone, and click Start. Read the drive letter one last time, confirm the erase warning, and let Rufus format the drive and copy the files. When the status reads READY, as below, close Rufus and eject the drive properly.

Step 2: Find Your Boot Key and Choose the Right Entry
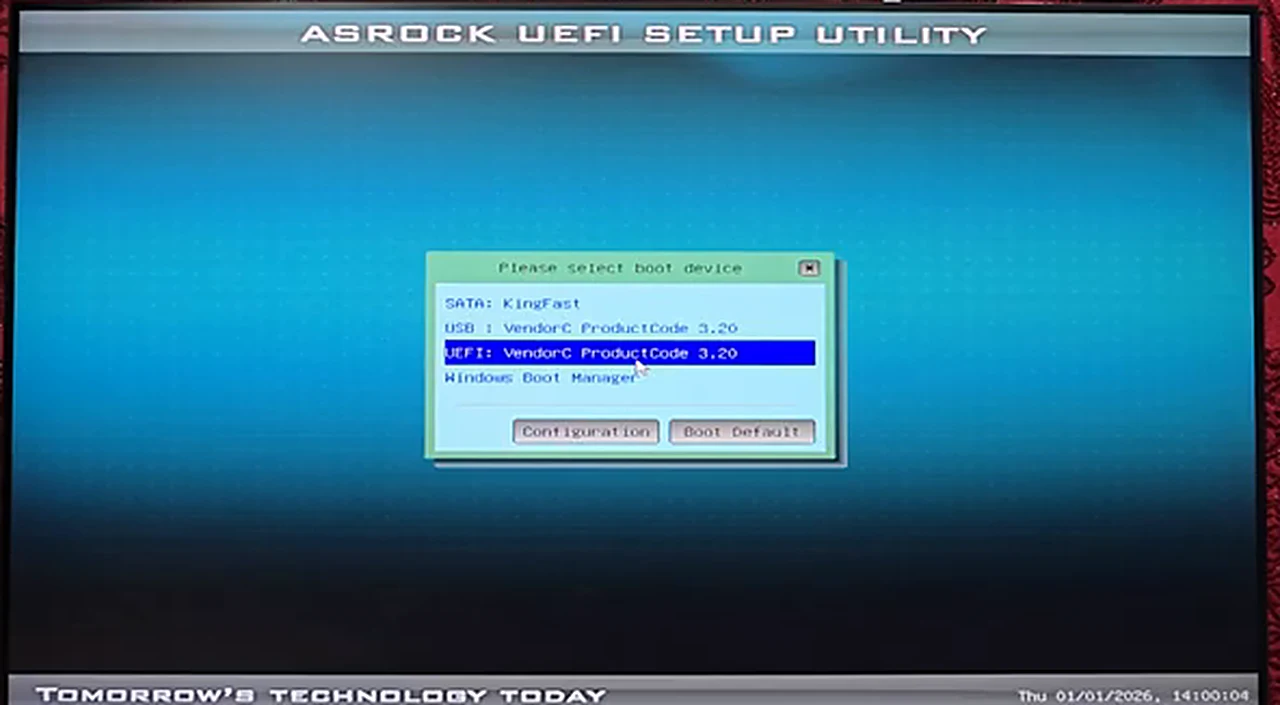
Every computer has a key that opens its boot menu, and brands rarely agree on it. Common keys include F11, F12, Esc, and F8. Search the web for your exact model or motherboard name plus boot menu key, as the video does for an ASRock board, where the answer is F11. Write the key down before you restart.
Plug the USB drive into the target computer, switch it on, and tap the boot key repeatedly until the boot menu appears. If Windows starts loading, restart and try again. On the machine in the video there are two entries for the same drive: a plain USB entry and a UEFI entry naming the drive. The plain entry did nothing, so the presenter chose the UEFI entry, and the installer loaded. Trying the other entry is normal, not a failure.
Step 3: Language, License, and the Custom Install
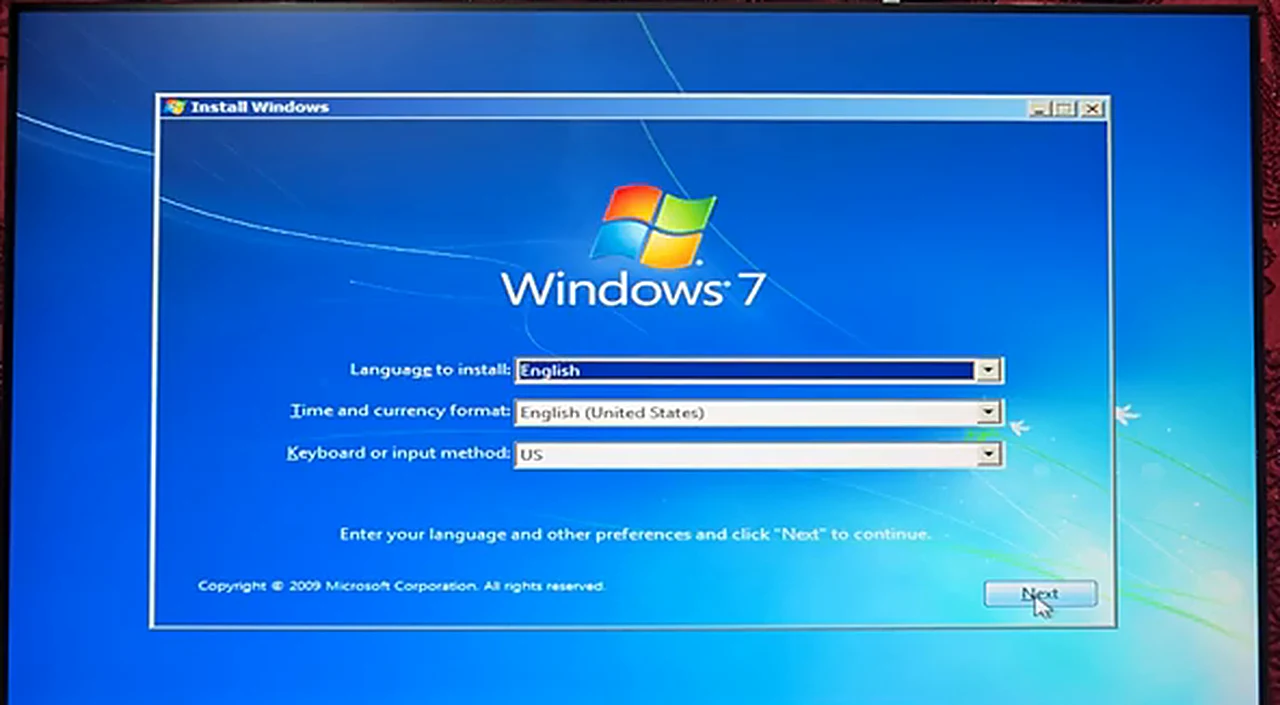
Leave the language, time and currency format, and keyboard settings as they are unless you have a reason to change them, click Next, then click Install now. Read the license terms, tick the acceptance box, and click Next. The decisions that matter are still ahead.
Choose Custom (advanced), not Upgrade. The disk screen lists every partition with its size, free space, and type. In the video the target is Disk 0 Partition 3, about 98 GB. Your disk will look different, so identify your target by size and by what you know is on it, never by partition number alone. If the computer has a second disk, work out which is which first.
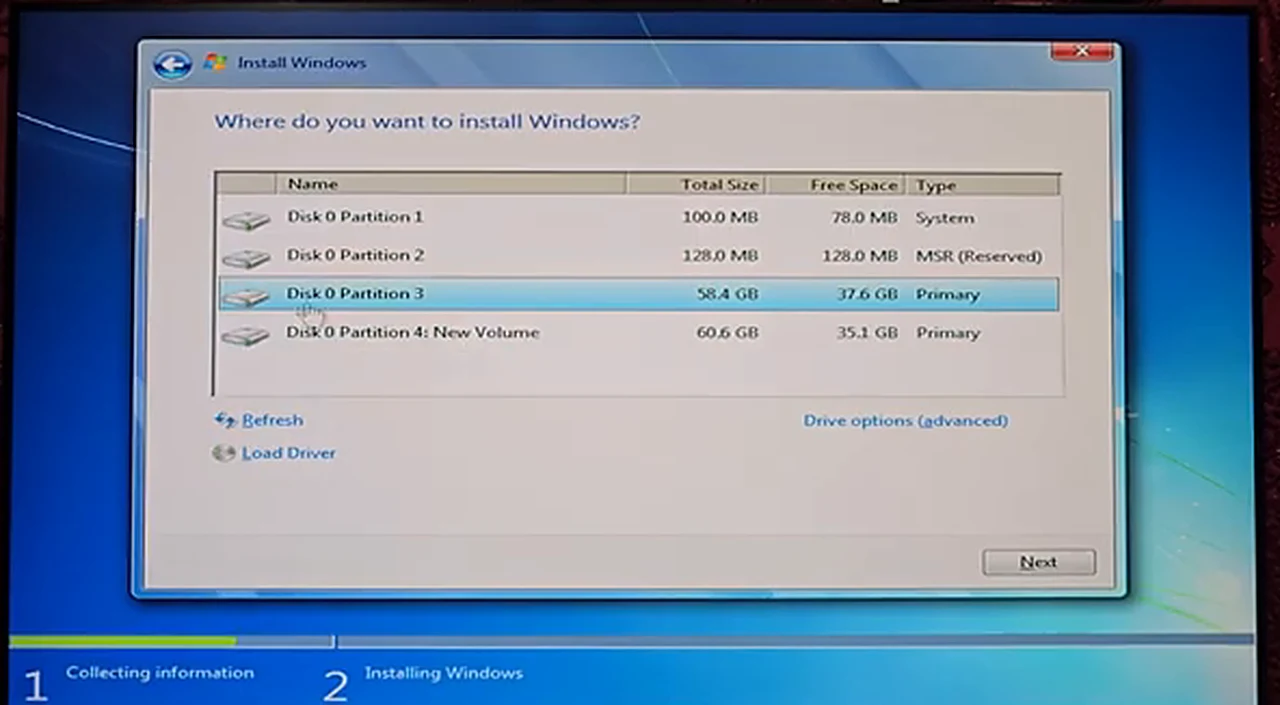
Select the correct partition, click Drive options (advanced), click Format, and confirm with OK. Do not delete the small system and reserved partitions around it unless you intend to rebuild the whole disk. With the same partition still selected, click Next to start the installation. Unsure? Photograph the screen with your phone and check the sizes against your notes first.
Step 4: Let the Installer Copy, Restart, and Finish
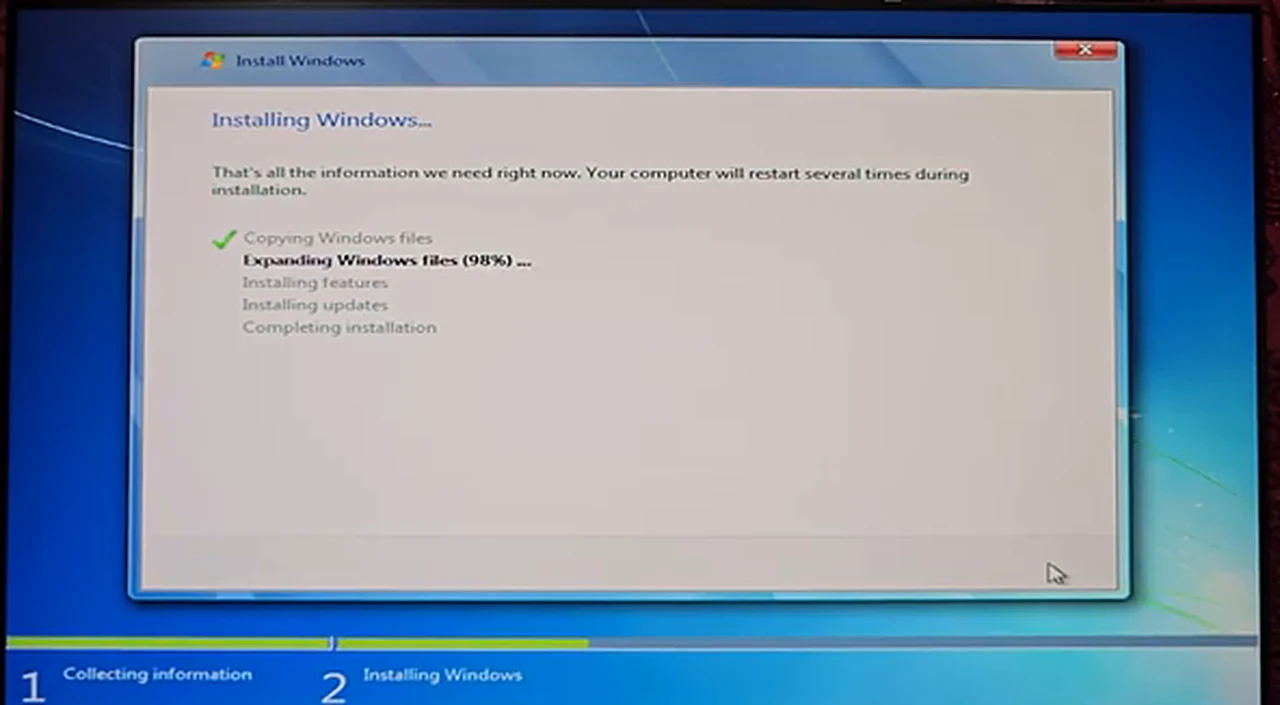
The installer copies Windows files, expands them, installs features and updates, and completes the installation. In the video the expanding stage reached 99 percent within a few minutes; slower disks take longer. Leave the computer alone, do not switch it off because the bar seems stuck, and do not remove the USB drive yet. Windows 7 restarts several times during a normal install.
After the final restart, type a username, and a computer name if asked. The video leaves the password blank because the machine is a test setup, but set a password on any computer you will actually use, and write it down somewhere safe. Click Next through the remaining prompts. The video chooses Use recommended settings for updates, but there are no new Windows 7 updates to receive, so it is a leftover setting, not a safety net. Set the time zone; for Bangladesh that is (UTC+06:00) Dhaka.
Why the New Desktop Looks Flat and Wrong
If the desktop looks flat, with chunky borders and washed-out colors, the graphics driver is missing, and Windows 7 is drawing everything with a basic fallback. The desktop below, with only the Recycle Bin on it, is a healthy install waiting for drivers, not a failed one. Until the proper driver is installed, the glassy Aero effects stay switched off.

Install drivers in this order: chipset, graphics, network, audio, then USB. Get them from the computer or motherboard maker’s support pages for your exact model, saved on a second USB drive before the wipe if possible. Only if the maker offers nothing should you consider a driver pack tool, and then with care: decline bundled extras and install only what the hardware needs. Check Device Manager for any yellow warning triangle.
Hardening a System That Gets No Patches
A working install is not a finished, safe computer. It is frozen at the last patch Microsoft ever shipped, and your habits matter more than any setting. The strongest protection is the simplest: keep it offline. If the machine runs one old program or workshop equipment, it does not need a browser, an email client, or a permanent network connection.
If it must go online, narrow the exposure. Use a limited user account rather than an administrator account, keep a still-supported antivirus product updated if one still supports Windows 7, leave the firewall on, and never sign in to banking, email, or shopping from this machine. Treat every USB drive as suspect, install only software you trust, and keep backups elsewhere. None of this makes Windows 7 safe in the modern sense. It makes a risky choice less reckless.
When Windows 7 Is the Wrong Answer
If this is your only machine, if it must handle the internet every day, or if it holds your work, your money, or your family photos, Windows 7 is the wrong answer. A supported system is simply safer for daily life; our clean install guide for Windows 11 covers that path. If the hardware is old and the job is mostly browsing and documents, lightweight Linux often revives it better, with security updates included; our Zorin OS dual boot guide keeps your existing Windows install alongside it.
If Windows 7 feels too old for the job, Windows 8.1 is the next step up on the same kind of hardware — here is the full guide to installing Windows 8.1 on an old PC.
Frequently Asked Questions
Can I still install Windows 7 in 2026?
Yes, on compatible old hardware, with a licensed copy you already own and a bootable USB drive made with Rufus. Microsoft no longer offers the download or support, so treat it as a special-purpose install.
Why does the USB drive not boot?
Usually the partition scheme in Rufus does not match the disk, the wrong boot menu entry was chosen, or the drive is in a port the firmware ignores. Recheck GPT against MBR, try the other entry, and try another port.
Which partition should I format?
The one you identified by size and free space before starting, and nothing else. Never format by partition number alone, and never format a drive you have not backed up.
Why does the desktop look flat after install?
The graphics driver is missing, so Windows 7 uses a basic fallback. Install the chipset driver first, then the graphics driver from the maker’s support pages.
Is Windows 7 safe to use online?
No, not in the way a supported system is. If it must go online, use a limited account, keep the firewall on, avoid banking and email on it, and keep backups elsewhere.
A Short Checklist Before You Decide
The hardware is old enough that drivers exist. You own a licensed copy. Your files are backed up and verified. The partition scheme matches the disk. The job genuinely needs Windows 7, and the machine can stay mostly offline. If every line is true, the steps above will get you there. If any line is false, fix it first, or pick the supported alternative. Nostalgia got you reading. Caution should get the final vote.