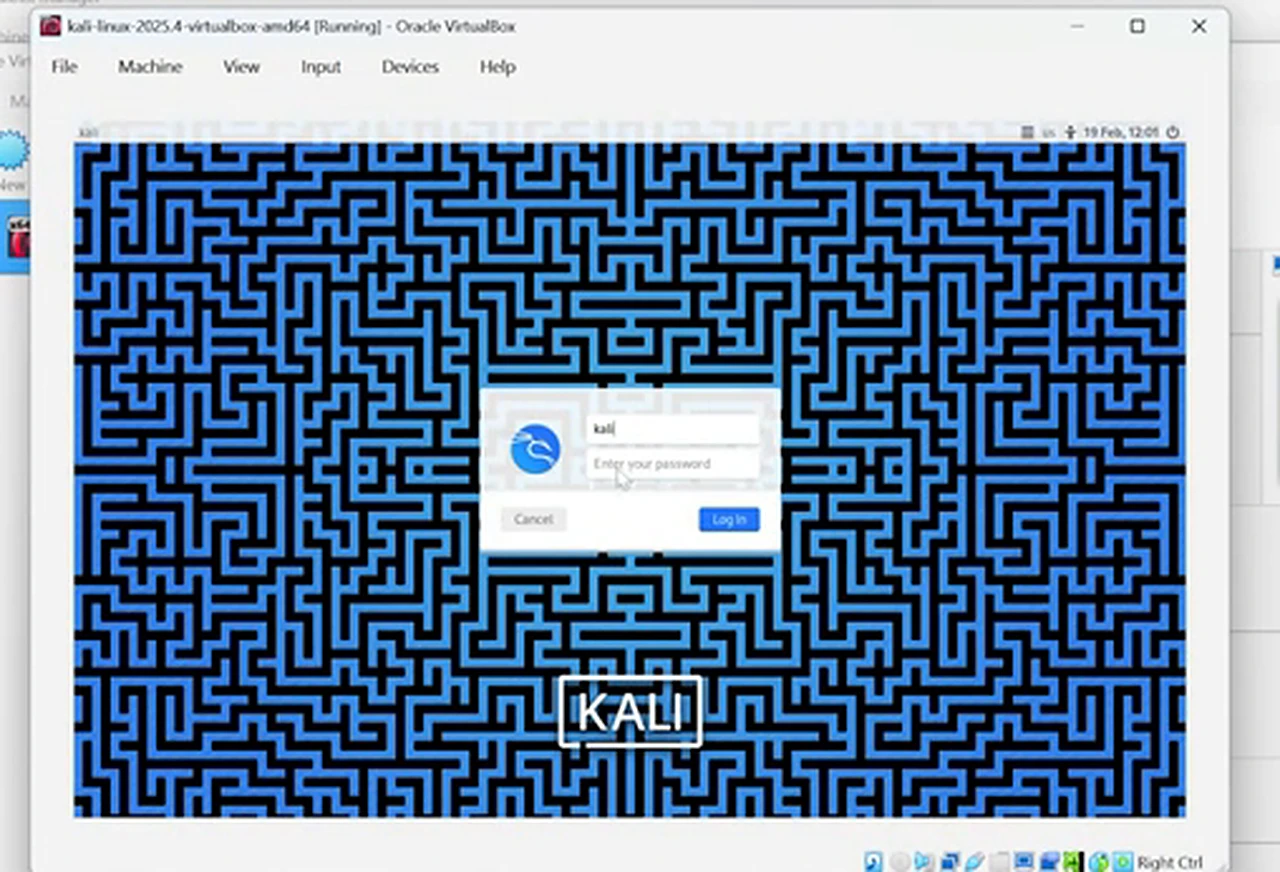
You press Start. A black window opens, and Kali Linux appears inside a rectangle about the size of a postage stamp in the middle of your screen. You can see the dragon wallpaper. You can just about read the login box. You cannot do anything useful with it, and the first thought is the obvious one: something went wrong.
Nothing went wrong. That tiny window is what a first boot often looks like when the setup is only half done. The more expensive mistake comes earlier, when a beginner installs Kali straight onto the computer before knowing whether they even like using it. Kali is not a slightly different Windows. It expects comfort with the terminal, and a wrong choice during a direct install can cost you the Windows setup you rely on every day. The safe order is the other way round: run Kali inside VirtualBox first, and only then decide whether it deserves a place of its own. This guide uses the ready-made virtual machine Kali itself publishes. There is no partitioning, no boot menu to repair, and nothing happens to Windows.
Why it looks broken: three wrong turns
1. Virtualization is switched off in the firmware
VirtualBox needs help from the processor itself, a feature called hardware virtualization. Many computers ship with it switched off in the BIOS or UEFI firmware. VirtualBox will still open, but the virtual machine will not run at a usable speed, and the error messages rarely name the real cause. People blame the download or VirtualBox when the switch was off all along. Checking this first is the best use of two minutes in the whole job.
2. The wrong Kali download
Kali offers two downloads that look alike at a glance. Installer Images are for putting Kali on a real computer or a blank virtual disk: you boot from them and partition a drive. Virtual Machines are finished systems, already installed, packaged for VMware, VirtualBox, Hyper-V, or QEMU. Download the installer expecting a ready desktop, and you will sit through an installation you never needed. The file you want says VirtualBox on it, and it arrives as a compressed archive, not as an ISO file.
3. The defaults are too small and too closed off
The ready-made machine arrives with 2 GB of memory, enough to start and not enough to feel pleasant, especially with a browser open. Its network is set to NAT, which gives it internet access through your computer but keeps it hidden from the local network. Its display starts small, because the guest has not yet adjusted to your screen. None of these is a fault. They are safe defaults for a machine that must run on almost any computer. Changing memory and network before the first proper boot turns a sluggish postage stamp into a system you can learn on.
Before you download anything
You need a Windows computer with permission to install software, a steady connection, and patience for one large download. The video lists 8 GB of memory as the minimum, with 4 GB workable, and 50 GB of free storage. Take those numbers in spirit: the virtual disk in the video is provisioned at about 80 GB, so free space matters, and giving the virtual machine 6 GB only makes sense if your computer has enough left for Windows. On a computer with 8 GB in total, give Kali 4 GB. Download over a connection you can leave alone; an interrupted download extracts into a broken folder.
The fix, in the order that actually works
Step 1: Check virtualization in Task Manager
Right-click the taskbar and open Task Manager, then open the Performance tab and click CPU. At the bottom right, look for Virtualization. It should read Enabled. If it does, close Task Manager and move on.
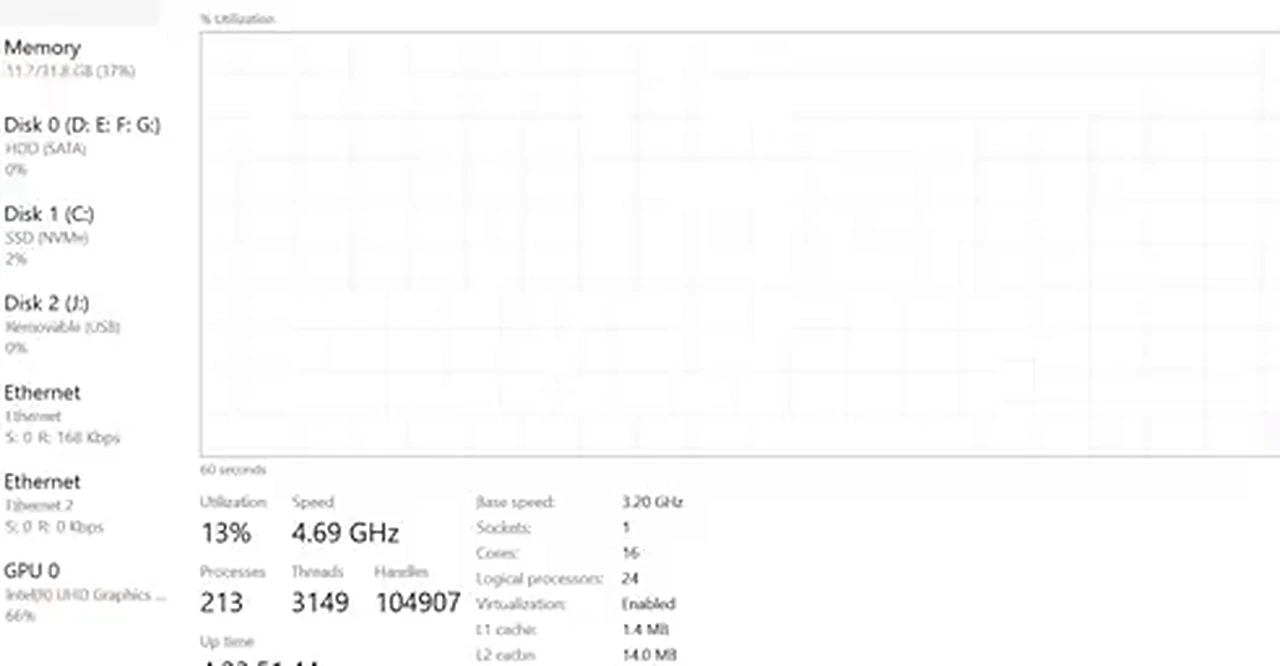
If it reads Disabled, restart and enter the BIOS or UEFI setup with the key your maker uses. The key differs for nearly every brand and model, which is why the video suggests searching for your exact model plus the words BIOS key. Dell machines in the search shown use F2, but yours may use Delete, F10, or F12. Once inside, look for the setting, which may be called Intel Virtualization Technology, VT-x, AMD-V, or SVM, under Security, Advanced, or CPU Configuration. Switch it on, save, restart, and check again. Do not download the Kali archive until this reads Enabled.
Step 2: Get VirtualBox and its Extension Pack
Search for VirtualBox and open the official virtualbox.org result. Click Download, then choose Windows hosts under the platform packages. The version in the video is 7.2.4; yours will be whatever is current, and that is fine. Install it with a double-click. On the same page, get the Extension Pack: click Accept and download beside it. It adds USB and display support the base package leaves out.
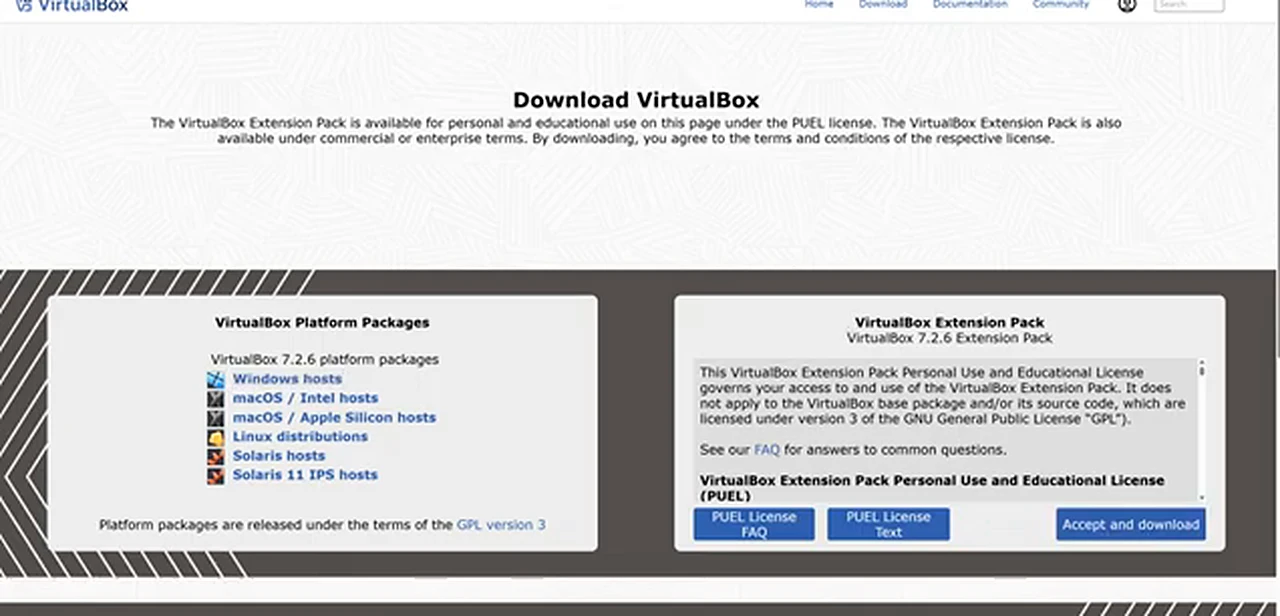
When the Extension Pack has downloaded, double-click it, click Install, scroll through the licence, click I Agree, and answer Yes when Windows asks for permission. If you already have VirtualBox, just make sure the Extension Pack matches your version. A mismatched pack causes odd behaviour that looks like a Kali problem and is not.
Step 3: Download the VirtualBox build of Kali, not the installer
Search for Kali Linux, open the official kali.org site, and click Download. You will see a choice. On the left is Installer Images. On the right is Virtual Machines. Choose Virtual Machines. The installer is for a real install, dual boot or single boot. You are here for the trial run, so you want the finished machine.
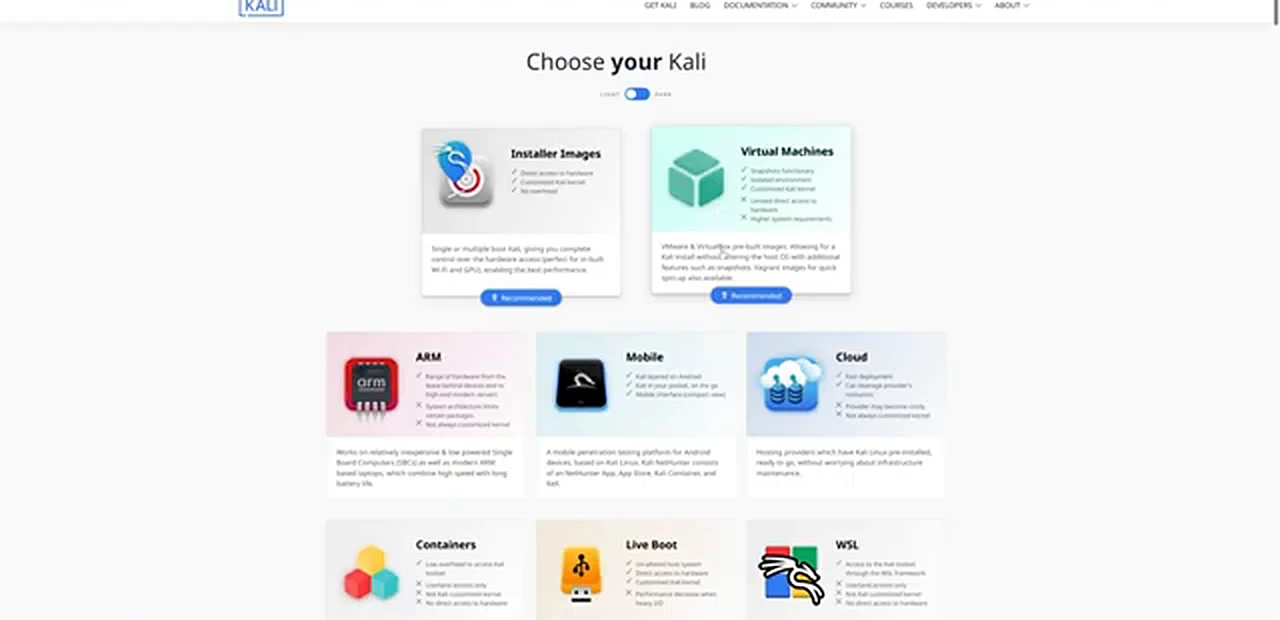
On the pre-built virtual machines page, choose the VirtualBox build in the top row, not the weekly build and not another platform. A VMware image will not import into VirtualBox the same way, and a weekly build is a moving target for a first attempt. Click Download and wait; the video allows about four minutes. While it runs, get WinRAR from its own website if you do not have it. You will need it to open the archive, because Windows will not always open this compressed format cleanly.
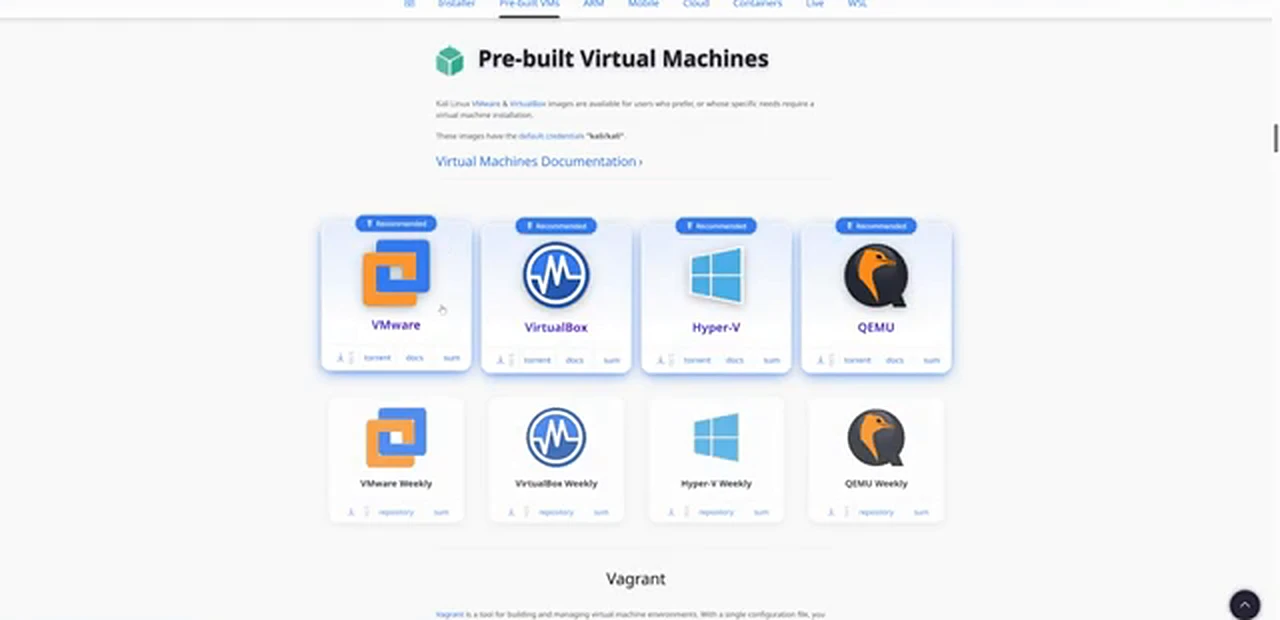
Step 4: Extract it, move it once, and import it with a double-click
Find the archive in your Downloads folder. Right-click it, go to WinRAR, and choose Extract files. Click OK. The archive opens into a folder with two files: the large virtual disk, and a small .vbox configuration file only a few kilobytes in size. Do not double-click the large file. The small file is the one that matters.
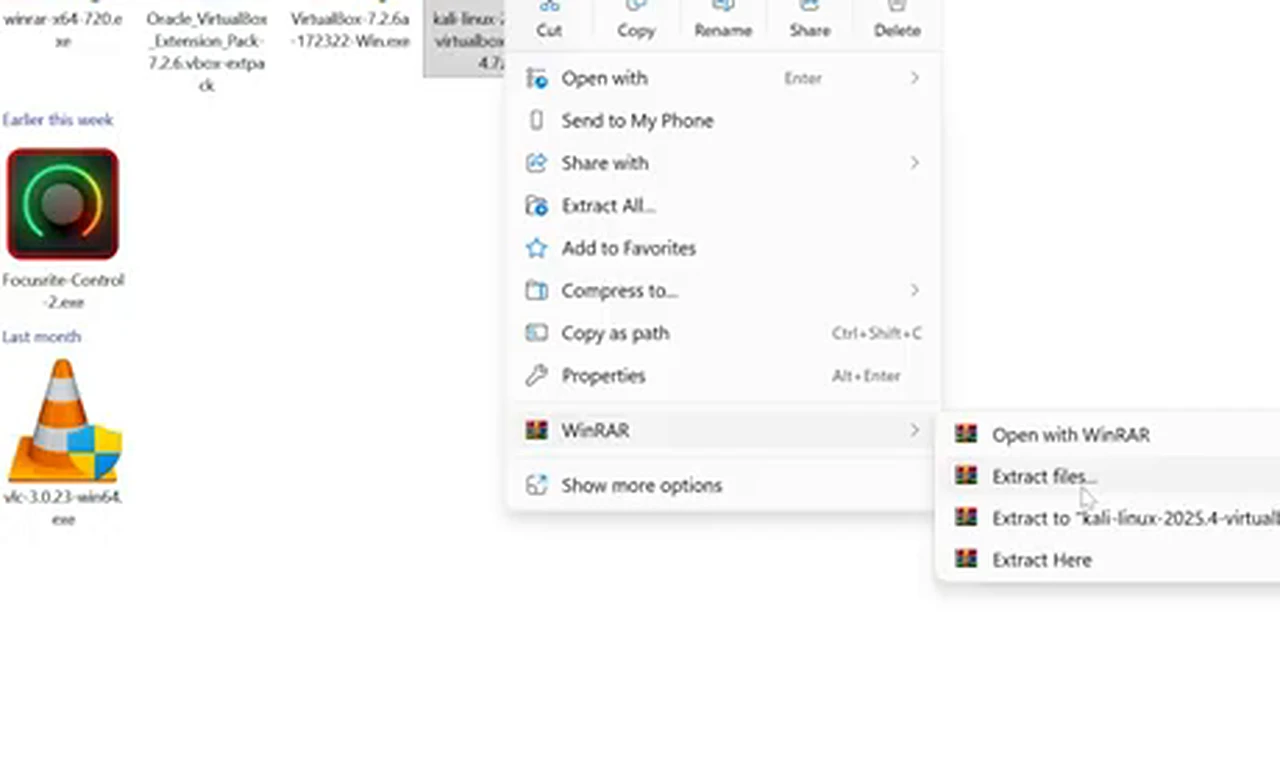
First, move the whole extracted folder somewhere it can stay. The video moves it under the user folder on the C drive, inside a folder created for VirtualBox. The exact name matters less than the rule: once VirtualBox knows where the disk file lives, do not move it again or delete it, or the machine will fail to start with an error about a missing disk. Then double-click the small .vbox file. VirtualBox opens and Kali appears in its list, already configured, named kali-linux-2025.4-virtualbox-amd64 in the video. No installer runs. The machine is simply registered, ready to start.
Step 5: Raise the memory to 6 GB
Click the Kali machine once, but do not start it. Its details show 2 processors and base memory of 2048 MB. Open Settings, go to System, and drag the memory slider to about 6 GB. In the video it lands on 6171 MB. Click OK and leave everything else alone. If your computer has only 8 GB in total, use 4 GB instead; giving Kali more will make Windows itself struggle. Never give it more than half of what the computer has.
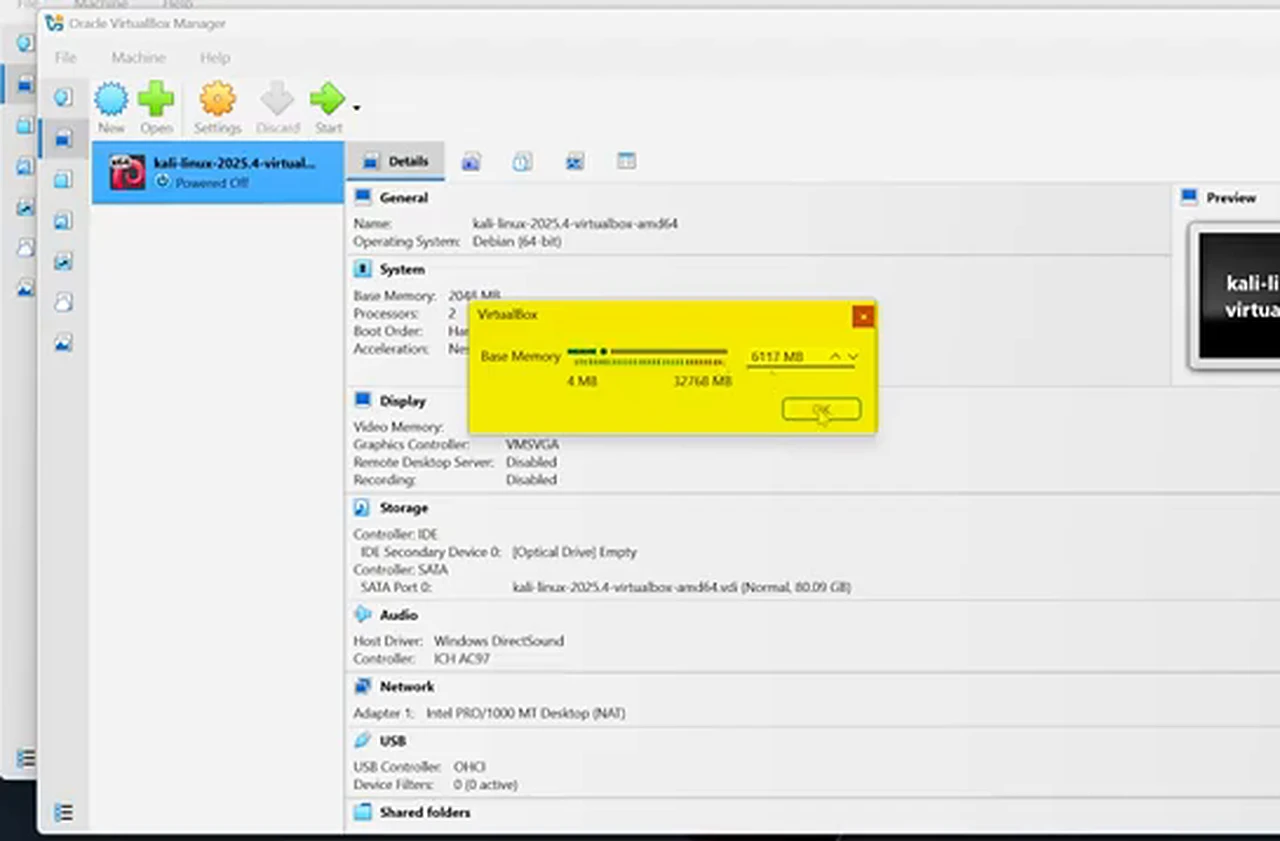
Step 6: Change the network to Bridged Adapter
Still in Settings, click Network. Adapter 1 is enabled, and Attached to will say NAT. Change it to Bridged Adapter, then click OK. With NAT, the machine reaches the internet through your computer and stays hidden from the local network. With a bridged adapter, it joins your local network directly, as if it were another computer on the same router. On a shared or cafe network, stay with NAT until you are home; a bridged machine is visible to other devices on the network, and you can switch back in the same dropdown while the machine is off.
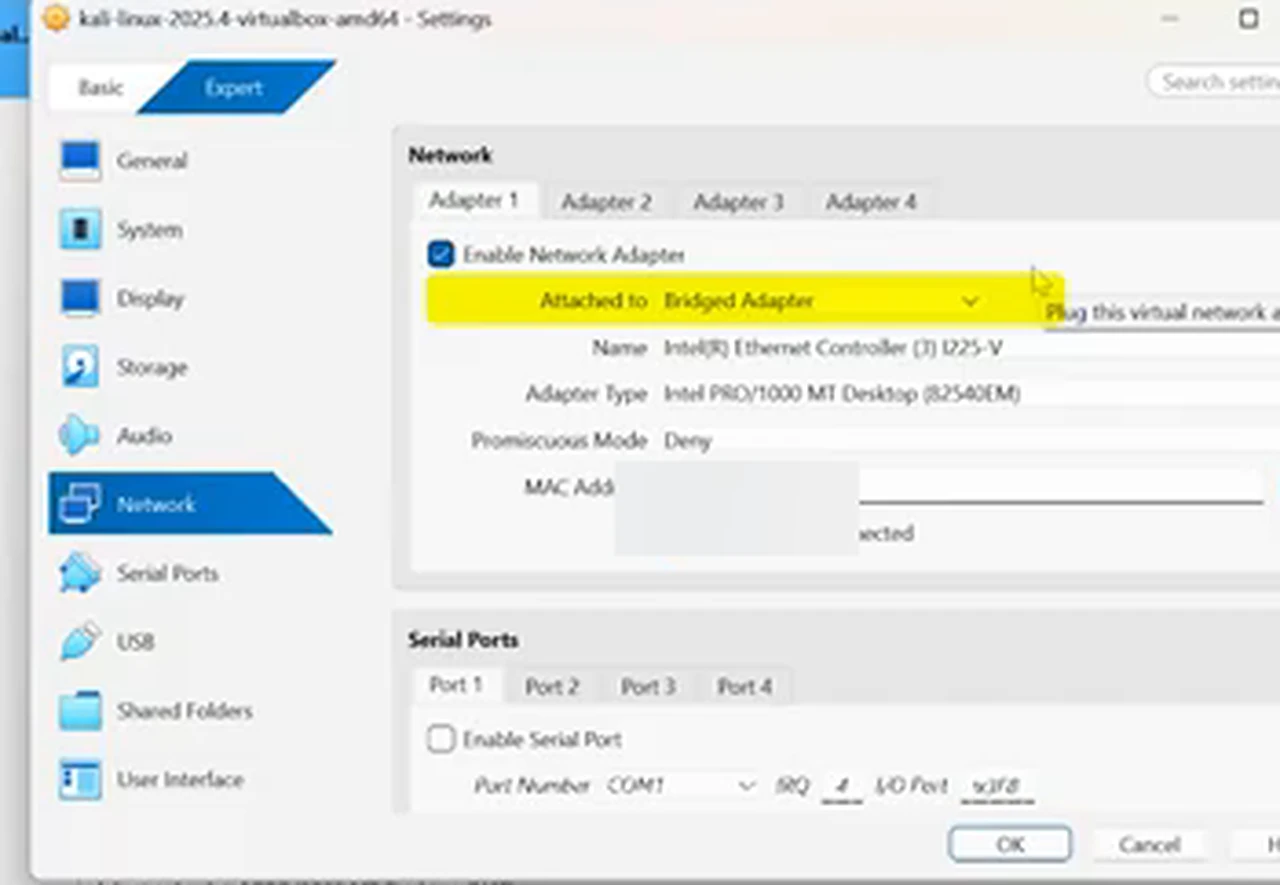
Step 7: Start it, wait, and log in as kali
Click Start and give it time. A first boot is slower than later ones, and a black screen for a while is normal, not a crash. When the login screen appears over the blue maze wallpaper, the username and password are both the same word: kali. These are the public default credentials for the pre-built image, which is why you should treat this machine as a practice system, not a vault. If the password is rejected, check Caps Lock and keyboard layout first, and type it slowly.
Step 8: Fix the small display with a restart and full screen
Here is the postage stamp from the opening. The desktop will probably open in a small window. Do not change display settings or install drivers yet. Power the machine off, then start it again. On the second start, the display usually adjusts itself to the window size, as it does in the video. Then open the View menu and choose Full-screen Mode. Kali now fills the whole monitor. If it stays small, check that the Extension Pack installed correctly, and that the machine was powered off fully rather than saved or paused. A saved state restores the old display size too.
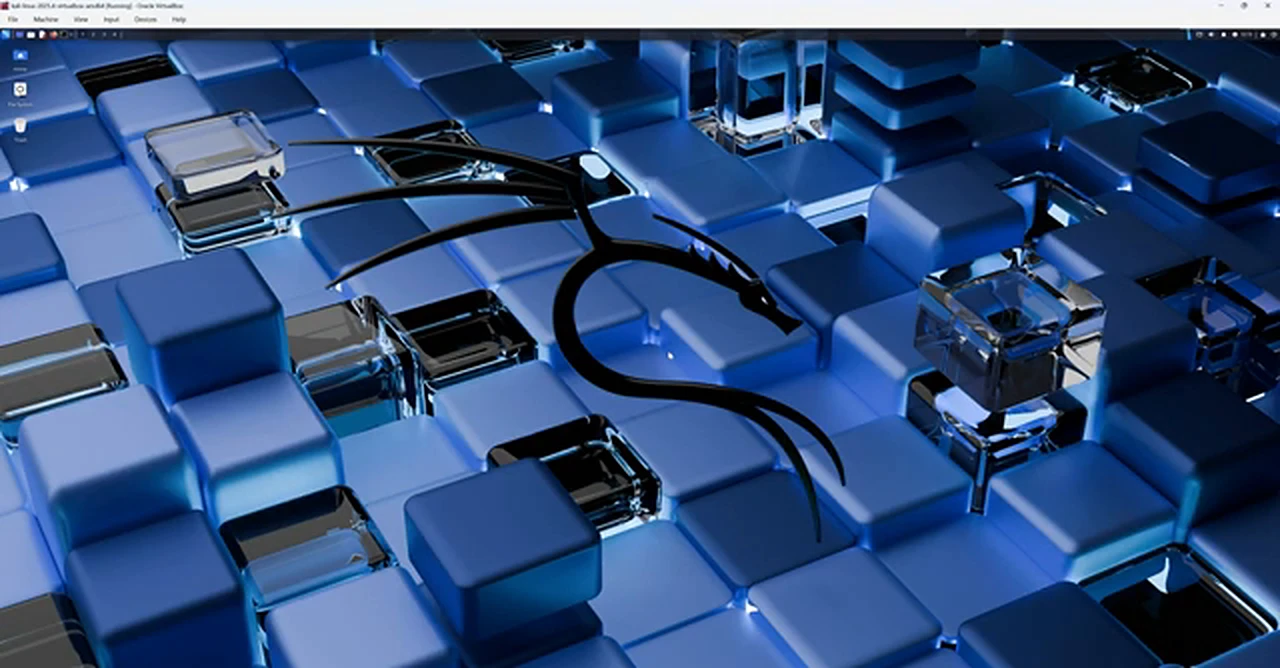
You now have a working Kali desktop inside Windows. Open the terminal, look around the applications menu, and get used to how different it feels before trying anything ambitious. A mistake here costs you a virtual machine you can reset, not a computer you need tomorrow morning.
Keep it working: five habits that prevent the next failure
Take a snapshot before you experiment. In VirtualBox, with the machine off, take a snapshot named clean first boot. Break something, restore the snapshot, and you are back in a minute. Without one, every serious mistake means reimporting the machine.
Change the default password. Open a terminal inside Kali and run passwd, then choose a new password. The kali and kali login is published in every guide to this image, and anyone on the same network who reaches the machine could guess it.
Leave the folder alone. The disk file and the .vbox file belong together where you put them in Step 4. Renaming or moving the folder breaks the machine with errors about a missing disk. If you need space, delete the downloaded archive, not the extracted machine.
Update slowly and on purpose. Kali is a rolling system, and a full update can be large. Take a snapshot first, and never start a major update five minutes before you need the machine. A practice system a week behind is more useful than one that broke mid-update.
Keep the practice inside the lab. Kali exists for security testing, and permission matters. Test your own virtual machines and your own home network, and systems you have explicit permission to test. Scanning a network or computer that is not yours, even out of curiosity, is unauthorised access. No tutorial makes it acceptable.
The sixty-second decision
Use Kali in VirtualBox for a few weeks before thinking about a direct installation. If you open it most days and the terminal stops feeling foreign, a real installation is a decision you can make with evidence. If you open it twice and leave it alone, you have lost nothing, and Windows never noticed.